


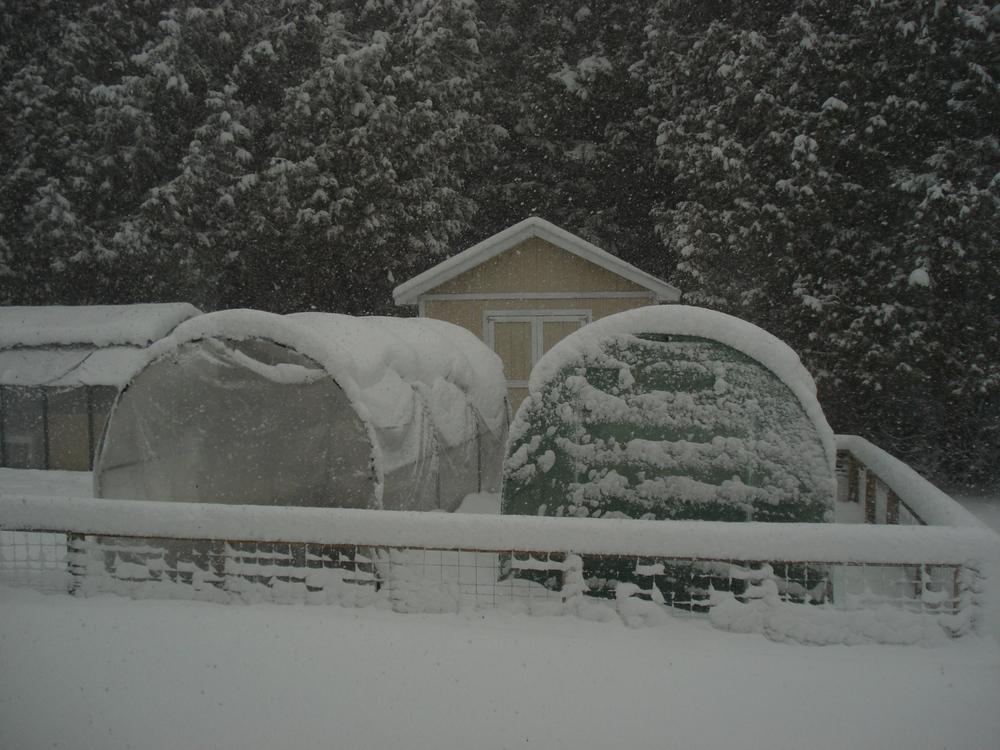
Things can get pretty bleak once the holiday season is over and winter has settled in on us – the landscape seems to be mostly black and white, days go by without any sunshine, a short trek outside requires heavy boots, coat, gloves, hat, scarf... and it’s still too early to start seeds for the garden, except for possibly winter sowing some of the hardiest of the hardy self-sowers. Of course, many of us have houseplants, and we may have brought in a few things from outdoors to overwinter, but the urge to plant something and see it growing can be difficult to deny. Our seed catalogs have been studied until they’re dog-eared, seeds have been ordered, received and sorted, and even our online southern friends seem to have little to chat about, other than how cold the weather is.
Even if you can’t get out into your garden because it’s buried in snow, you can still have some plants growing that will bring back that feeling. Stop throwing away all the scraps of veggies when you cook. Some of them can give you some visual, and even edible, enjoyment, no matter what the thermometer might say.
Here are a few things to try:
AVOCADO: Save a pit and grow a tree! After you make that batch of guacamole, rinse off an avocado pit and then plant it in a small pot of soil, so that about 1/3 of the pit is still above the soil line. (The large end of the pit should be in the soil.) Or poke 3 toothpicks into the perimeter of the pit and submerse the bottom 2/3 in a glass of water, with the toothpicks keeping the upper part of the pit above the water line. Keep the soil moist, or the water at its original level, and be patient. Eventually (perhaps 3-6 weeks), you will see a sprout emerge from the top of the pit, and roots from the bottom. If you started with the water method, plant your pit in soil at this time, with the top 1/3 of the pit exposed, and continue to keep the soil moist (but don’t overwater; yellow leaves are a sign of overwatering). Place the pot in a sunny window. Once you have a couple of sets of leaves, pinch off the top to cause your plant to branch, and continue to pinch off the shoots to achieve a nice bushy plant.
CARROT: Cutting up carrots for dinner? Cut a few tops off so that you have pieces about 1" thick, then partially bury them in potting soil in a small pot. Keep the soil moist, but not soggy. Place the pot in a sunny window. Leaves will begin to grow quite quickly, which you can just enjoy as small ferny plants or clip off and add to salads. Eventually your carrot tops will flower and produce seeds, which you can try planting in your garden.
CELERY: Cut 2-3 inches off the root end of the stalk and place into a dish of water, so that just the bottom is covered with water. Place in a sunny window and mist with water occasionally to keep the top moist. Alternatively, place the root end of the stalk in a pot with potting soil. Keep the soil moist but not soggy, and place the pot in a spot where it will get at least 6 hours of sunlight daily. Before long, new growth will begin to appear. You can just enjoy this new growth, or you can plant the roots out in the garden once the weather is warm. New celery stalks will grow and you can then harvest the full-size stalks, and repeat the process with the root ends from those plants.
GARLIC: If you didn’t use up that garlic that you grew or bought quickly enough, and it has started sprouting, just stick a few cloves into a pot with some soil and keep moist. (Don’t use dried-up garlic, which likely will not grow.) Before you know it, you will be harvesting “green garlic,” similar to green onions, which can be chopped up and added to salads, soups, potatoes, omelets, or wherever you would use chives. Break a bulb of garlic into the individual cloves and plant the cloves (pointy end up) about an inch deep in a pot filled with moist potting soil. Water as needed to keep the soil moist but not soggy. Continue to harvest the sprouts as they grow.
GINGER: If you bought more ginger root than you can use, take the excess piece and plant in a pot of potting soil with the buds facing up. Keep in a warm place – ginger is a tropical plant! New growth should start within a couple of weeks, at which time you can pull it up and use it again, or just let it grow and enjoy the foliage. Ginger can grow to 2-3 feet in height. Ginger prefers a rich soil, moist but not soggy soil, plenty of light but not direct sun, and protection from the wind.
LETTUCE: Romaine lettuce in particular works well. Grow the same as for celery, by cutting off a couple of inches of the root end and placing in a glass or jar with a little water. Once the roots begin to grow, partially bury in moist potting soil in a pot. New leaves will begin to form, which can be harvested and used as you would any lettuce.
ONION: When you cut up onions, either bulbs or shallots, save the root ends and plant in a pot of soil. Soon you will have onion shoots to use in the same way as green onion tops. Cut about 1-1/2" from the root end and set this piece aside for about a day to dry. Cover with about 1" of potting soil in a pot and water to keep moist but not soggy. You can harvest the shoots as they grow, or you can put the plant out into the garden (cutting the leaves back to several inches high) and allow it to develop into a new onion. Then you can repeat the process.
SWEET POTATO: If you bought too many, or just want to buy one or two to try this, simply immerse your sweet potato about halfway in a jar of water with the narrow end down, place it in a sunny window, and have a bit of patience. Roots will start growing and it will start sprouting stems and leaves. (It’s best to pick a potato that has “eyes” (buds), which will grow quite quickly into vines.) You can leave your potato in the water or put it into a pot of soil, and those stems will grow into nice vines that will hang down or can be trained up a small trellis. The leaves and vines are even edible! For a fuller, bushier plant, trim the vines back to about a foot long as they grow out. Note: You can also remove the shoots from the potato, place them into a glass of water until roots form, and then plant them in potting soil. You may even get a harvest of sweet potatoes!
PINEAPPLE: The top of that pineapple you just bought can be planted and grown into a whole new pineapple plant! You should start with a mature pineapple that has healthy, firm, green leaves. Grab the leaves and twist – hard. It should come out with a bit of stalk. Strip off some of the lower leaves to reveal the stalk. Then let the crown dry out for a couple of days, to prevent rot. Next, place the crown in a glass of water, away from temperature extremes, and change the water every 2-3 days or so. In about 3 weeks you should see healthy root growth. Once the roots are growing, move the top to a pot of fast-draining potting soil (such as cactus potting soil). Water thoroughly and place the pot in a sunny window (or under a grow-light). Keep the soil slightly moist, not wet and not dry, and do not fertilize. In 6-8 weeks your plant should have started putting out some strong roots. Check for this by gently tugging on the top. If the plant comes out of the soil easily, replace it and wait a while longer. (If the base looks like it is rotting, discard it and start over.) Once your plant takes hold and starts growing, the original leaves will begin dying off and new leaves will sprout in the center. Remove the original leaves as they die, and water about once a week. After one full year of growth, repot your plant in a 12" pot with fast-draining potting soil (avoid getting soil into the central leaves). Be careful not to overwater, and re-pot the plant into a larger pot if it gets root-bound. Give your plant at least 6 hours of sun per day during the growing season. It takes about 20 months for the plant to start flowering, but then your efforts may be rewarded with the appearance of bright blue flowers, followed by the development of new fruit. After 3-6 months the fruit will begin to ripen, and when it is golden about halfway up, it is ready to harvest. Yes, it’s quite a long process, but now you can start all over again!
WHEAT BERRIES: Another grocery item that can provide a bit of greenery in the winter; sprinkle them on top of a pot of moist soil, cover with a 1/4" layer of additional soil, then again cover with plastic wrap and place in a warm spot. Remove the plastic when your wheat begins to sprout and place in a sunny window. If you have a cat, it will likely enjoy eating the sprouts, either directly from the pot or chopped and added to the cat food.
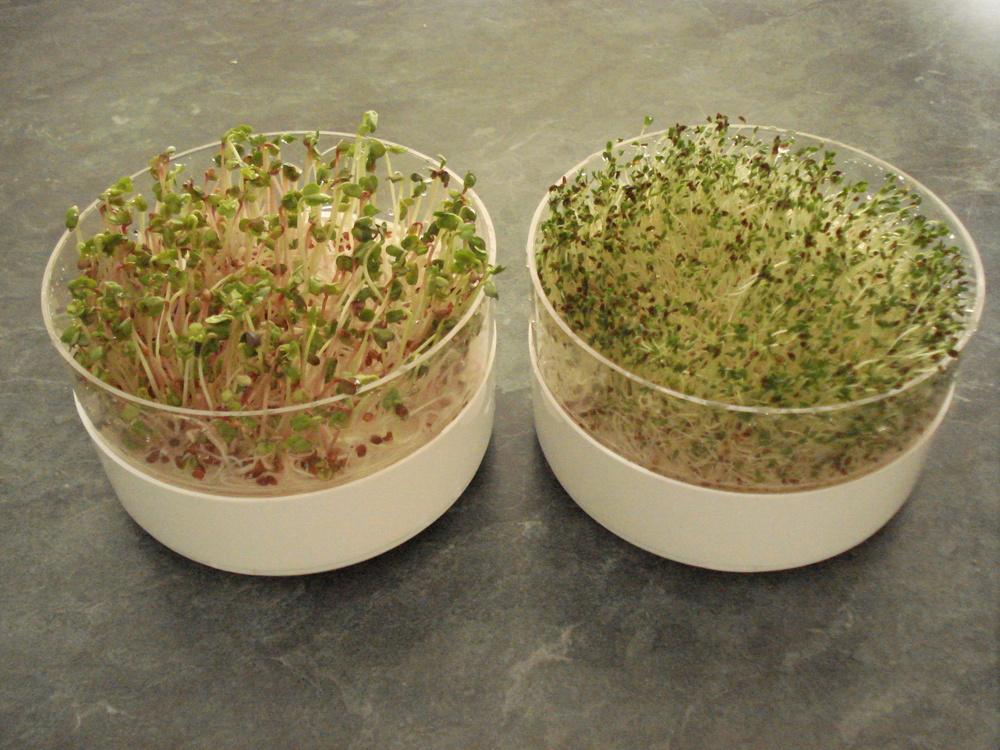
SPROUTING SEEDS: Not quite the same as “garbage gardening,” seeds for growing sprouts are sold through many seed catalogs, and perhaps at your local garden center or grocery. Radish, alfalfa, mung beans, and wheat are popular for this purpose. You can buy a sprouter, but all that is necessary is a jar with a cover that is porous – a good use for those nylon stockings that you were going to discard (washed first, of course!). Place a tablespoon or so of seeds into the jar and cover with water; let stand for 8-12 hours, then pour off the water. Add more water, swirl the jar to rinse the seeds, and pour that water off as well. Set the jar on its side so the seeds have more room to spread out. Rinse your seeds in this manner a couple of times a day, to keep them moist and fresh. Within a couple of days you should start seeing some growth, and before long they will be of adequate size to harvest and use for your salad, sandwich, or omelet, or just to munch on. This is such a quick and easy process that you will wonder why you haven’t done it before! (Note: Do be sure to obtain seeds specifically for sprouting. Many seeds that are sold for planting in your garden have been treated with chemicals to prevent rotting in the soil. Of course, if you have saved seeds from your own plants, and have not used chemical sprays on your plants recently, they should be fine to use as well.)
Now that you’ve tried a few of these ideas, it’s probably spring and time to actually get your garden growing. Happy gardening!
| Thread Title | Last Reply | Replies |
|---|---|---|
| I did it! by chelle | Apr 3, 2015 7:35 AM | 4 |
| former Buffalo gardener by SCButtercup | Mar 26, 2015 4:44 AM | 0 |
| Celery by btammi1 | Mar 25, 2015 8:44 AM | 1 |
| Growing Tips by MemaBlueEyes | Mar 23, 2015 2:45 PM | 1 |
| Thanks ! by Weedwhacker | Mar 22, 2015 10:03 PM | 1 |
| wow by Ecscuba | Mar 22, 2015 6:59 PM | 2 |
| Great article! by PAgirl63 | Mar 22, 2015 6:57 PM | 1 |
| Northern exposure by drdawg | Mar 22, 2015 3:11 PM | 5 |


