
I love the look of an arbor framing an entrance to a garden and the look of a large arbor/mini-pergola with shaded seating underneath for a place to sit and relax. I wanted something that was relatively easy and inexpensive to build, yet very sturdy and long-lasting. The solution for me was to make a feedlot panel arbor.
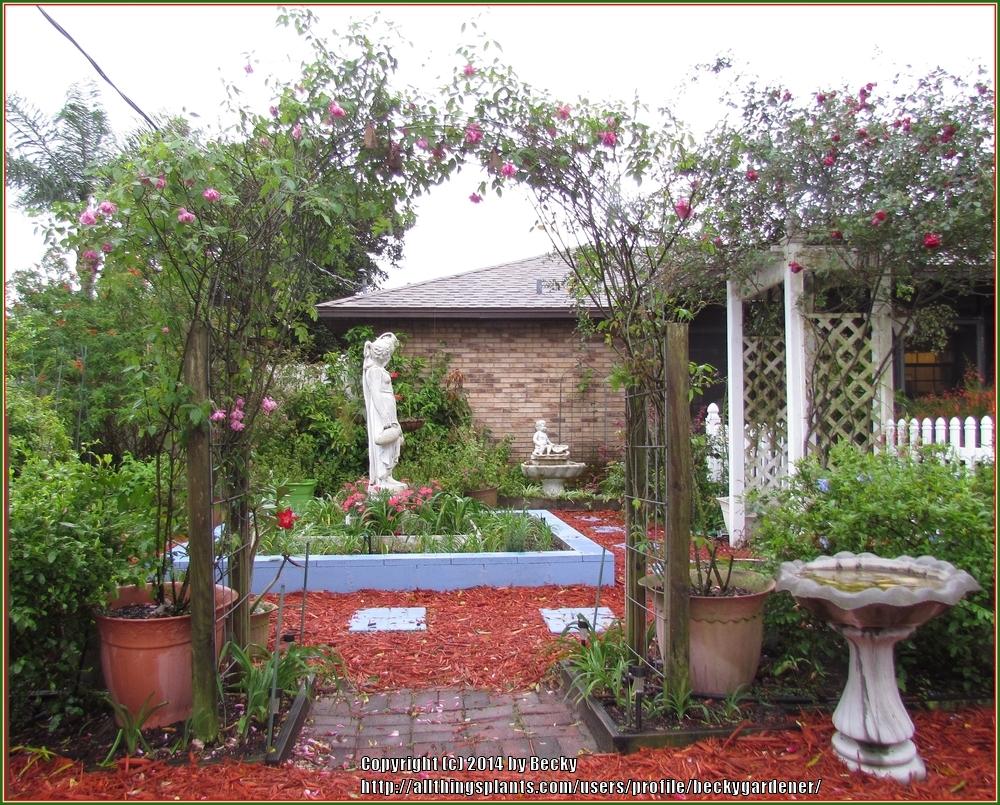
How it looks today:
Feedlot panels are light weight, flexible, and easy to maneuver. Each panel is made of welded steel construction. These panels are very strong, sturdy, and sag resistant. Perfect gardening material! 4 x 4 posts or good quality landscape timbers can be used to mount the cattle panel to create an arbor. The panels are typically 16 ft. wide x 50 inches tall. I purchased mine at Tractor Supply for about $20 a panel. I chose a feedlot panel for "cattle," not smaller animals. I prefer panels that have the wider mesh. These panels are 50 inches in height, so I had it cut in half right down the 16 ft. length. (You will be able to make TWO arbors from this one panel.) It will require double cuts. You don't want to have prongs sticking out, so those have to be removed from both panel pieces with heavy-duty wire cutters. Fortunately, the nice salesperson at Tractor Supply was willing to cut the panel in half for me, as well as clip the prongs off after the initial cutting. (Note: The panels won't be exactly the same size.) When the panels are used for an arbor, the height actually becomes the width of the arbor. You MUST keep the length of both halves of the panel at the original 16'.
To transport the 2 pieces of panel, I had to curve them just as I would to make the arbor. They were then slid into my van through the back of the vehicle with both sides/ends of each panel resting up against the walls of the van (or a truck bed). You will definitely need a truck or van to transport those 16' long panels (even when bent into an arch shape). My next purchase was eight 4" x 4" posts or smaller landscape timbers. (I recommend the landscape timbers because the arbors are only going to be about 20" wide. 4 x 4 posts just seemed too wide to mount the narrow panels.) I purchased 8' long timbers and had the store cut each down to 6'. Two or three bags of cement and a box of Electro Galvanized Fence Staples finished off my necessary purchases. I recommend 1-1/4" staples, which seemed to be the perfect size for the panels.
1 - Cattle Panel - $20.00
8 - Landscape Timbers - $3.50 each
1 - Box of Fence Staples (1 lb. box of approximately 87 staples) $3.50
3 - Bags of concrete $2.00 each
Total cost to make TWO arbors was approximately $60. If you just need one, you could split the cost with a friend wanting to make one, too!
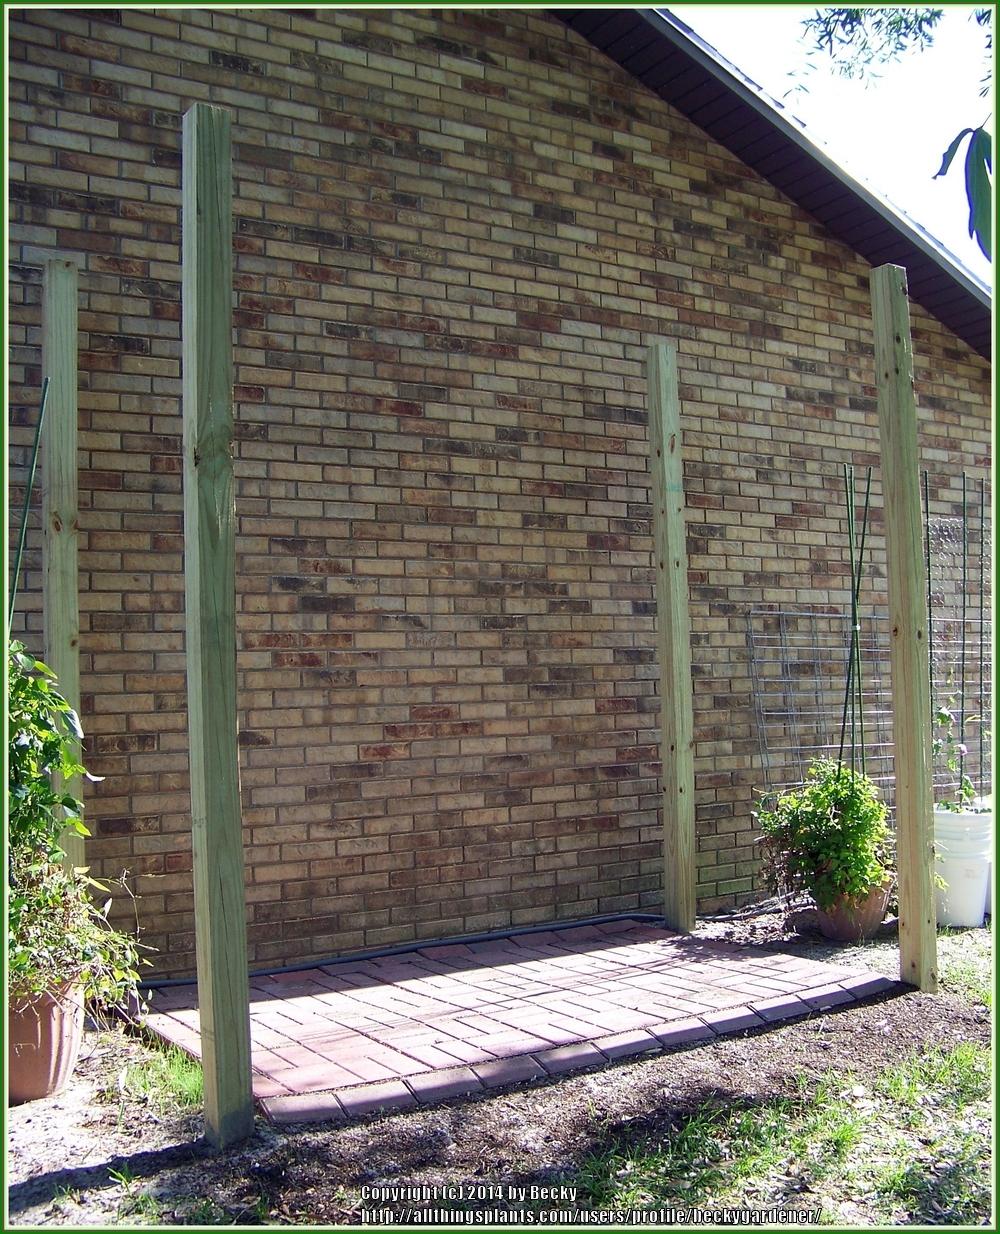
Once you get the supplies home, you must decide where to place your arbors. Determine how wide of an opening each arbor will be. I decided to make each of my arbors 5' wide (opening to walk through) and 7' tall. It will take two people to build each arbor. Sink the 6' tall wood timbers into the ground about 2' deep. Make sure you measure very carefully the placement of each piece of wood. When building each side of the arbor, I placed the wood timbers about 16" apart. Each side of the arbor was 5' directly across from its opposite post. This enabled the cattle panel side edges to be placed right in the middle of each post to be secured with the fence staples. Add concrete in the holes and let the concrete set over night. A level and a tape measure are two necessary tools needed to make sure the posts are straight vertically and the correct distance from each other horizontally.
Timber posts in place. (I added the paver floor before finishing the pergola/large arbor structure.):
Once the timbers are secured in the ground in hardened concrete, it's time to put the cattle panel in place to complete your arbor. This is where two people are necessary. Each person will take a side of the 16' length panel and start moving closer to each other to bend it upward to make an arch shape. Position the panel so that each of the 4 corners is against one of the posts. The panel should be on the inside, not the outside of the arbor posts. I positioned the bottom of each side of the panel off the ground by about 5 - 6 inches. (Doing so helps prevent it from deteriorating.) One person holds the panel in place while the other person hammers in the fence staples. I added a staple to each rung of the cattle panel to make sure it was secure. After that, you can add a vine or climbing rose to each side of the arbor. Once the plants grow and cover the arbor, you won't see the steel panel at all. These panels are so sturdy, you can grow just about any plant on them. The steel panel will outlast the wooden posts by many years.
Close-up of fence staples:

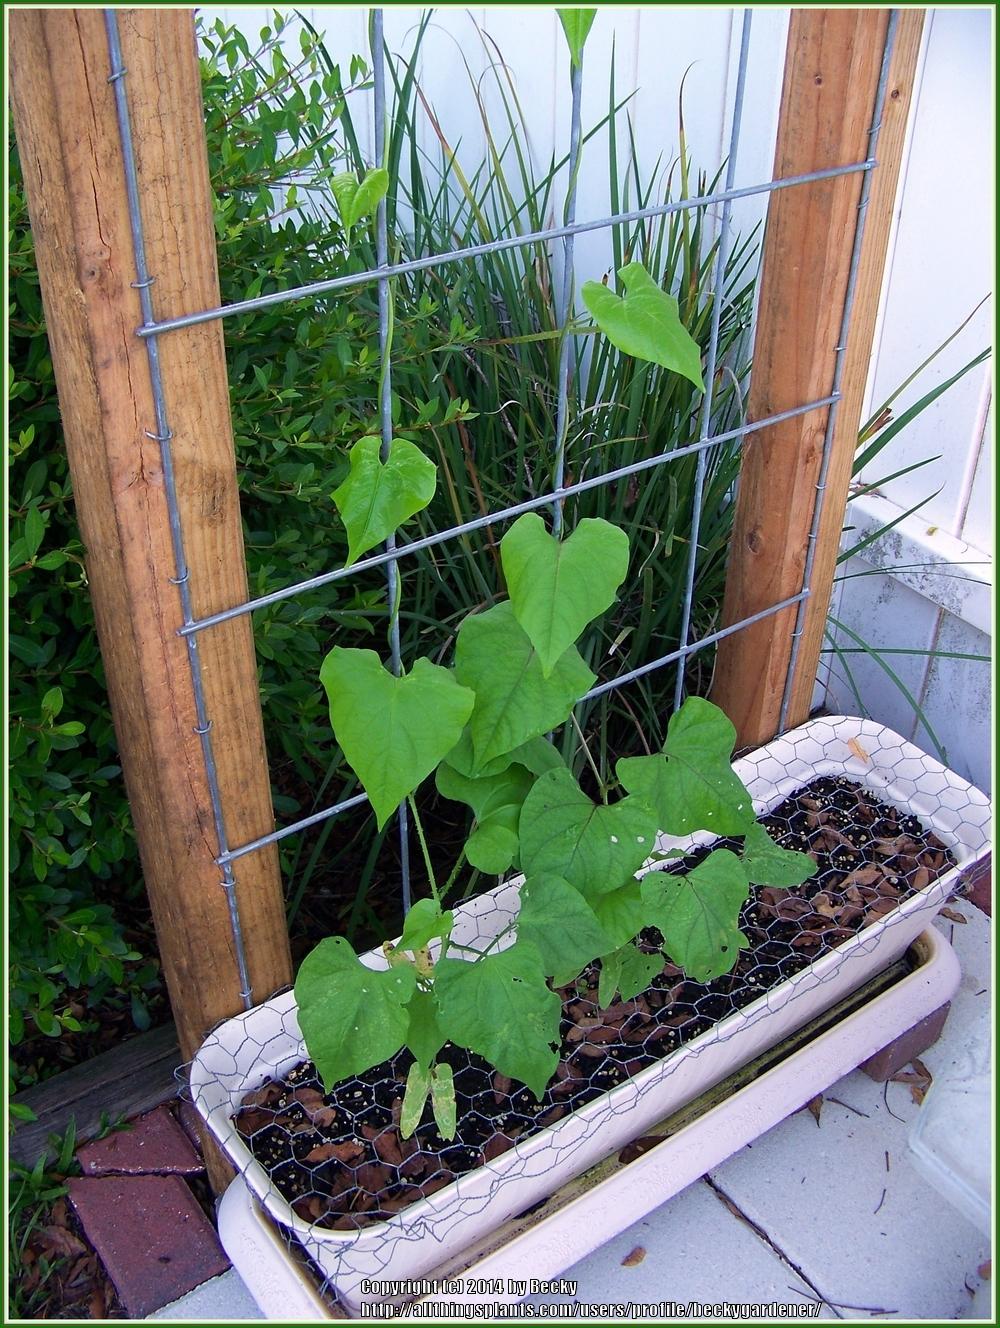
A larger view of the cattle panel mounted to the landscape timber:
Finished arbor:
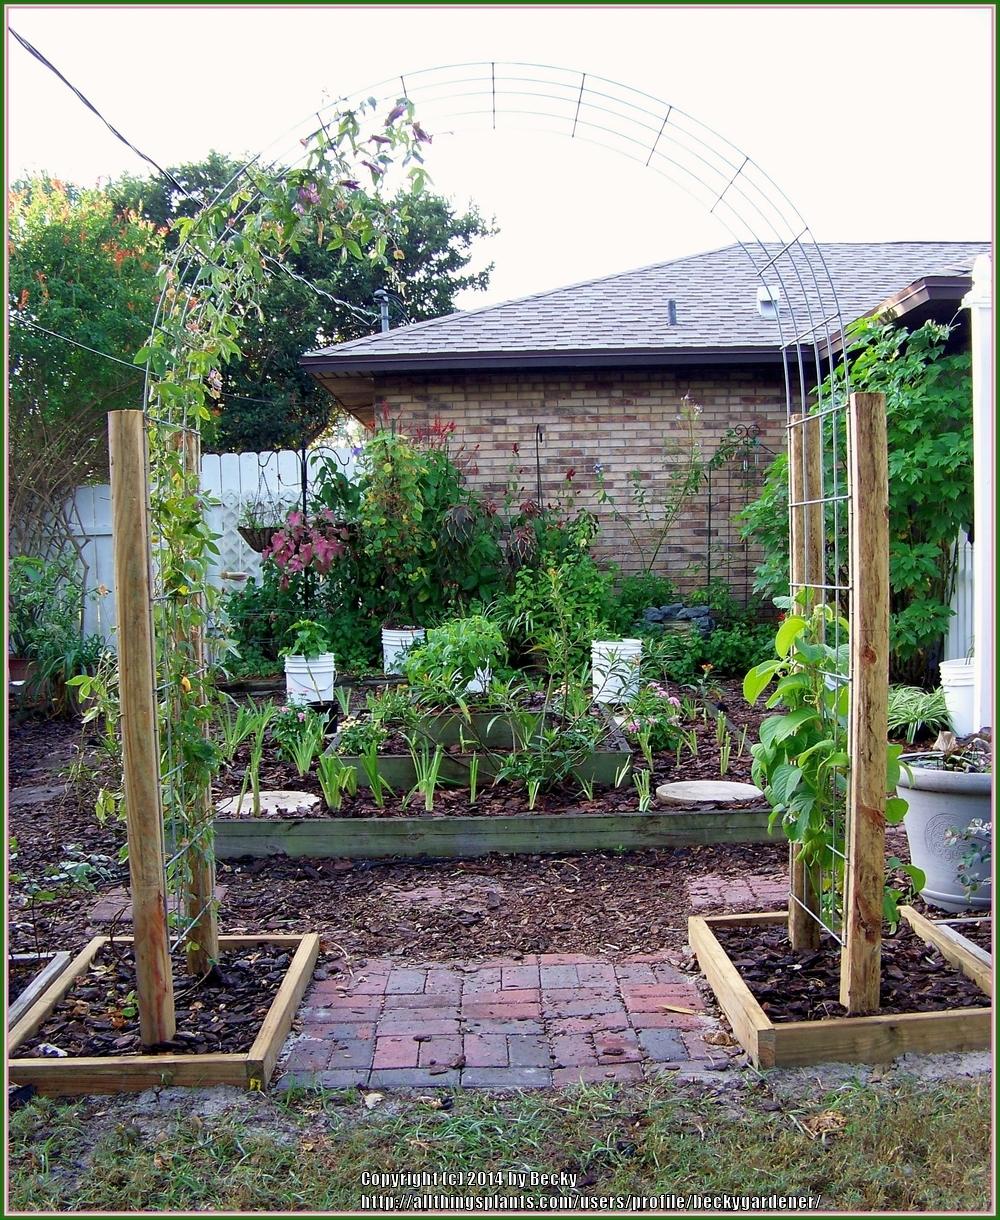
Arbor gate entrance:

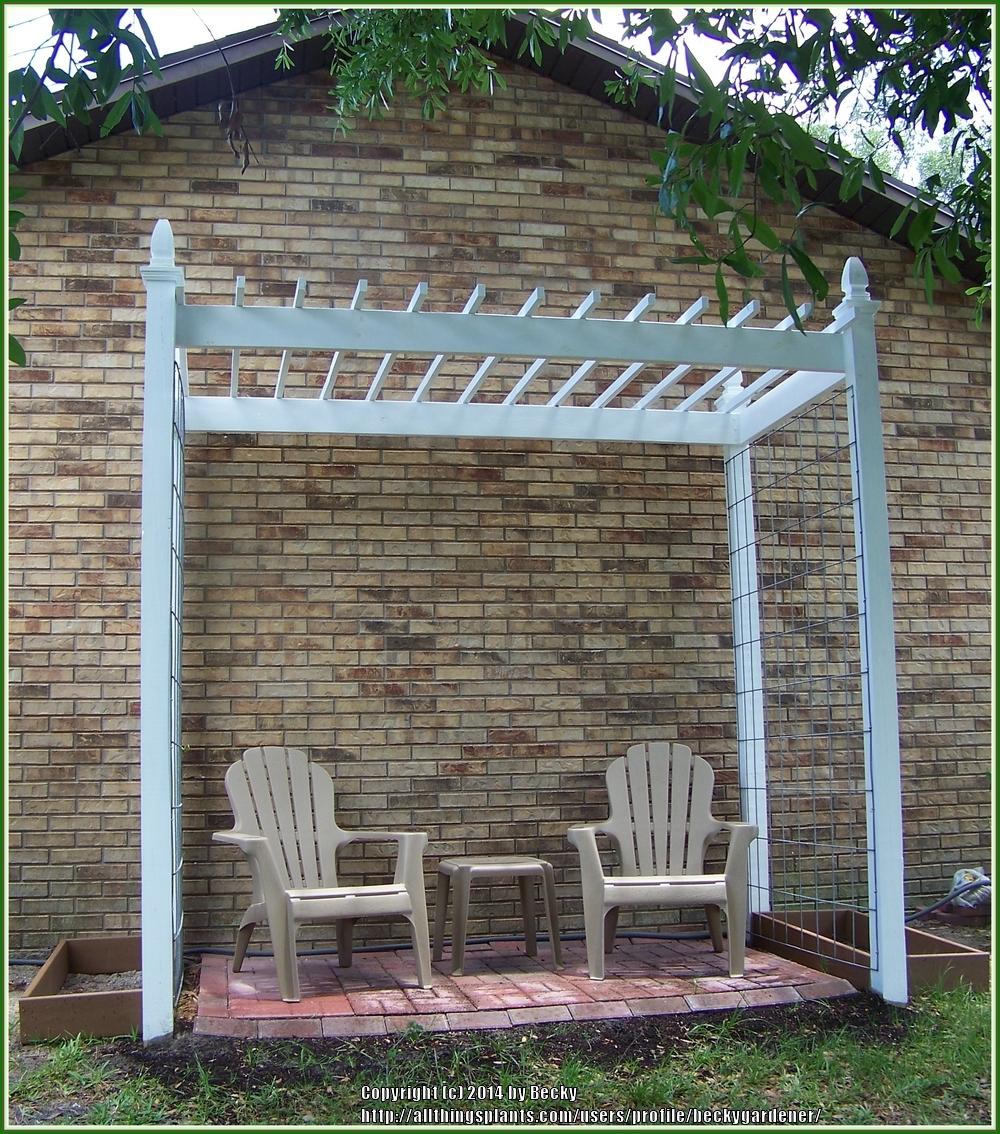
If you want something bigger than a 5' x 7' x 20" arbor, consider making a mini-pergola or much larger arbor using the same materials, plus additional wood. Instead of dividing the cattle panel up the middle of the 16' length, cut the panel in half so that you have approximately two 7-1/2' length pieces. (Each piece of panel would be approximately 7-1/2' tall x 50" wide.) Use 4 x 4 posts for this project. The height of the posts should be at least 10' tall, so you can sink 2' into the ground, making the pergola 8' tall when completed. You will also need wood slats to make the roof of the pergola/arbor. The size of the wood will determine the amount of shade you are trying to achieve. Wider, thicker pieces of wood will provide more shade, depending on how closely spaced they are. You will need to make a roof frame to mount the slats on, so more wood is required for this project. Or if you prefer, purchase a second piece of cattle panel to use as the roof of the mini pergola/large arbor and have it cut to fit the size of the roof area. The cattle panel is mounted to the sides of the pergola using the fence staples to make a wide trellis for vines or other plants to grow up. With the right plant species, the trellis and roof of the pergola will eventually be covered. My pergola/large arbor is approximately 9' wide x 8' tall x 54" deep once it was completed.
Finished pergola with garden boxes on each side:
A closer view of the roof/corner posts:
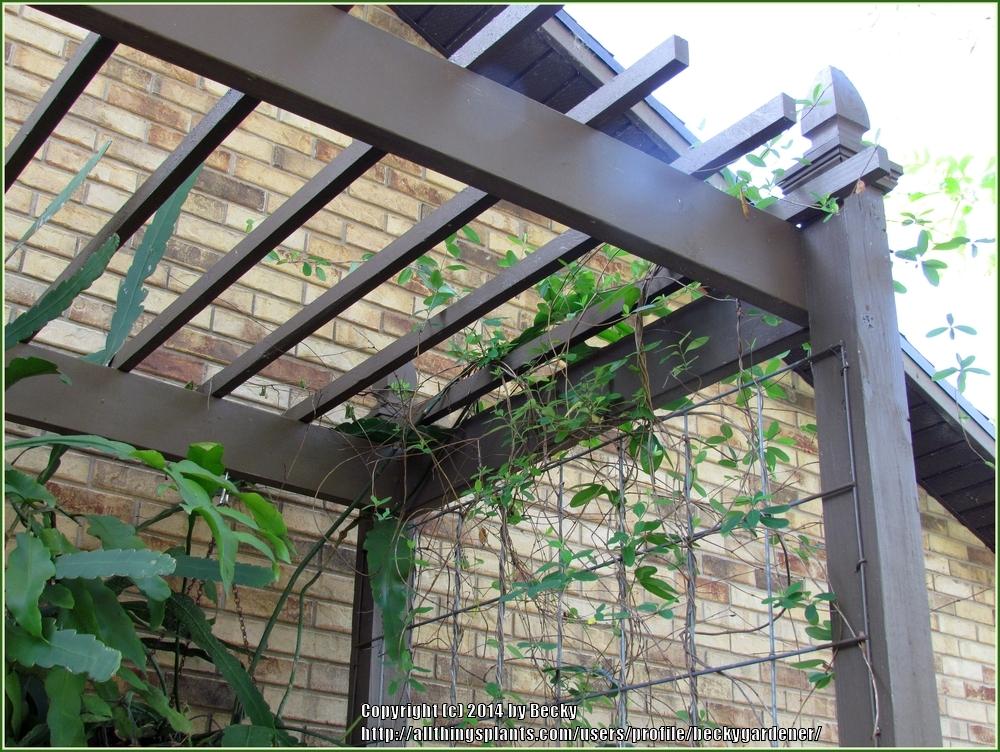
If you are planning to paint the wood, I recommend that you paint it BEFORE building it. It's much easier to reach all the corners and areas behind the cattle panel. Originally, I painted the pergola white. I regretted it later, since white gets dirty rather quickly and will look unsightly. I repainted my pergola dark brown and it looks nicer and more natural looking now.
How the pergola looks today:
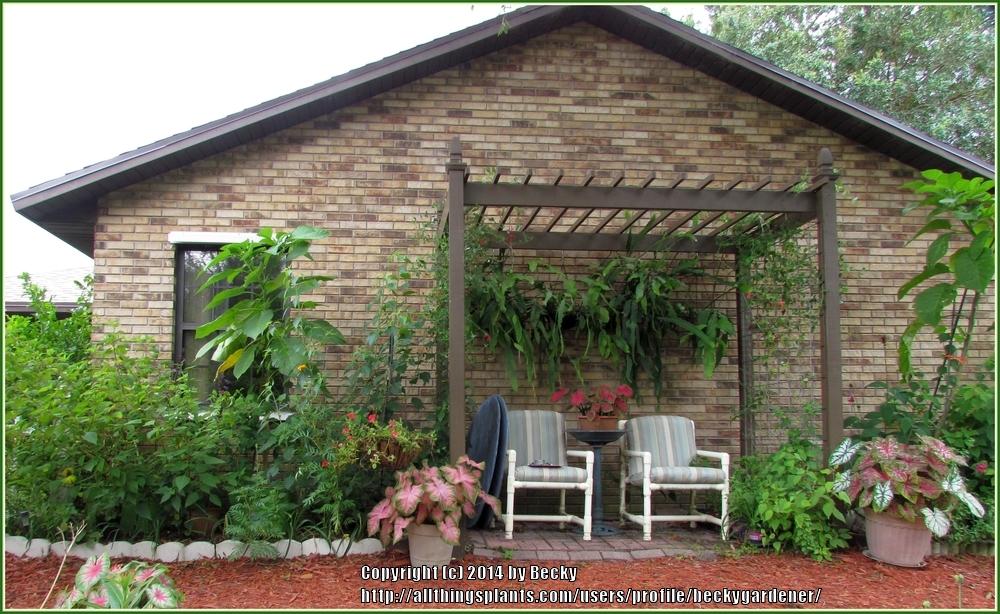
As a finishing touch, I added brick or white pavers on the ground below to make a floor so that it would not become a muddy area from constant use. You can also create a garden bed on each side of the arbor to grow your vines. I hung shade plants (epiphyllums) from the pergola and added 2 patio chairs so my husband (or friends) and I can sit in the shade and enjoy the garden and the wildlife. Each project was completed in one weekend once the materials were acquired. The arbors and pergola are 6 years old now and I've seen no signs of the cattle panel deteriorating. It will most certainly outlast the wood used in making this arbor project. I've used my arbors to grow numerous plants, from edibles (cucumbers and small melons) to flowering vines to my current climbing roses. You can grow just about any climbing plant on this arbor design. Choose your favorite climber and go for it!
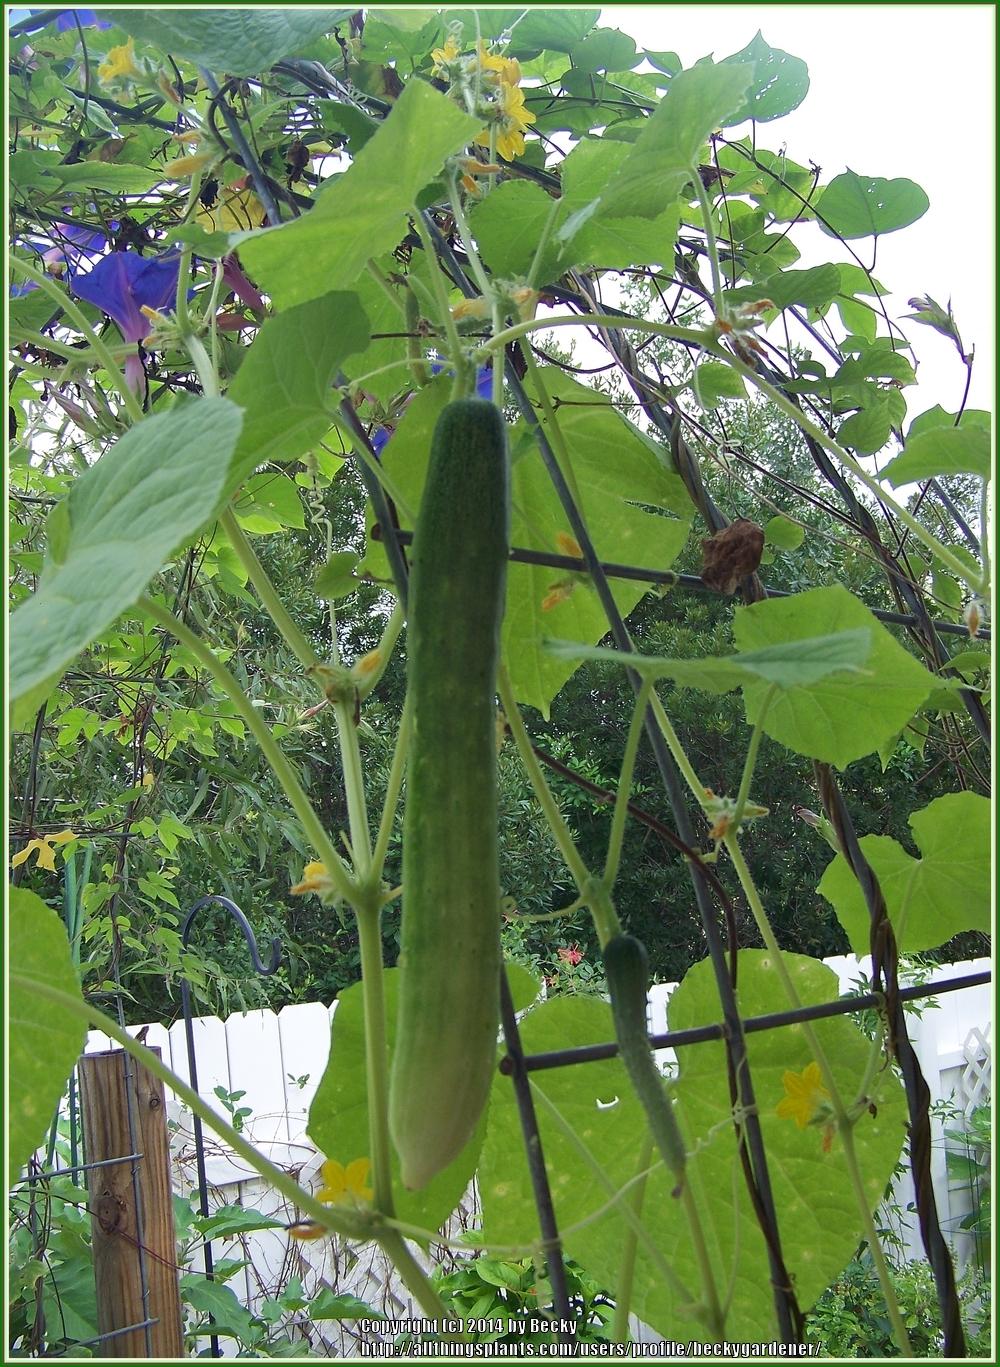
Cucumber vine and Morning Glory vine:
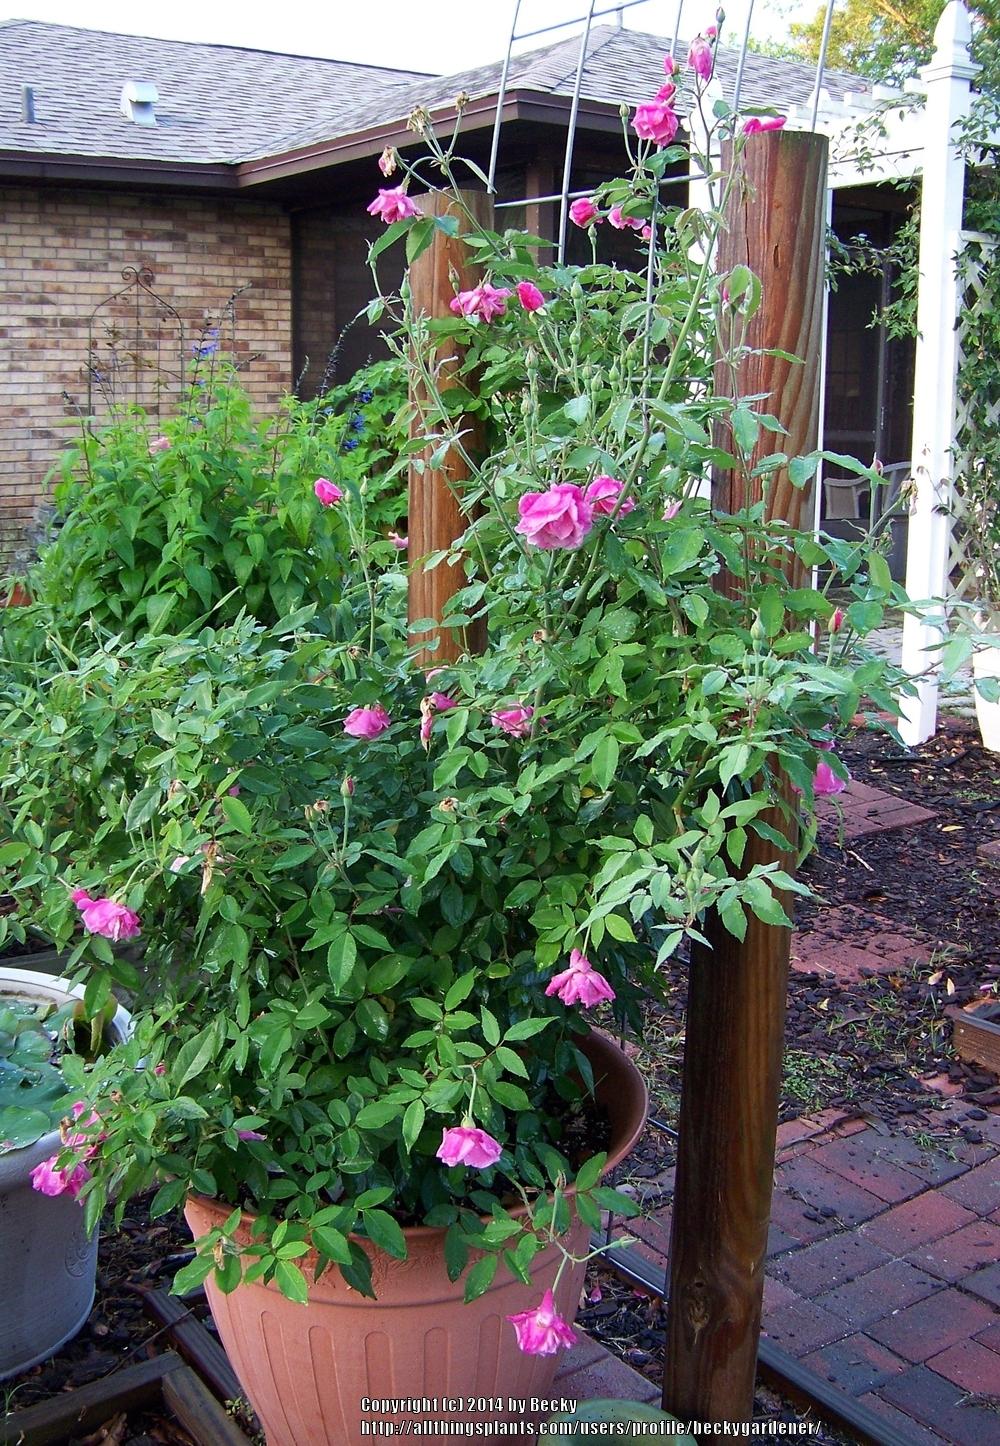
Climbing roses:
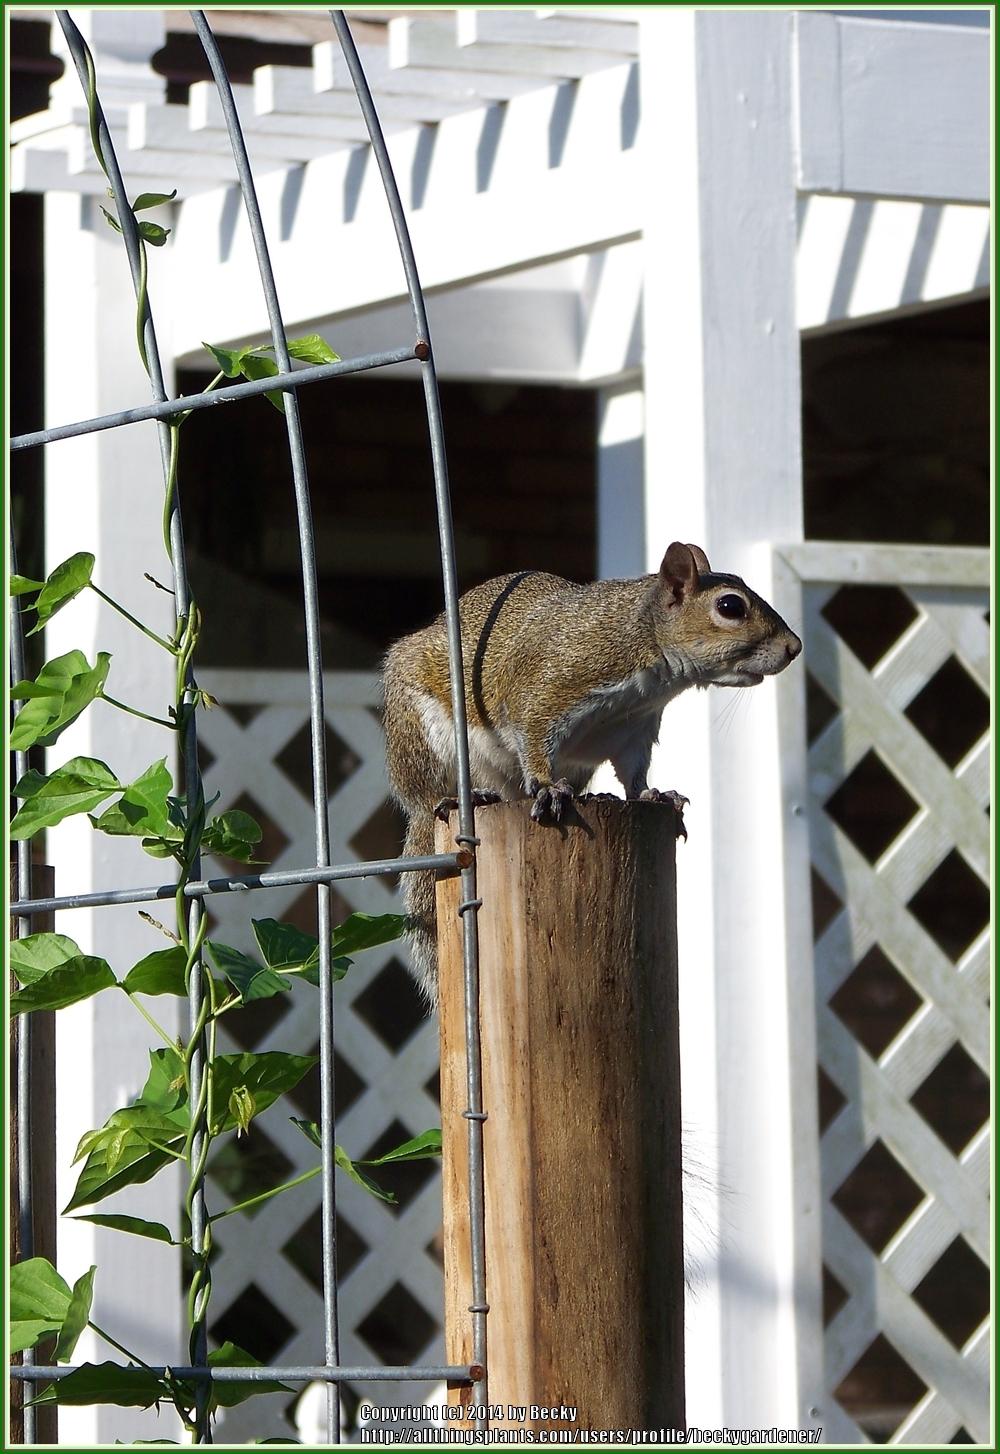
Even the wildlife enjoy the arbors:
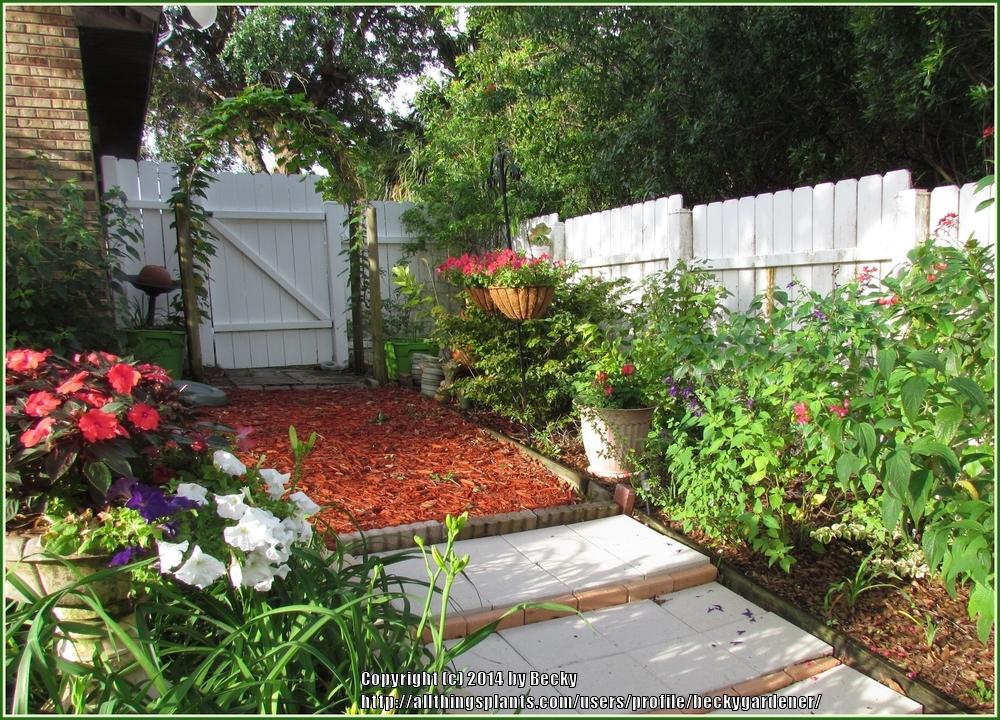
A view from the back of the garden towards the gate entrance arbor:
| Thread Title | Last Reply | Replies |
|---|---|---|
| Panel width by GThumb66 | Mar 14, 2015 12:00 PM | 1 |
| Concrete by Birdielover | Mar 7, 2015 10:05 AM | 1 |
| Mulch by vitrsna | Mar 5, 2015 9:24 PM | 21 |
| A way to make these things? by coconut | Mar 4, 2015 10:30 AM | 6 |
| very nice by Ecscuba | Mar 2, 2015 7:21 PM | 1 |
| Hog Panels by paulgrow | Mar 2, 2015 7:20 PM | 1 |


