
Main Contributors: tink3472, fiwits, dormantsrule, chalyse
Top 10 Reasons to "Pot-Up or Re-Pot" a Daylily (DL):
1. You've had a DL in the same pot for more than 3 years -- it's probably time.
2. You've bought a DL from local sources and it may already be root-bound.
3. Fans in a DL's pot have increased and are crowded in the pot.
4. Water drains right through the pot, or the pot quickly needs re-watering. You insert a fingertip and the soil doesn't "give," roots are growing out the drain holes, or the pot's sides are bulging.
5. You'd like to hybridize DLs fom the garden, but they need a shadier, cooler spot for pollen and seed pods to set reliably.
6. You'd like an easier garden to tend -- planting pots-inside-of-pots in the ground or enjoying them on your patio.
7. You'd like to rotate blooming DLs throughout the seasons.
8. You're moving and you need to convert garden favorites into potted favorites.
9. Your garden DL is not well and you want to clean it up, reinvigorate it, focus on its treatment inside a container, and tend to it closely.
10. You have been enabled by ATP daylily "helpers" (guilty parties abound here, thank goodness) to buy lots more daylilies and are ready to share some of your previous finds with others (they make great office, service provider, and family/friend gifts!).
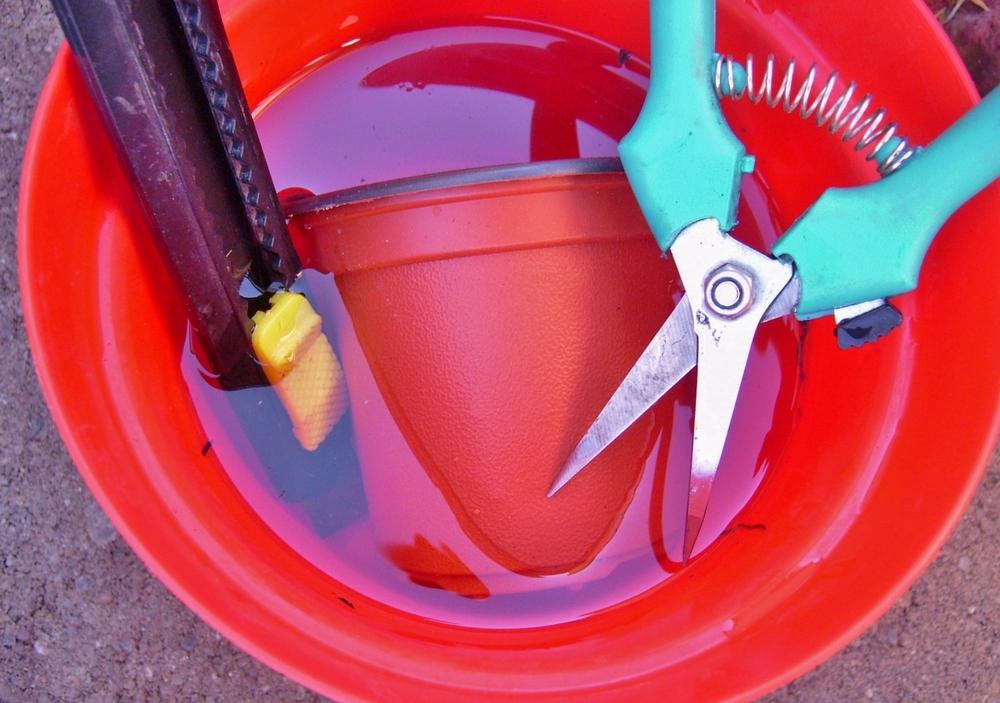
Basic Tools - Cutting tool; Bleach, Banrot, or Hydrogen Peroxide; Measuring Cups; Spray Hose; Pots; Soaking Bucket; Soil & Fertilizers, ID Markers
Time Needed: 30-60 minutes for 1) set-up with tools and soaking solution, 2) trimming and cleaning roots and foliage, 3) soaking roots and cleaning pots, and 4) clean-up.
Trimming and/or Dividing Fans for Repotting:
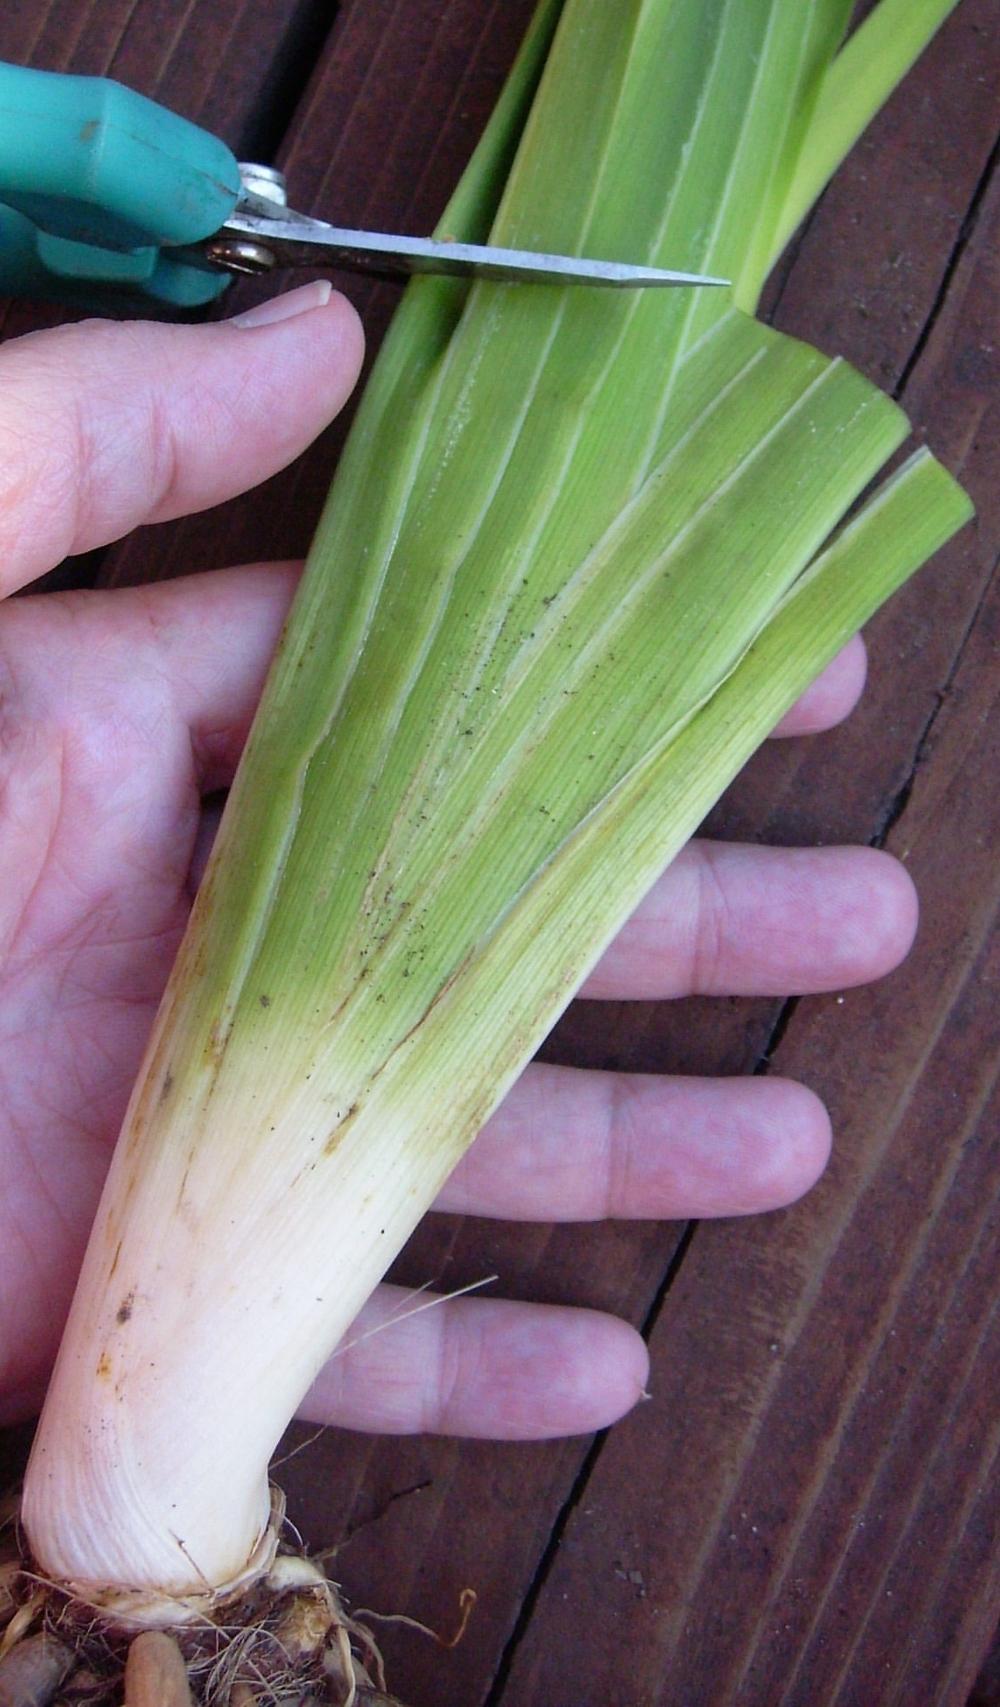
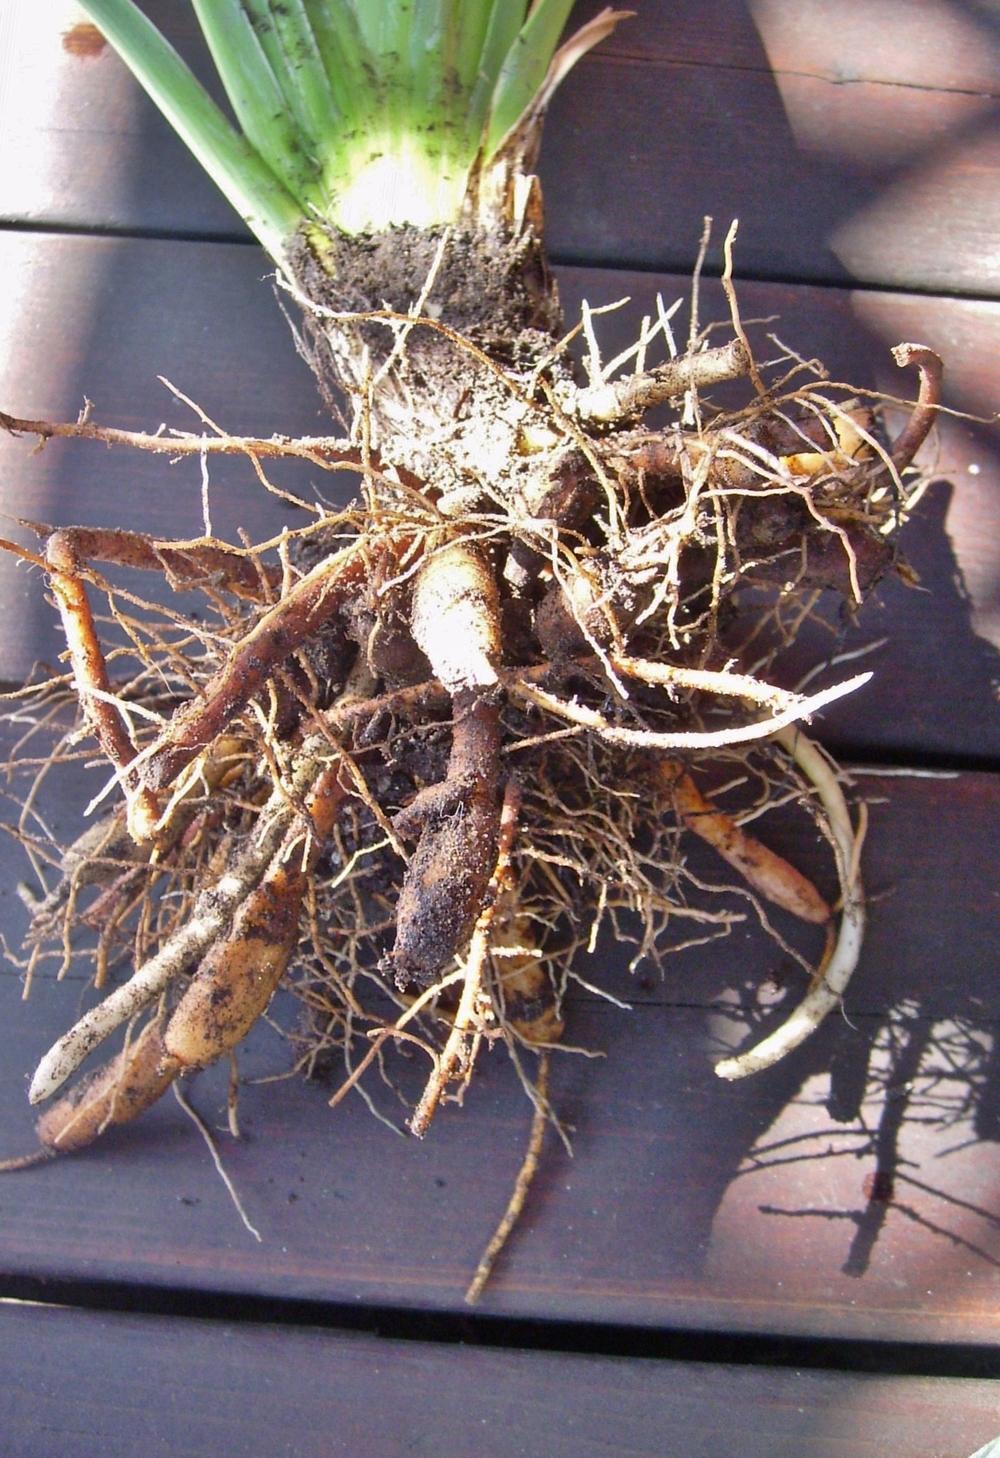
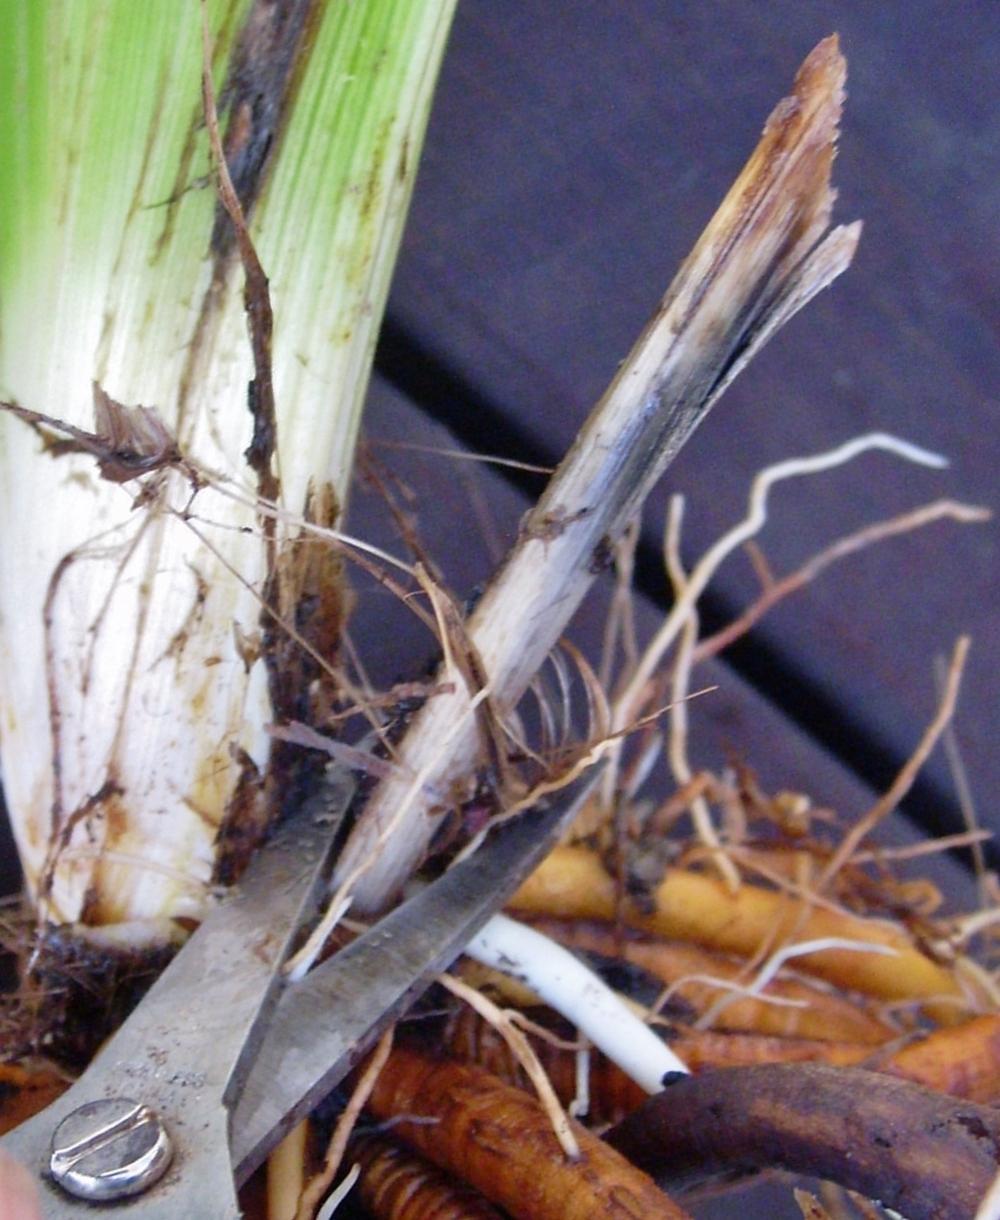
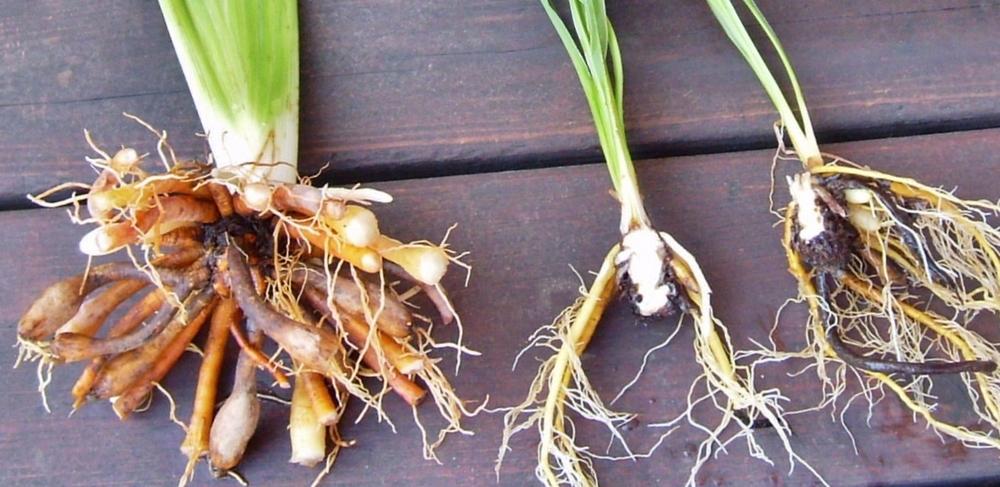
1. Set up a soaking pot and prepare a 10% hydrogen peroxide or bleach solution with water (about 1/4 cup to 2-1/2 cups of water) or use 1/4 teaspoon per gallon of Banrot. Soak your tools in the solution before beginning, to avoid transmitting disease and bacteria. Next, cut back the fan's foliage to about 4-6 inches. Foliage will droop and die back anyway after repotting, so this makes the fan easier to handle and increases the ability of the fan to stay upright after repotting. You can use your own hand-width to make the cuts, as shown in the photo below. Then, remove the clump or fan that you want to repot, loosening the dirt from around and between the roots, and spray rinse the roots with water to remove as much of the soil as possible.
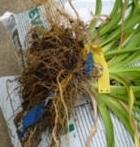
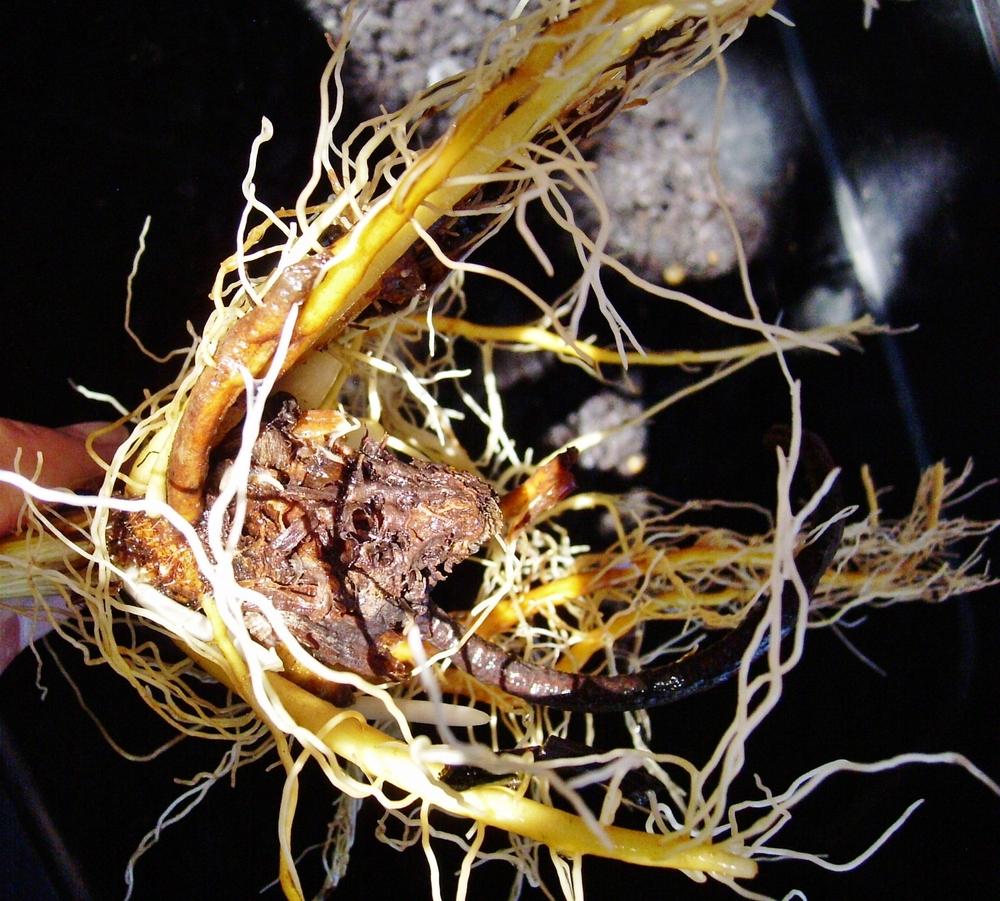
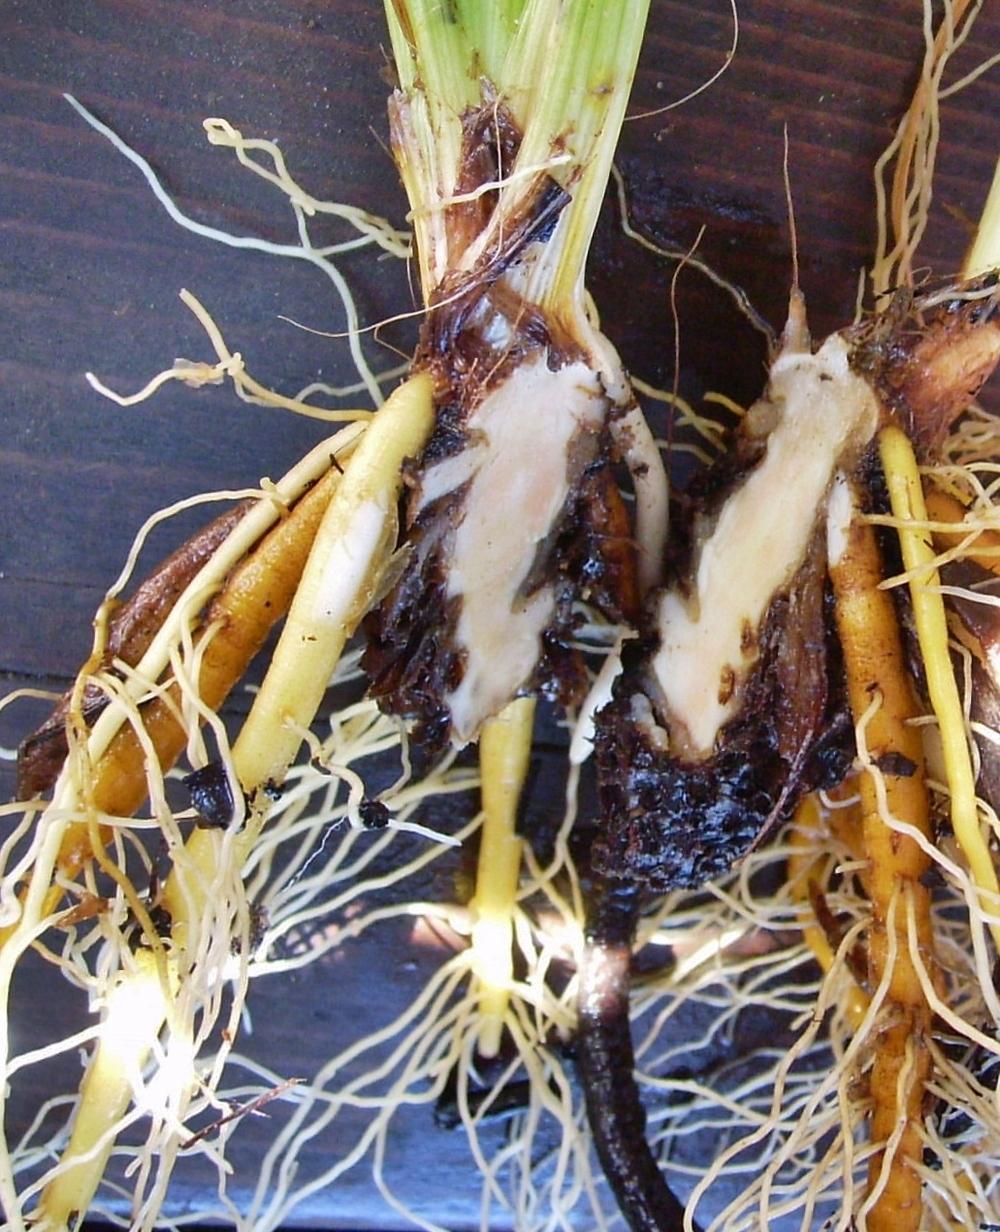
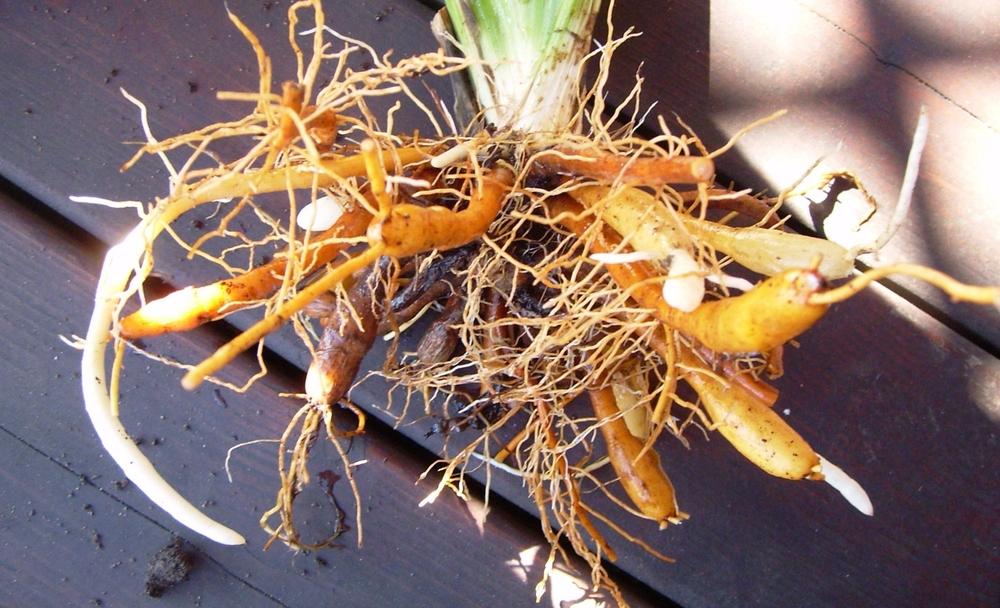
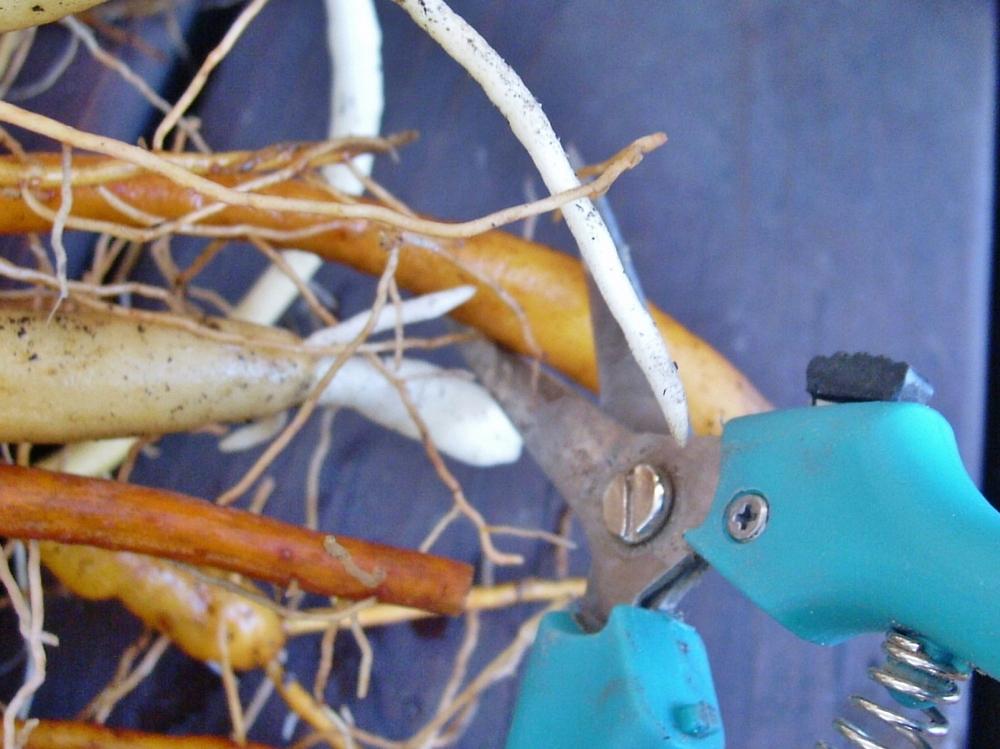
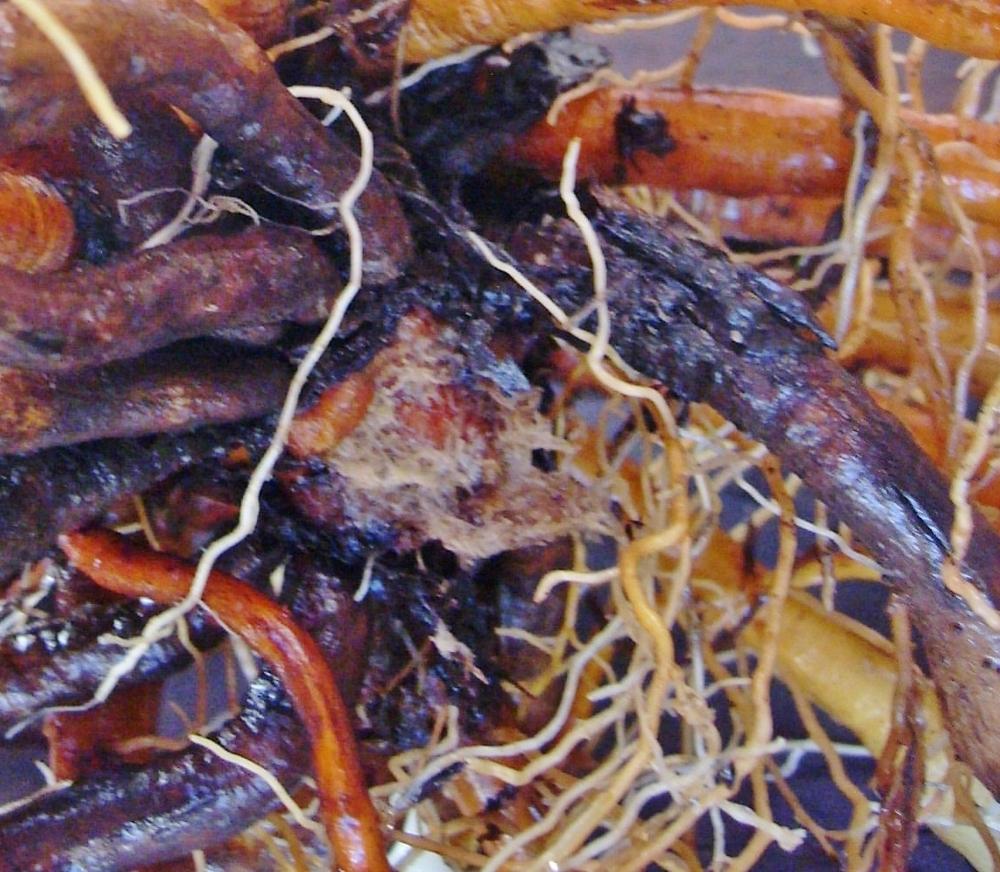
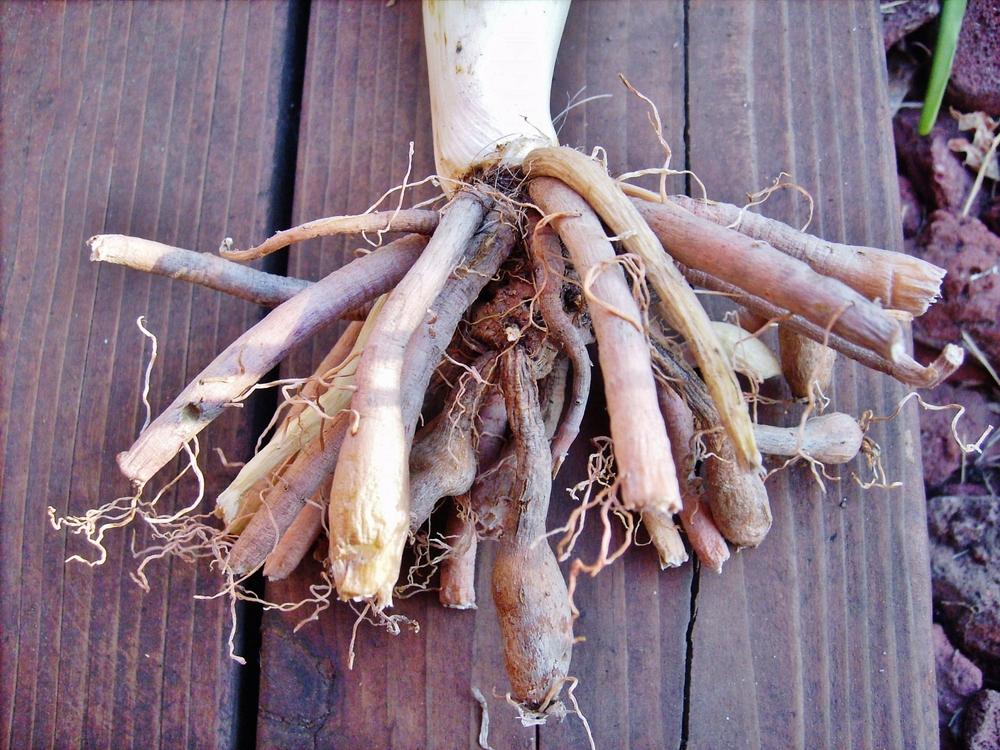
2. Cut the roots back by focusing first on empty, squishy-slimy roots (usually dark ones in the center) and removing them where they attach at the crown. Also trim any longer, usually outer roots to fit the new pot. My general rule of thumb is not to cut too much more than 1/3 of a root's length, as is done in repotting bonsai, but your mileage may vary. All types of roots can be cut: young white shoots, golden plump tubers, and trails of tiny roots coming off the tubes. Remove any spent outer leaves and scapes from the foliage as needed and check the crown. If there is any slime on the crown, gently brush or scrape it off, and then discard all of the material that has been removed.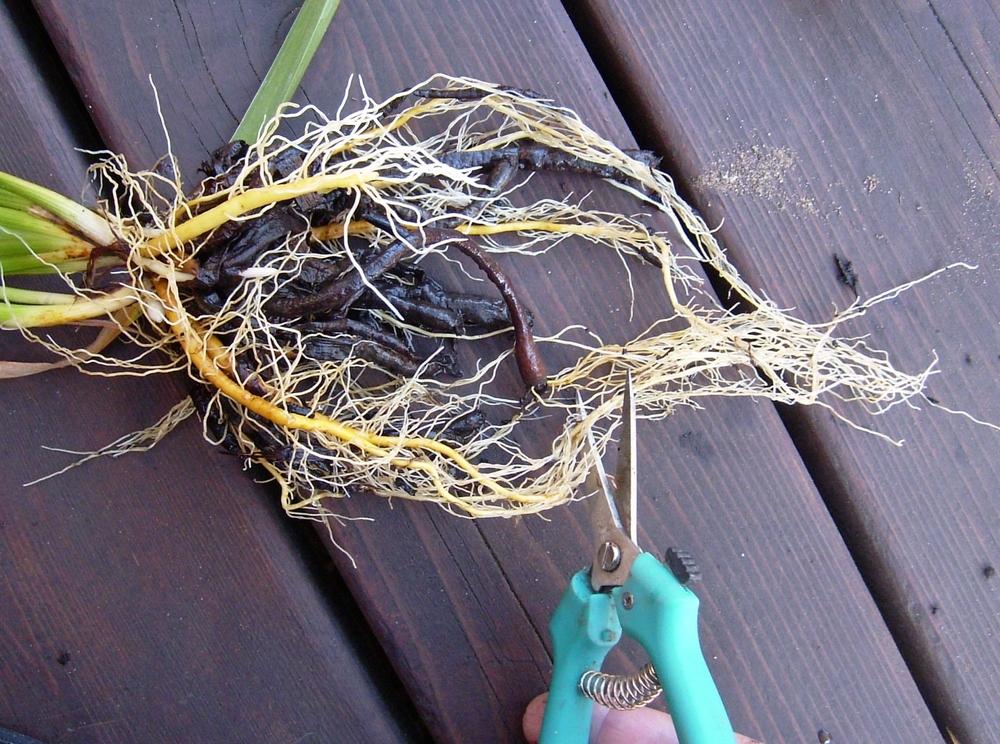
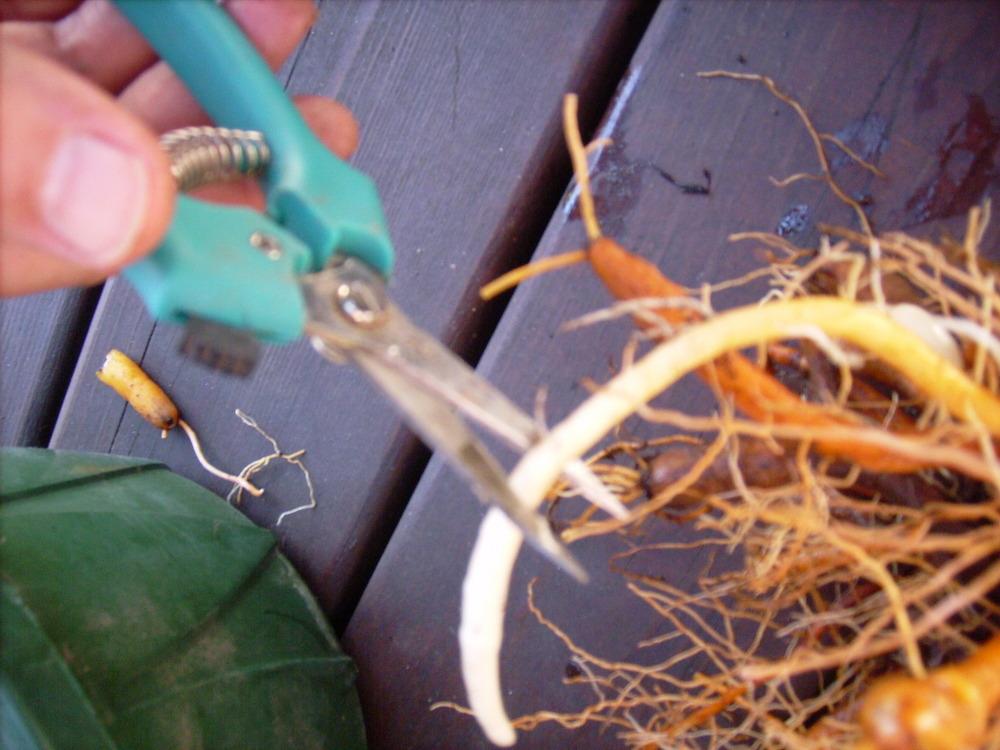
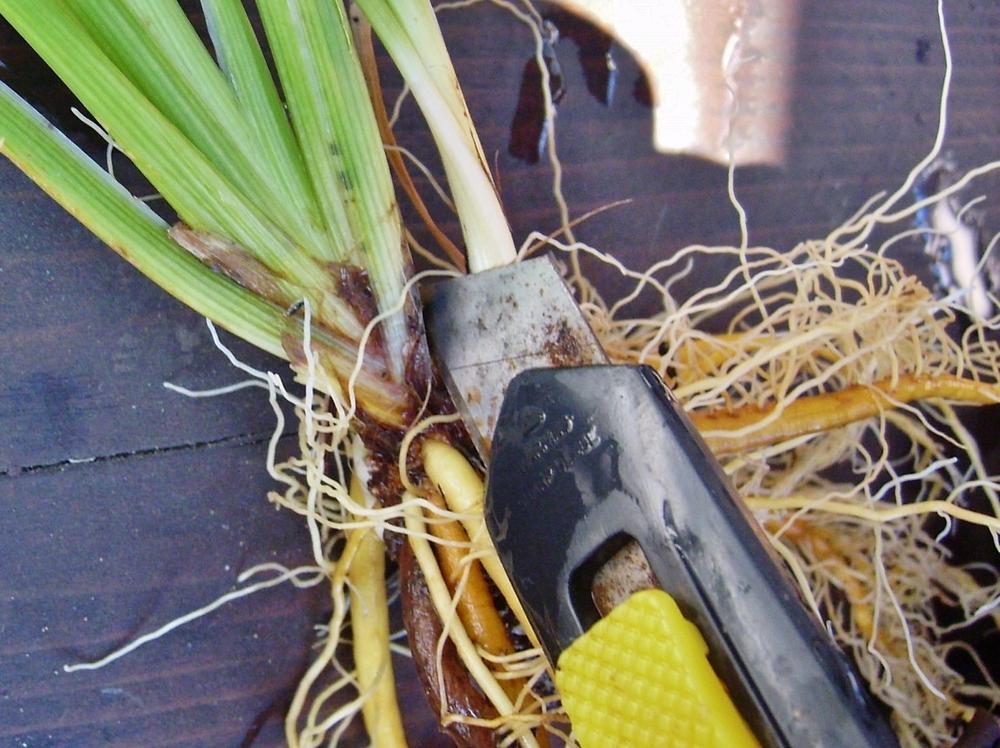
3. If you want to divide multiple fans, now is the time to do it. For fans that share the same crown, just cut them apart as equally as possible (as long as some part of the crown is separated, it should regenerate well, even if the fan has snapped off). I like to use a box-cutter type of knife because the razor-blade sharpness and thinness puts very little pressure on the crown and makes it easy to control how and where the cut goes, but you can use any kind of cutting tool you prefer. If the fans have their own separate crowns, you can divide them by hand, by using a commercial dividing tool, or with a couple of screwdrivers. If the original fan has sent out a runner, just snip the joining segment between the two fans.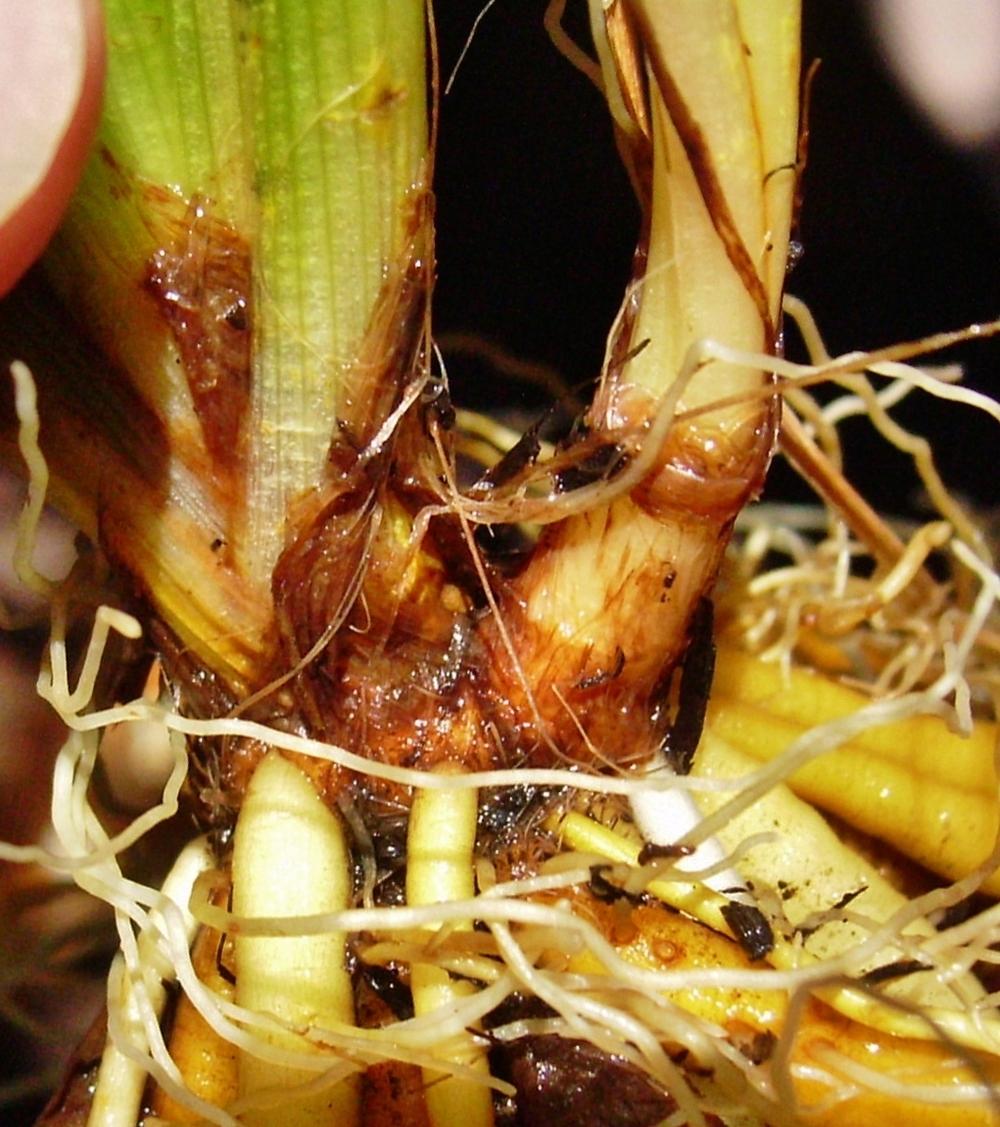
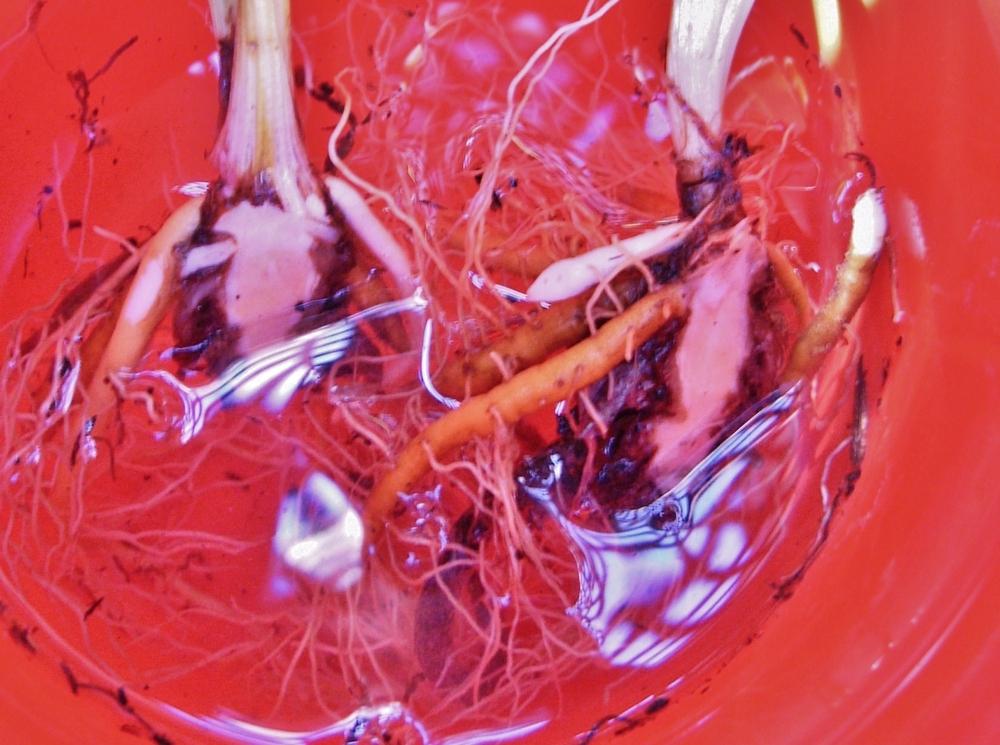
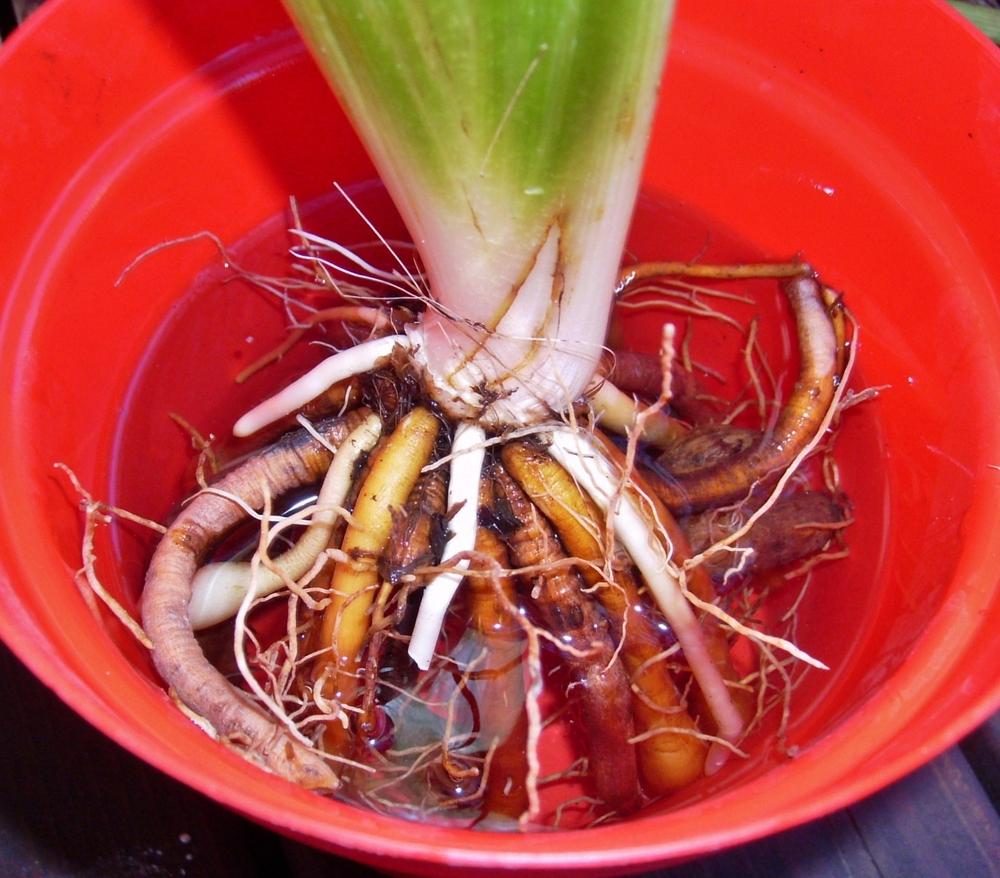
4. Soak the cut roots in the hydrogen peroxide solution for about 10 minutes. You may notice a tiny bit of foaming or bubbly fizzing as the mild solution of hydrogen peroxide does its cleansing work, or a lightening of the roots in mild bleach -- that's okay. Then rinse the roots well to remove the soaking solution, and put the fan (or fans) in a cool, dry, shady area to air out for 24 hours. This will help the roots seal over with scar tissue and help prevent the growth of bacteria. Next, disinfect the pot you will use for repotting with the used peroxide soaking solution.
Trimming to Move from Garden to Pot
1. Set up a soaking pot and prepare a soaking solution as before. Soak your tools and dig up the clump or fan that you want to bring from your garden into a pot, loosening the dirt and rinsing the roots.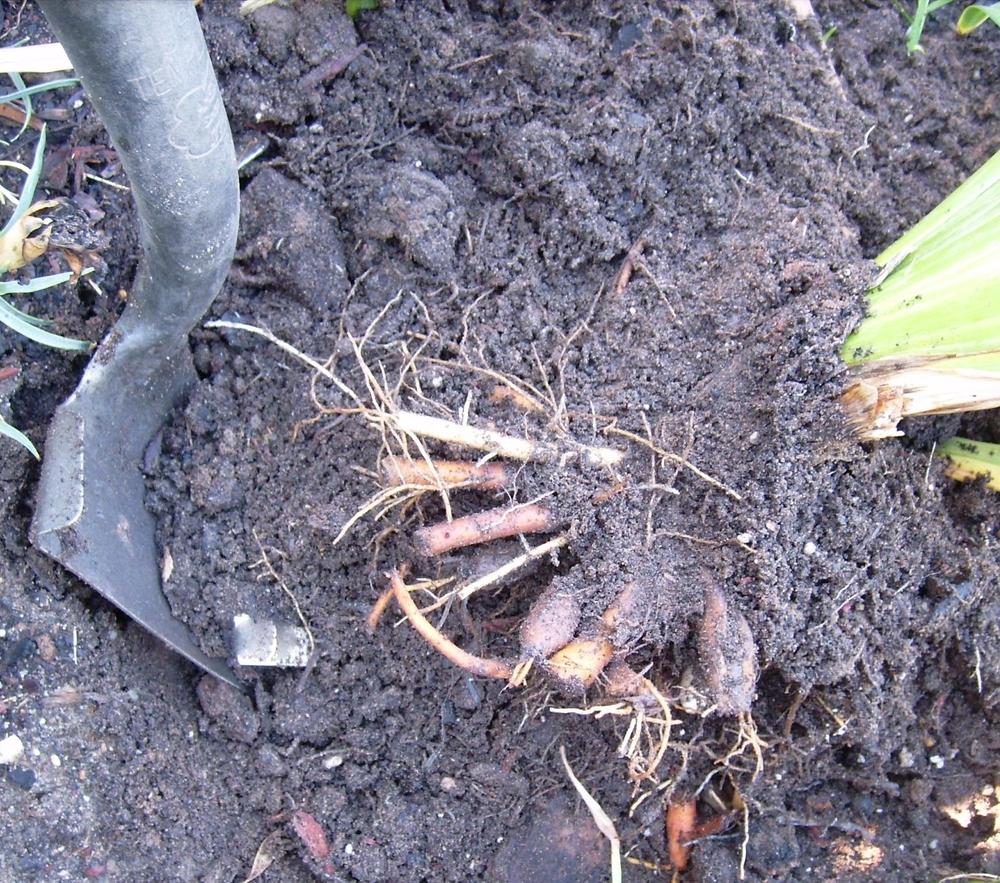
2. Cut the empty/squishy roots first and then trim the firmer roots to fit the new pot. Again, a general rule of thumb is to not cut too much more than 1/3 of a root's length. Remove outer leaves as needed and check the crown. If there is any slime on the crown, gently brush or scrape it off, and then discard all of the material that has been removed.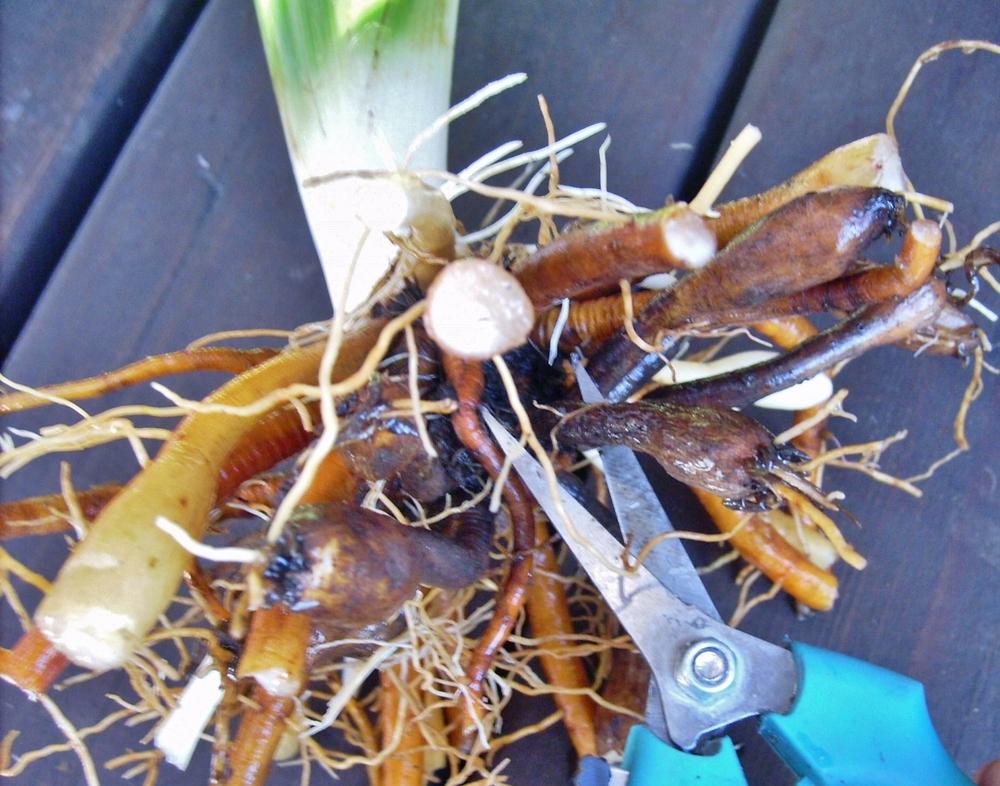
3. The remaining root ball should fit into its new pot with at least an inch or two of space on each side and a few inches on the bottom. Soak the trimmed roots for about 10 minutes in the 10% soaking solution. Then, rinse the roots well to remove the solution, and put the fan (or fans) in a cool, dry, shady area to air out for 24 hours. This helps the roots seal over with scar tissue and aids in preventing the growth of bacteria. Next, disinfect the pot you will use for repotting with the used soaking solution.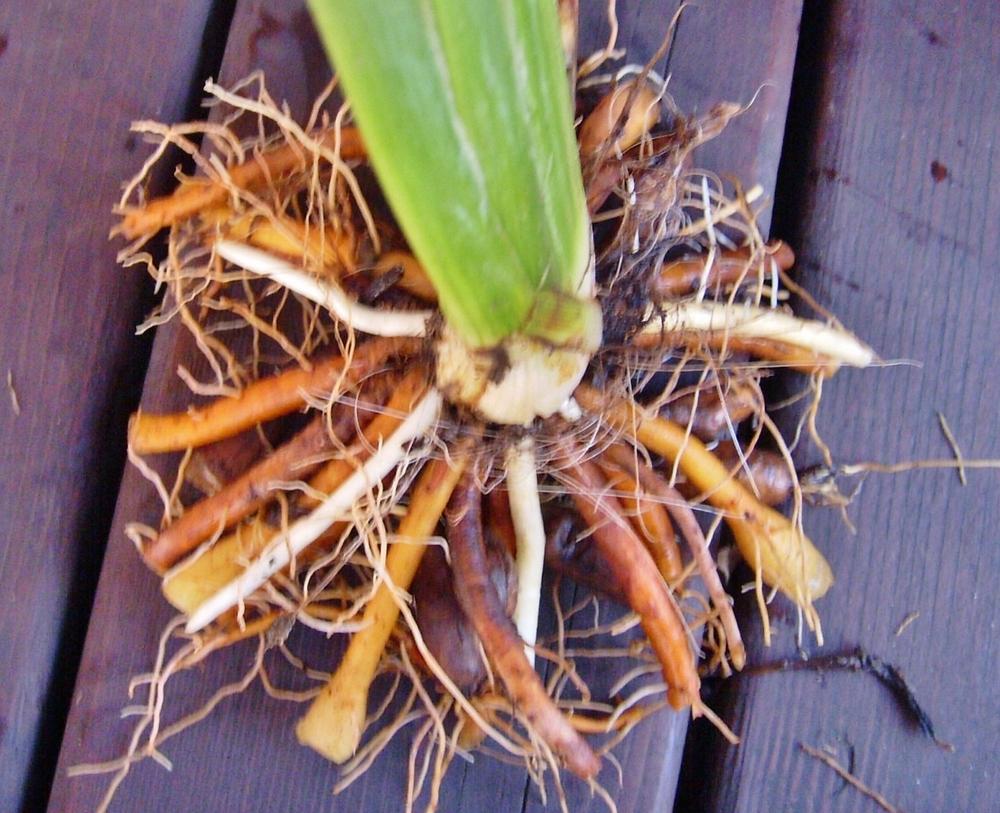
Repotting and Fertilizing
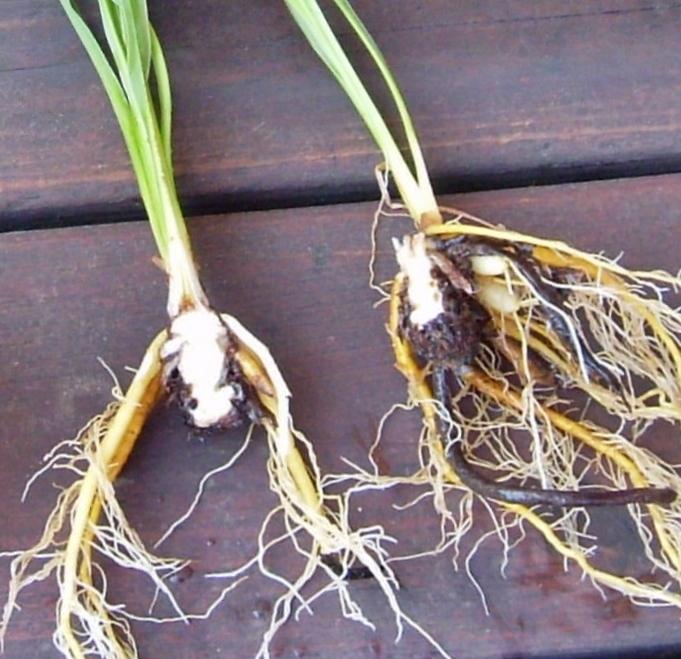
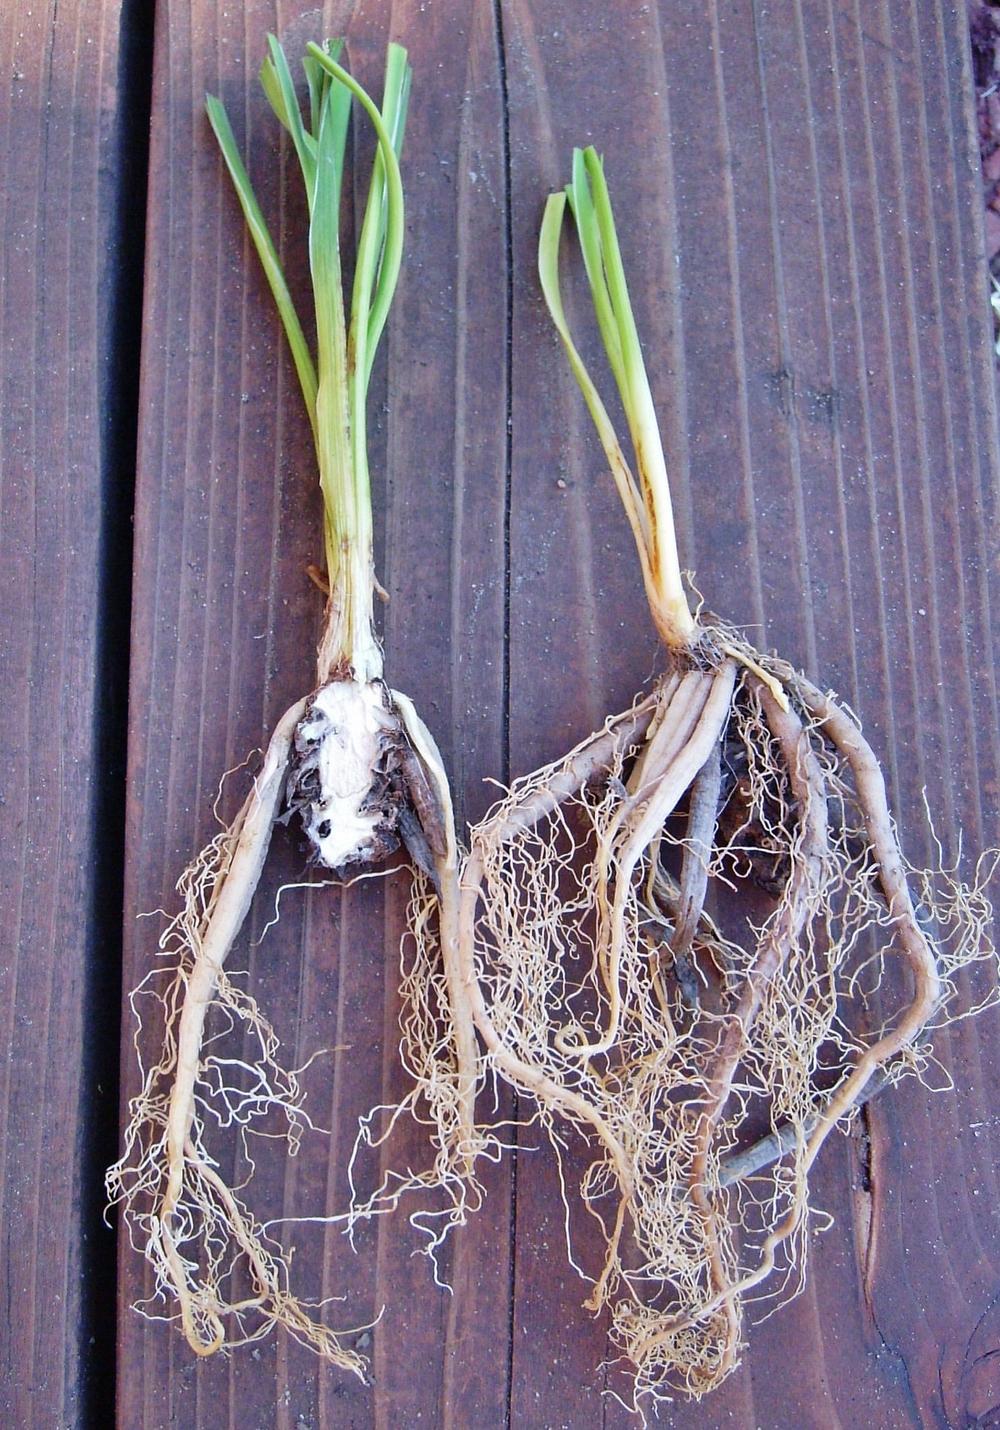
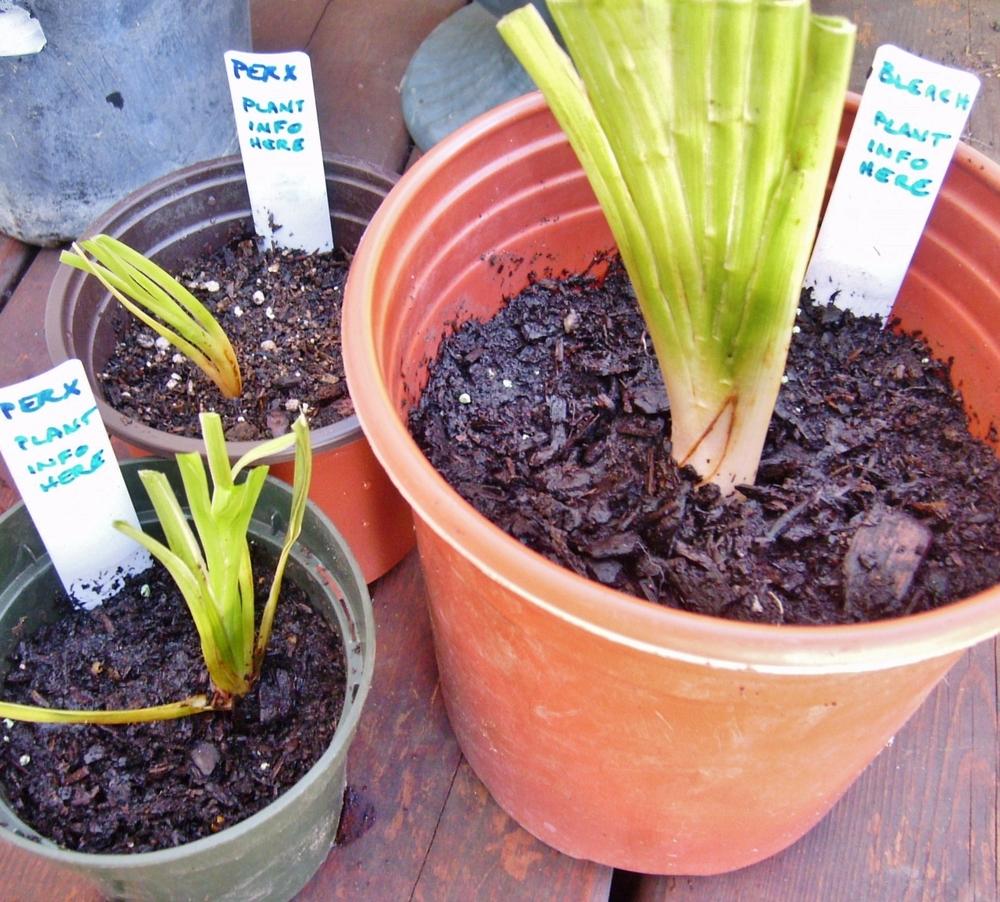
1. When you are ready to re-pot your DL, determine whether it should be soaked a bit in plain water first. Very shriveled roots and a crown with few roots left on it may need a bit of water-soaking. In the first picture below, the roots still looked plump and fine, so I did not bother soaking it first. The second pictured fans were pretty dry and hard, so I soaked them about 30 minutes in water before repotting. Next, prepare your potting soil, amending with mild-acting fertilizing sources if needed, and plant the fan with the crown no more than one inch below the surface of the soil. Remember to make or replace the plant ID in the new pot.
Additional Links and Resources
To use the search tool to look for additional articles on All Things Plants (just enter "daylily"): https://garden.org/ideas/search.php?q=DAYLILY&submit=Search
An article by daylily about general DL care, including links to the American Hemerocallis Society with further information and to YouTube for videos about soil, health, etc: https://garden.org/ideas/view/daylily/1029/Daylily-Basics-Soil-Prep-Plant-Water----Then-Enjoy-the-Show/
An article by tink3472 about preparing fans for shipping (very similar to repotting/trimming info, with added info on nutrients and care): https://garden.org/ideas/view/tink3472/998/Preparing-Daylilies-for-Shipping/
| Thread Title | Last Reply | Replies |
|---|---|---|
| Very informative article by canadanna | Oct 18, 2013 7:51 PM | 5 |


