
Shopping List
Cover Stock Paper
Transparent Duct Tape
Step 1
These plant tags make use of QR Codes. I found my plant, which Hen and Chicks (Sempervivum 'Pacific Blazing Star') in the All Things Plants Database. On the right side of the page, in the blue bar, I see the QR code conveniently placed right there. I right-clicked on the generated QR Code, saving it to my desktop. Name the QR Code the same name as your plant for easy reference.
Step 2
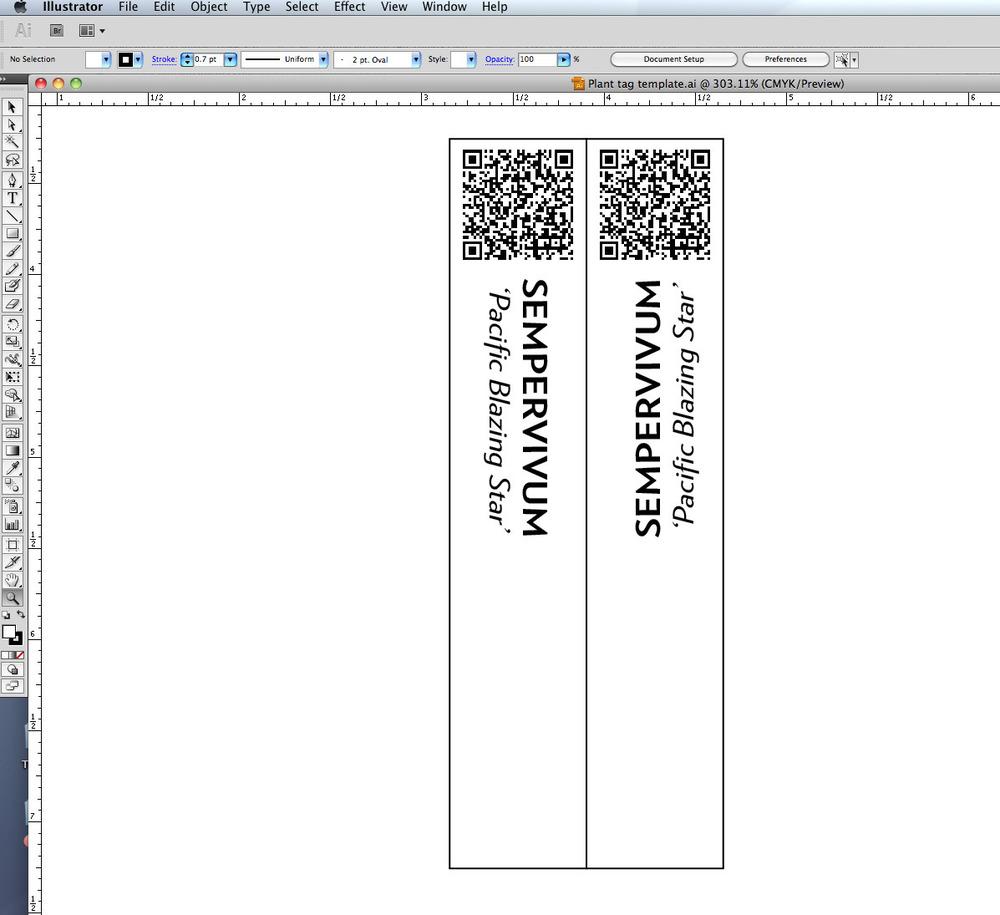
The second step is to use software to layout your tags. I used Adobe Illustrator; however, you can use the software you are most comfortable with using. I placed my generated QR Code into the page layout and typed the name of the plant how I wanted it to appear. I used a thin line border for a guide when cutting the tag out. I repeated the artwork, so that when I folded it in half, there would be text and a code on both sides of the tag. This way, if one side of the tag does end up fading over time, I still will have the other side to fall back on. Here is a screen shot of how this looks in Adobe Illustrator:
Step 3
After you have your tag set up the way you prefer, you can either fill up the page with more tags for different plants or proceed to print the tag out to your chosen paper. I used light blue cover stock to make the tag sturdy.
Step 4
Cut the tag out and fold in half. You can cut the bottom of your tag into a point if desired.
Step 5
Take a strip of transparent duct tape and position your tag on top of the sticky side towards one side. Simply fold the other half over and press in place. Take care to make sure it adheres completely all the way around.
Step 6
Cut the tag out, leaving a small amount of excess on the sealed sides. Here is a photo of my finished tag:
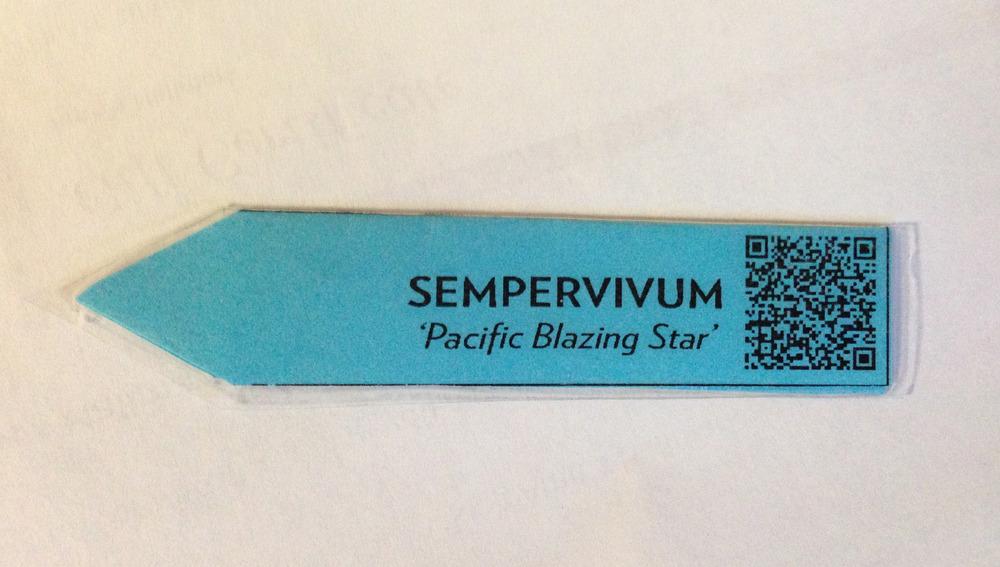
When scanned, the QR Code will take you to the All Things Plants Database for the plant you entered. There are free apps for smart phones that allow you to scan them with your phone. If you don't like the appearance of plant tags, you can stick these tags far enough into the potting mix so that only the QR Code is out of the soil. Simply scan the QR Code with your phone if you want to know which plant you are viewing.
| Thread Title | Last Reply | Replies |
|---|---|---|
| Waterproof Laser "Paper" by molanic | Nov 1, 2022 12:00 PM | 0 |
| A New Product Using QR Code Plant Tags by dennislduffy | Dec 2, 2016 3:44 PM | 0 |
| Marine Spar Varnish by crittergarden | Mar 7, 2014 8:43 AM | 6 |
| I'm wondering if you can save a step.... by fiwit | Mar 6, 2014 7:55 PM | 5 |
| Update by clintbrown | Mar 6, 2014 7:53 PM | 0 |
| Thanks, I think. by greene | Sep 16, 2013 11:10 AM | 8 |
| Plant markers by glendaberman3 | Sep 14, 2013 9:52 AM | 0 |


