
Starting a garden in containers can save the day if you don't have good soil, you don't have enough garden space, or you have physical issues that would keep you from tending a garden. The only requirement for a container garden is adequate sun for the plants you are growing. I'm temporarily in a wheelchair, so I plan to grow tomatoes on my driveway. I took photos of the process of getting my Earthboxes ready to plant. The drawings provided with the boxes when you buy them are fairly clear, but sometimes it's easier to understand a real photo.
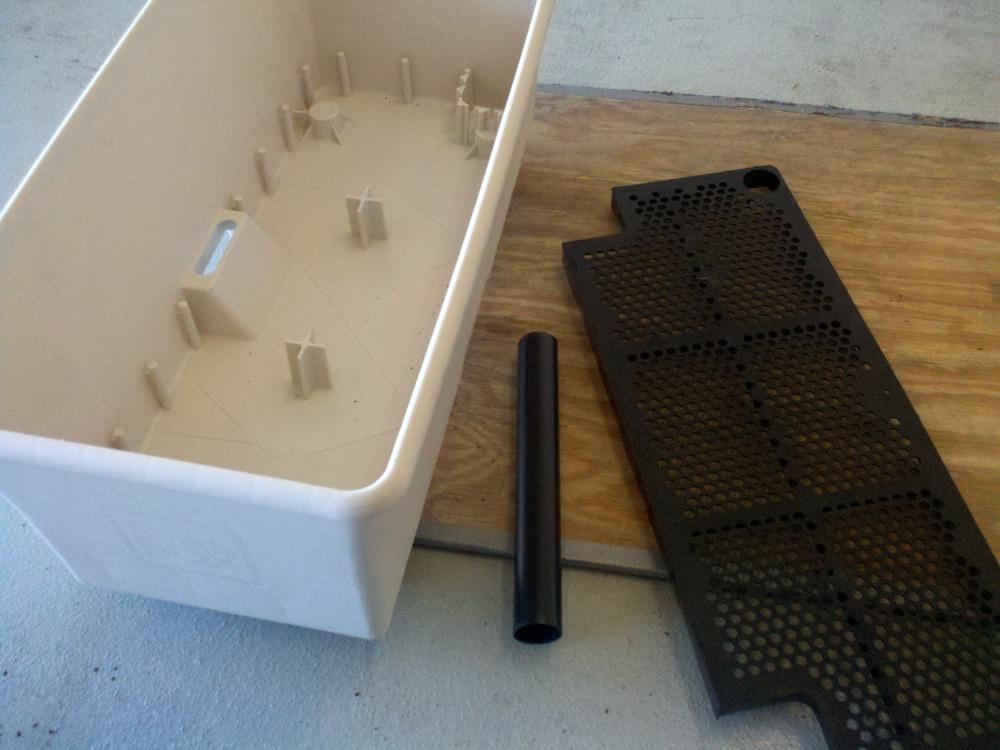
Step 1, Gather the parts. Here I have the box, the reservoir screen and the fill tube. You can't see the casters, which I've already installed. If you want the boxes to roll, buy the factory casters. The hardware store furniture casters won't fit.
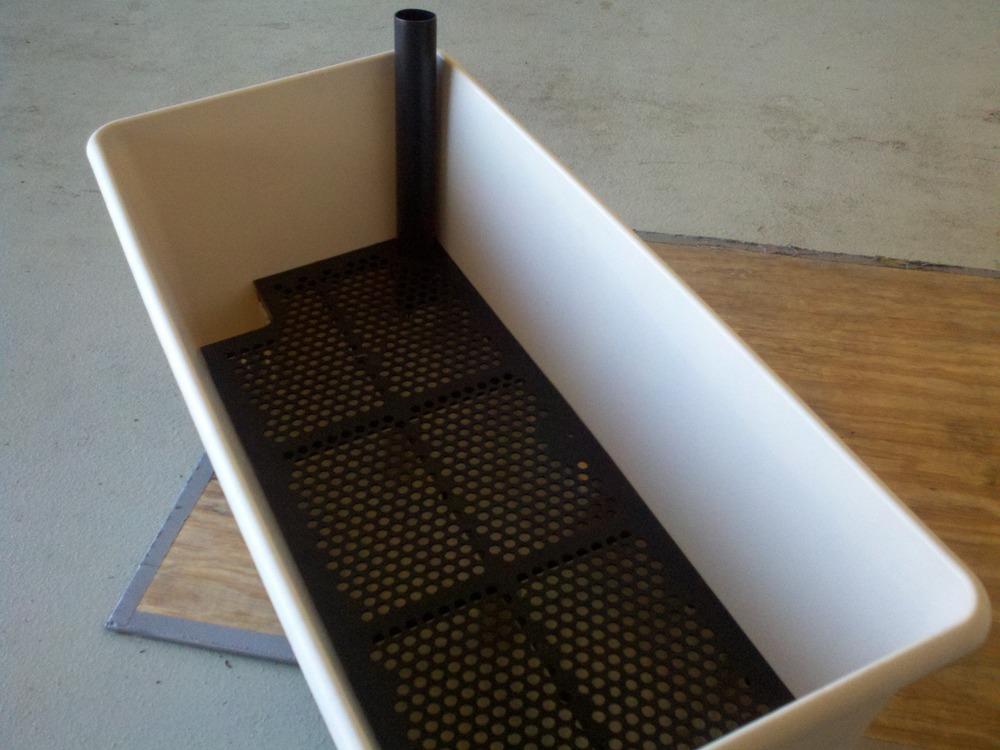
Step 2, Assemble. The reservoir screen lies over a variety of support posts in the bottom of the box. There are three holes. Two are large rectangular holes that allow potting mix to be packed and submerged in the water. That packed soil is a wick that pulls water up by capillary action and supplies the plants with water and dissolved nutrients. The smaller round hole is for the water fill tube. It provides a way to get water to the reservoir, to be used as the plant needs it. You can't see it in the photo below, but there is a hole in the box itself, that keeps the reservoir from overflowing and allows an air gap between the water surface and most of the soil. You can see the overflow hole in the parts photo, above.
Step 3, Soil wicks. Pack potting mix in each of the square corners. The bottom of the box is molded to make a basket to hold the packed soil. Be sure the soil is packed tightly. If it isn't, the water won't wick correctly into the rest of the box. It's hard to see, but the soil is packed into the wicking basket here.
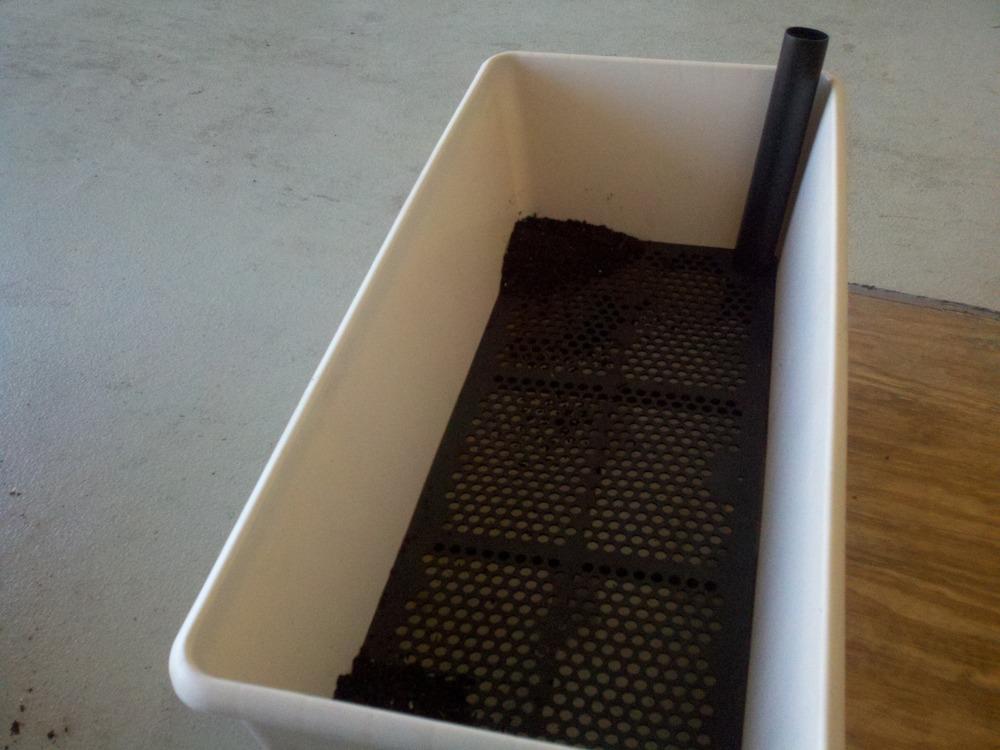
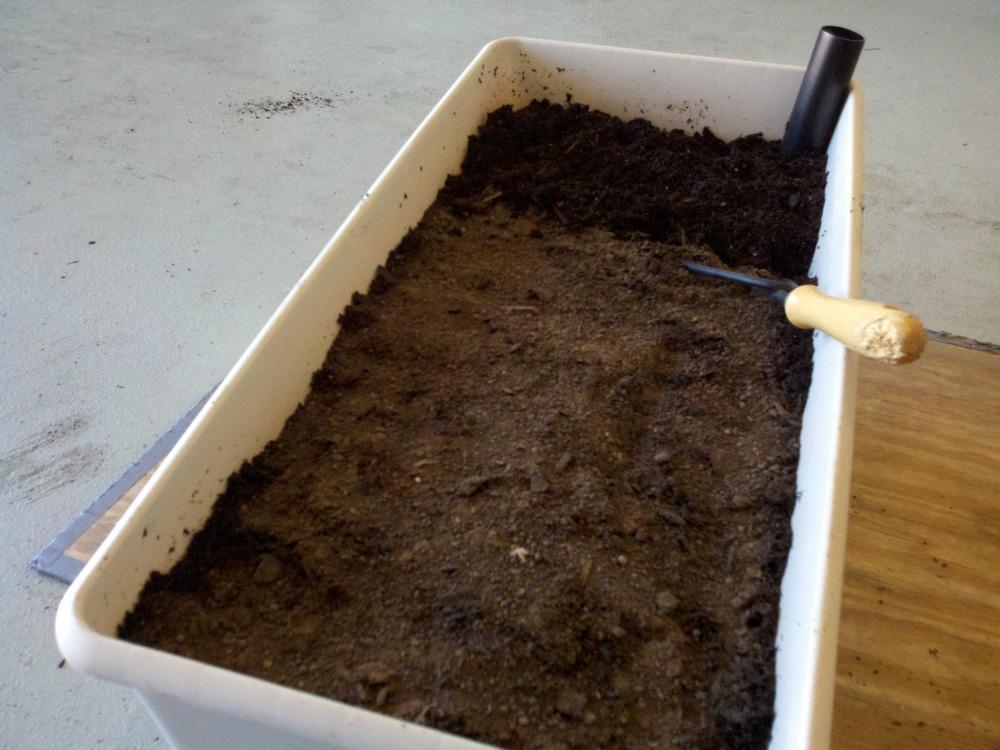
Step 4, Bottom layer. Spread an even layer of potting mix over the reservoir screen about two inches deep. Pat the soil into place to make a firm layer, but not a solid one. This will provide the base for the remainder of the container and ensure that the soil won't filter down into the water reservoir.
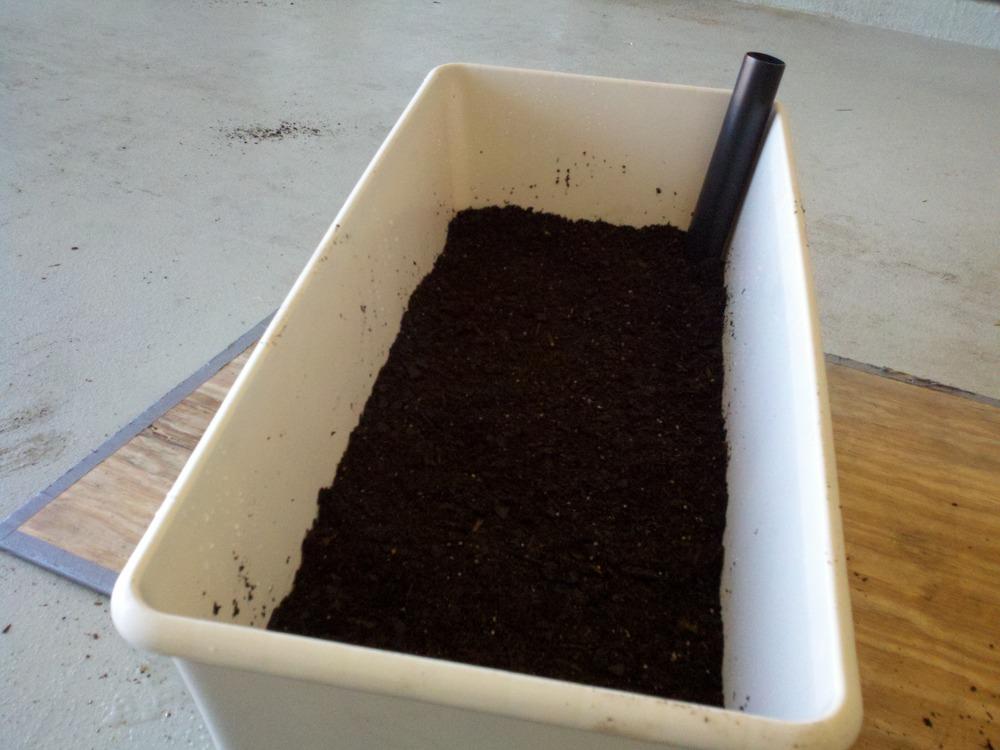
Step 5, Soil & Dolomite Lime. Add additional potting mix to fill the Earthbox to within 2-3 inches of the top. Level the soil, but don't compress it. Spread one pound (a generous cup) of dolomite lime evenly over the surface. Mix the soil and lime to a depth of 3-4 inches. When you have completed these steps, lightly compress the soil.
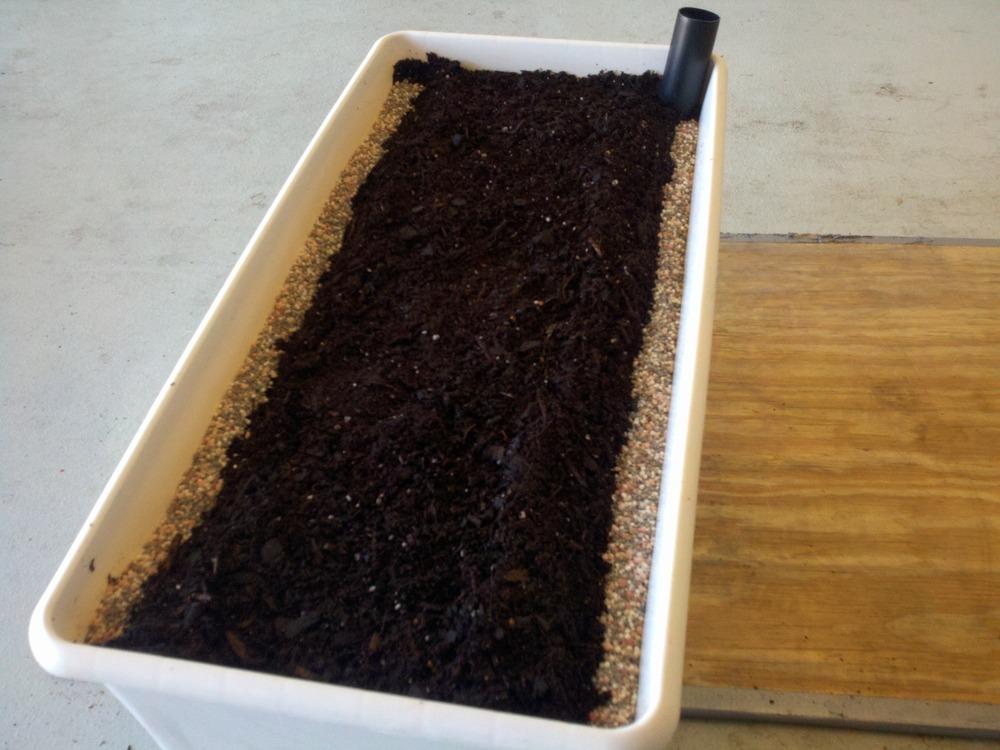
Step 6, Fertilize. This step will vary, depending on what you are planting in your Earthbox. The setup instructions show fertilizer placement and seedling locations for a variety of vegetables and plants. I wanted to plant my tomatoes in the middle of the box, rather than along the edge as Earthbox instructions show, so I modified the fertilizer placement. I put two thin strips of fertilizer at each side of the box, in a 2-inch deep trench. I used, as the instructions specify, two cups of chemical fertilizer. Cover the fertilizer with the soil pushed up to make the trench. However you plant, space the fertilizer so it isn't too close to the plants' roots and where it won't "burn" the plant with too much fertilizer.
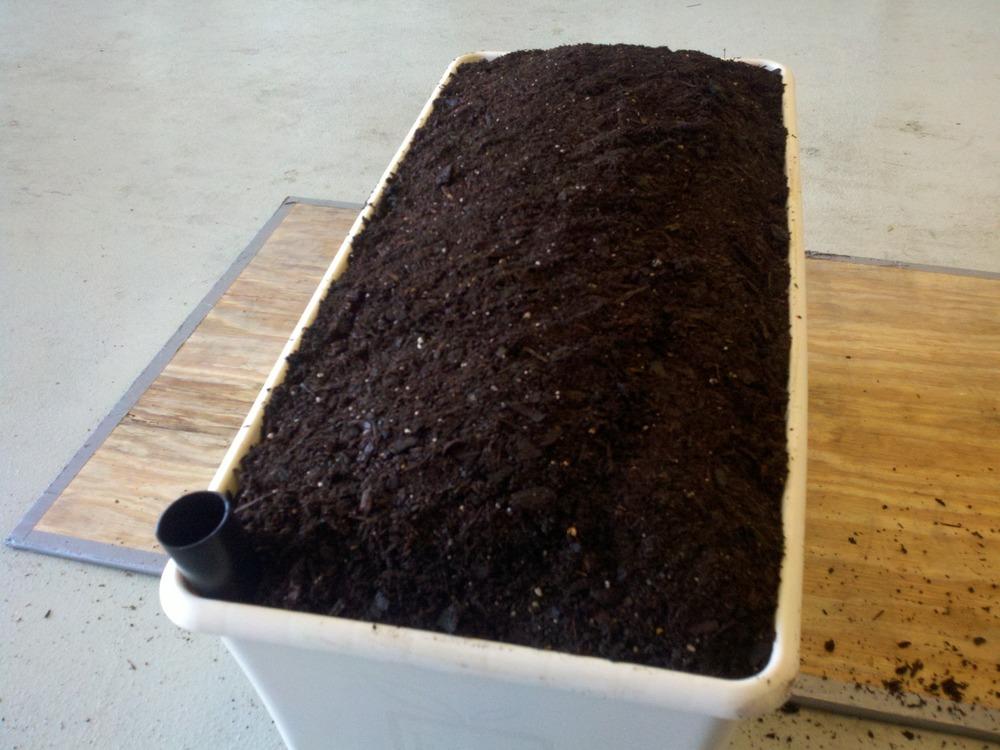
Step 7, Finish the soil. Mound soil at least two inches taller than the edges of the container. Pack lightly as you add to keep the mix from falling out. If you use a two cubic foot bag of mix, you should have just enough to complete a nice loaf-shaped mound.
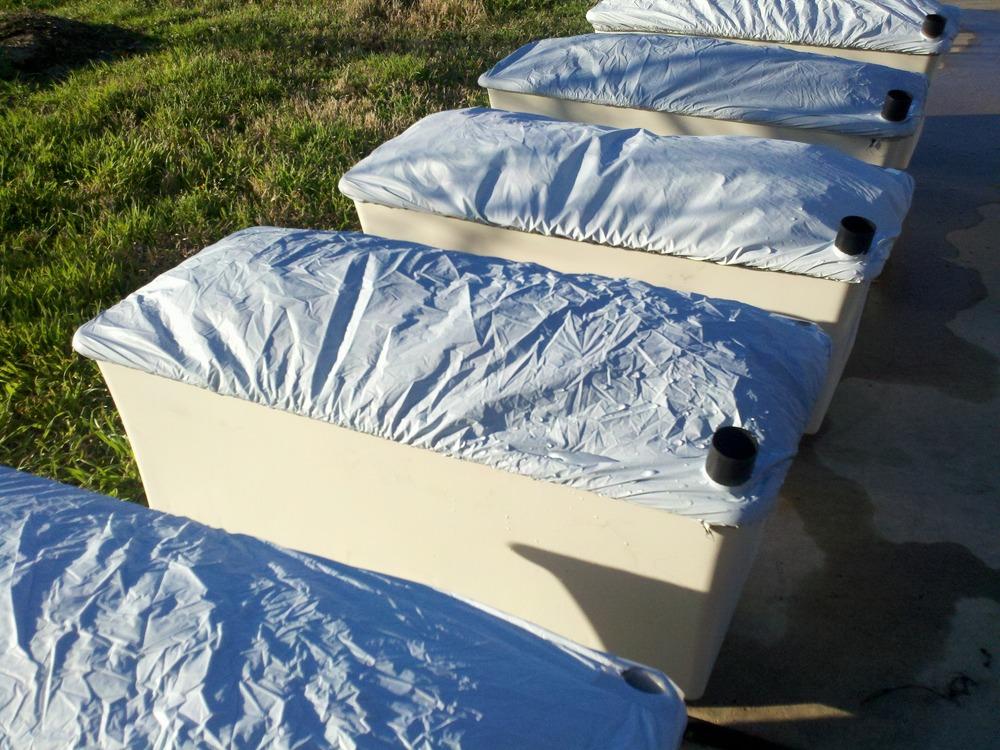
Step 8, Cover and plant. Pull the plastic mulching cover over the fill tube using the pre-cut hole. If you live in a cooler climate, use the black side of the cover out, to help warm the soil. In warmer areas, such as here in central Texas, use the white/grey side of the cover to help keep the soil a little cooler. The elastic around all of the edges of the cover will pull over the upper lip of the box and secure snugly. All that's left is to use a sharp knife to cut slits in the cover at the desired planting locations, dig a small hole to fit your seedling, plant, and water the seedling lightly. Fill the reservoir until water flows from the overflow hole. Add more water every two or three days at first, then every day as your plants grow and need more water.
For another type of self-watering container, see the Forum thread below. Learn how to use a few inexpensive parts and a little time to make your own self-watering container, an "eBbucket."
The thread "Make an eBucket!" in Vegetables and Fruit forum
If you want to find out more about the Earthbox, available accessories, or where to buy them, visit their website at:
http://www.earthbox.com
Whether you buy your self-watering container or build it, it is a great way to grow plants or vegetables when you might not be able to have a full-sized garden or grow plants in the ground. The water reservoir helps to ensure that your plants get consistent, even watering, and the potting mix and fertilizer ensure good growth. Finally, by growing in a covered container, you guarantee that you never have to pull weeds!
David Reaves
Austin, TX
| Thread Title | Last Reply | Replies |
|---|---|---|
| I'm an Earthbox addict by dyzzypyxxy | Apr 19, 2014 5:56 PM | 1 |
| Great Innovation for Gardening! by chalyse | Apr 19, 2014 2:37 AM | 3 |


