
Air-layering a plant, though sometimes tedious and often slow to show success, is a viable method for obtaining additional plants. It is thought that air-layering was begun by the Chinese well over 1000 years ago. It was a technique used in growing bonsai plants. Typically, air-layering would be used on woody plants, but it is sometimes used on herbaceous plants as well. For this discussion, let's narrow our focus to woody plants. This could include houseplants, such as Ficus (benjaminia, alii, and lyrata) and many outdoor plants, such as magnolia, camellia, azalea, and fruit and nut-bearing plants.
To understand why we perform this method of propagation, you need to understand some of the basics of the make-up of woody plants' branches/stems. Woody plants have a tough covering, called the bark, and then beneath that is the cambium layer, then the phloem layer, and finally the xylem. The bark protects the plant from damage. The cambium layer is an active, cell-dividing layer that helps heals wounds. The phloem layer carries mineral nutrients, carbohydrates, and water from the leaves down to the lower portions of the plant. The xylem carries mineral nutrients and water from the roots up to the leaves. The process of air-layering prevents this flow from the leaves to the roots but allows for the flow from the roots to the leaves. This is important to understand.
You will need a sharp, sterile knife, rooting hormone (powder, liquid or gel), moist, long-fibered sphagnum moss, cellophane wrap, and plastic-covered wire ties.
Since rooting cuttings is very difficult, I air-layer my Ficus lyrata (Fiddle Leaf Ficus), and this is the woody plant that will be used in this discussion. The first thing you want to do is find a branch that has matured. Young branches will still be green and very flexible, but mature ones will have a dark, more bark-like appearance, and will be somewhat stiff. Pick a place on the branch that will be near the trunk (stem). You want several leaves to be present, so leave as many as possible above this location. If there are any leaves in the area that you want to air-layer, remove them. Take a sharp, sterile knife and make a circumferential cut through the bark, cambium, and phloem layers. You don't want to cut much into the xylem though. You can sort of tell when you reach the xylem because it will be more dense and the cut pretty much stops at that layer. Also, the xylem will generally be whitish, whereas the cambium/phloem will be more green. After making that first cut, make another similar circumferential cut approximately 1.5" to 2" from that first cut. Then strip off that bark/cambium/phloem between the two cuts. By removing this layer, you will have prevented the branch from moving nutrients down from the leaves. These nutrients will literally be stopped at the girdled cut and this will stimulate the cut surface to grow roots. By preserving the xylem, nutrients and water can still flow from the roots up to the leaves, and thus this girdled branch will maintain its leaves. Note: If the leaves of this branch die, you'll know you cut too deeply into the xylem. This branch will not root in that situation.
Apply rooting hormone onto this "nude" xylem tissue. Take a piece of cellophane wrap, approximately 4"-6" wide and 8"-10" long, and place a handful of moist sphagnum moss on one end of the wrap. Place the moss against that girdled area, wrapping it around the branch so that the moss completely covers the girdled area. Wrap the cellophane around and around the moss/branch so that you end up with several layers of wrapping. Secure a tie around the lower end of that cellophane and then around the upper end. The idea is to have enough secured wrapping so that it will extend slightly beyond the girdled area and so that the sphagnum moss will remain moist as long as possible.
You'll have to inspect that wad of moss every week or two. IF the moss has begun to dry out, you'll need to undo that upper tie, tease the cellophane apart, and add water until the moss is wet again. Re-tie and then squeeze that wad of moss to rid it of excess water. The moss must remain moist throughout this air-layering process.
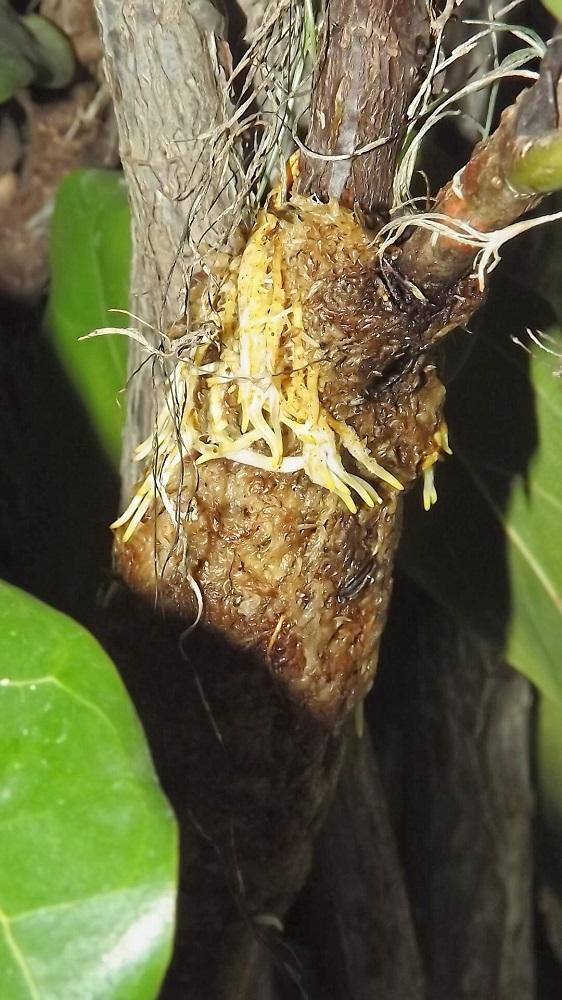
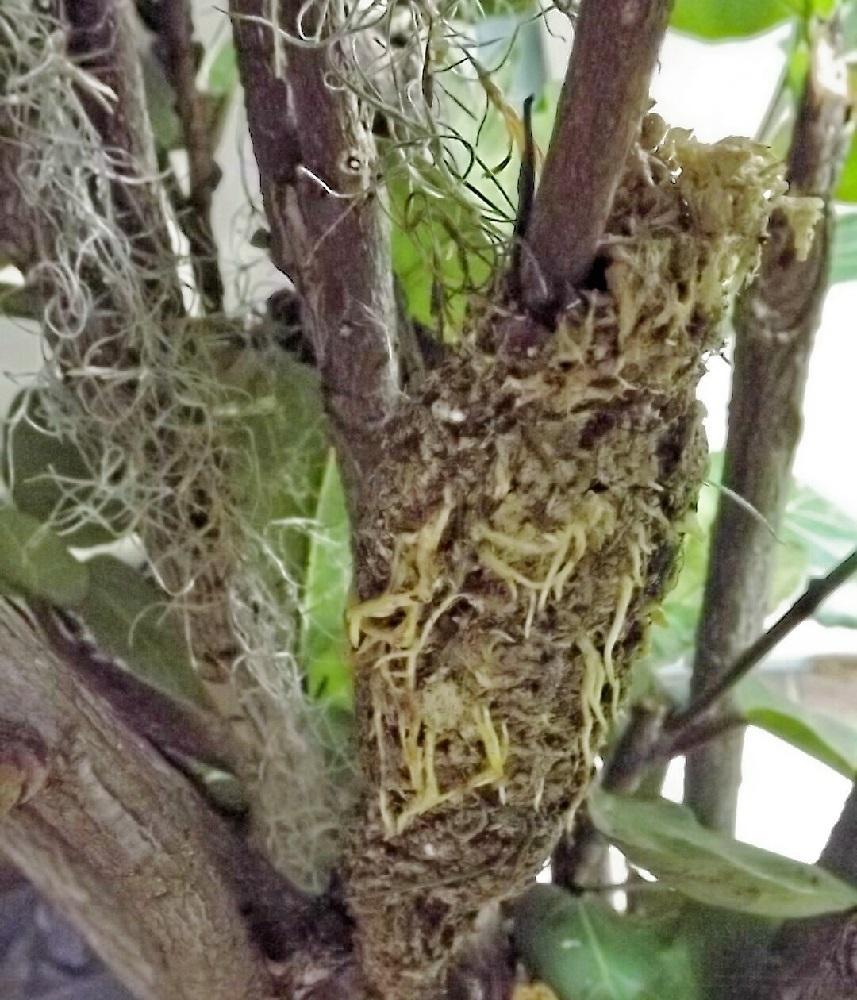
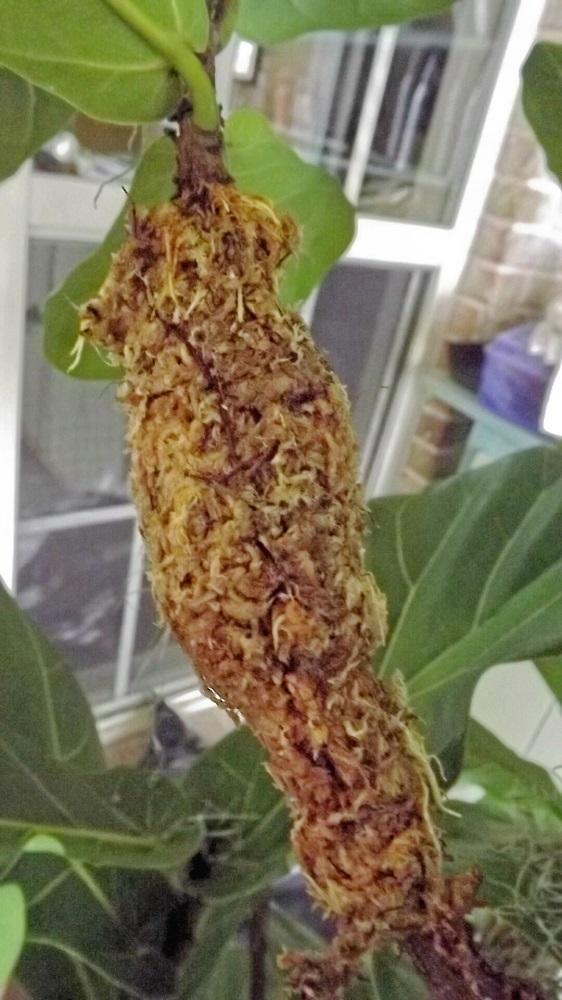
If the air-layering is successful, and this may take weeks or even months, you will eventually see roots growing through the moss and under that clear cellophane wrapping. Let plenty of roots form and when you feel that there are enough roots, you can take shears and cut that branch below the wad of rooted sphagnum moss. Remove the ties and cellophane. Then plant that branch in potting mix, deep enough to completely cover that wad of sphagnum so that the roots are all beneath the soil level.
You will want to keep that potting mix moist. To help this new plant recover, mist those leaves every day or two or place a plastic tent around the entire plant to keep the humidity up. Keep the plant in a warm, shaded area. After about 14 days, if you have used a tent, you'll need to start acclimating the plant to the "real" environment. Just cut a few holes in the tent material, and every few days cut a few more. After 10-14 days remove the tent. If the weather is mild, you can put the plant outside, in a lightly shaded area. If the weather is cold, the plant can be placed in the house, in strong, indirect light.
Your new plant will be identical to the "mother" plant and will be grown exactly the same.
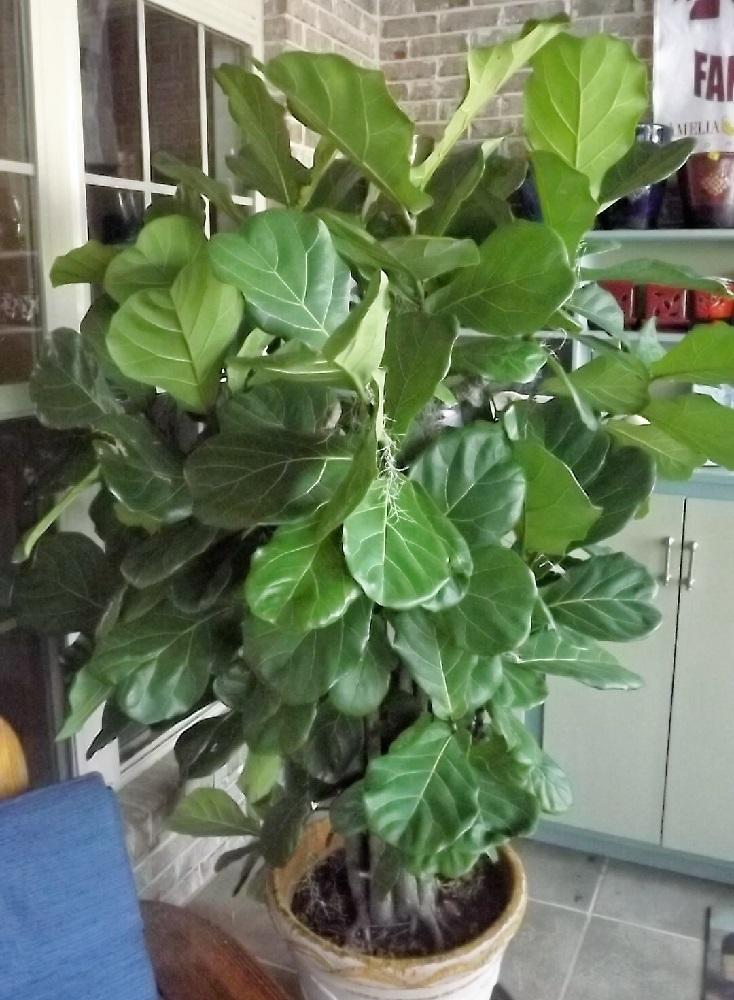 "Mother" Fiddle Leaf Ficus
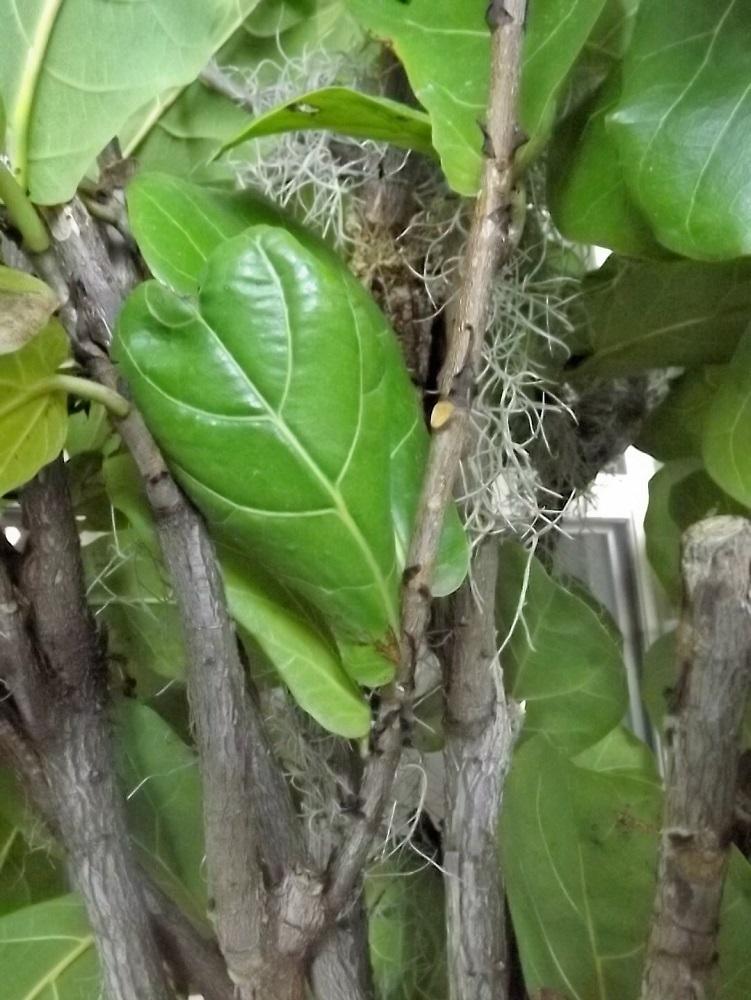 "Donner" branch with 3 leaves in air-layer area. Remove those leaves
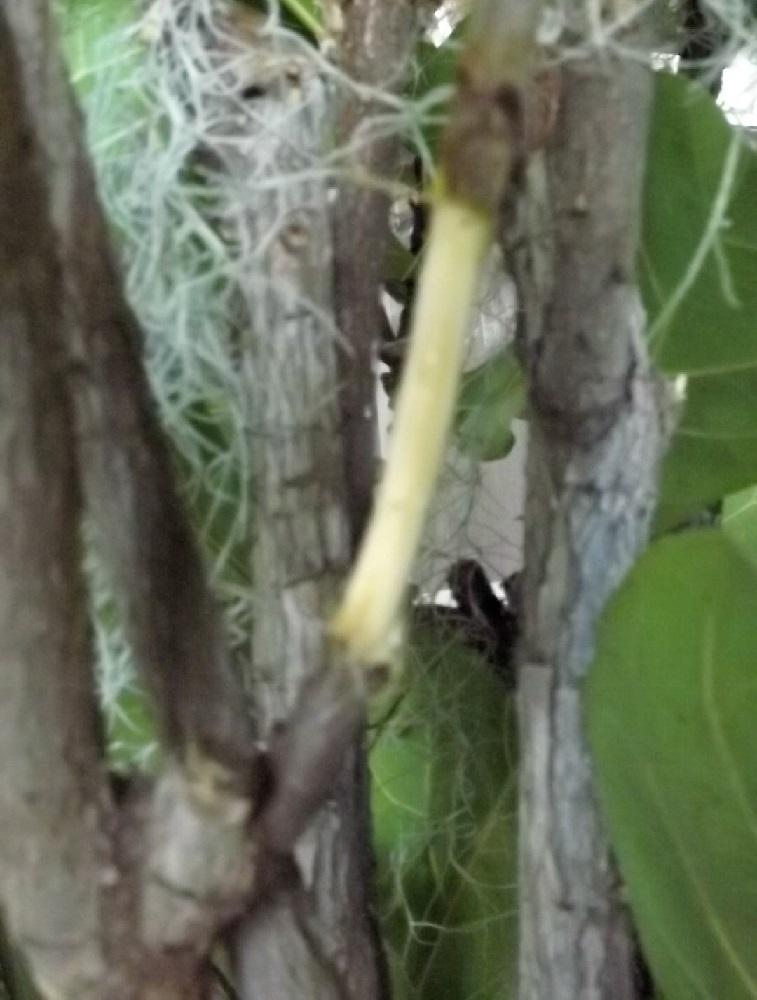 Girdled section. Apply your rooting hormone there
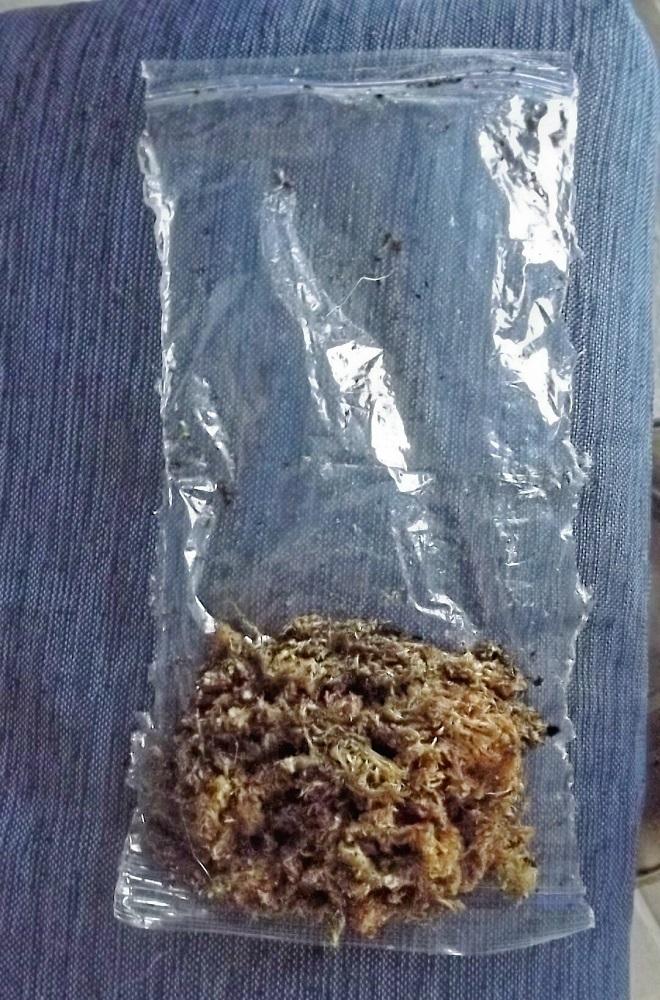 Sphagnum moss and cellophane ready to wrap girdled area
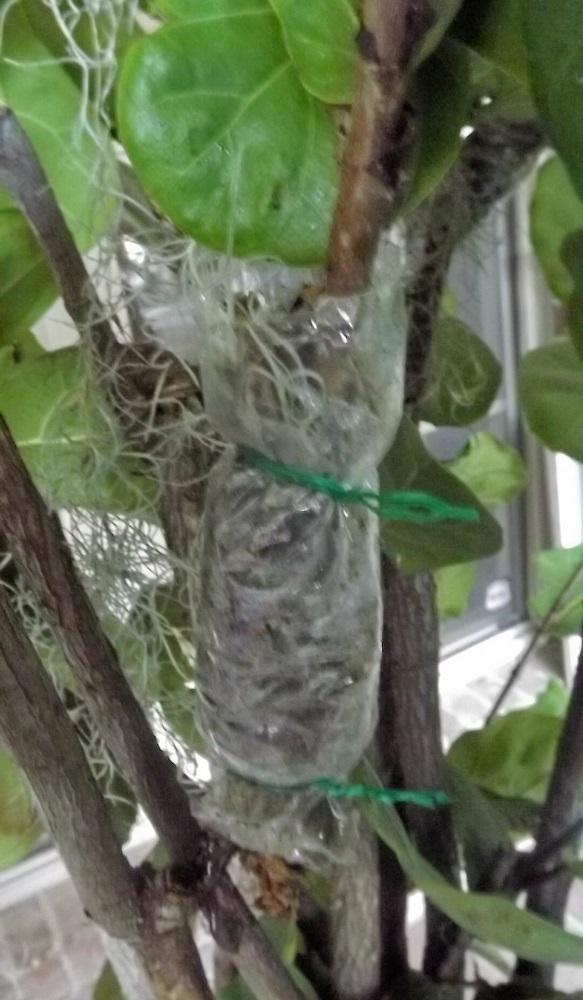 Wrapped branch and tied on both ends
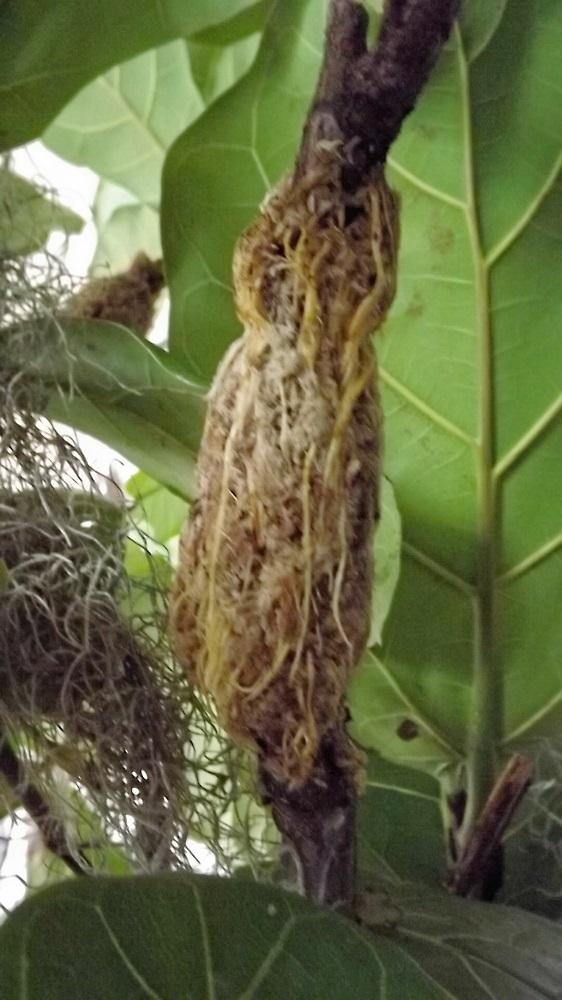
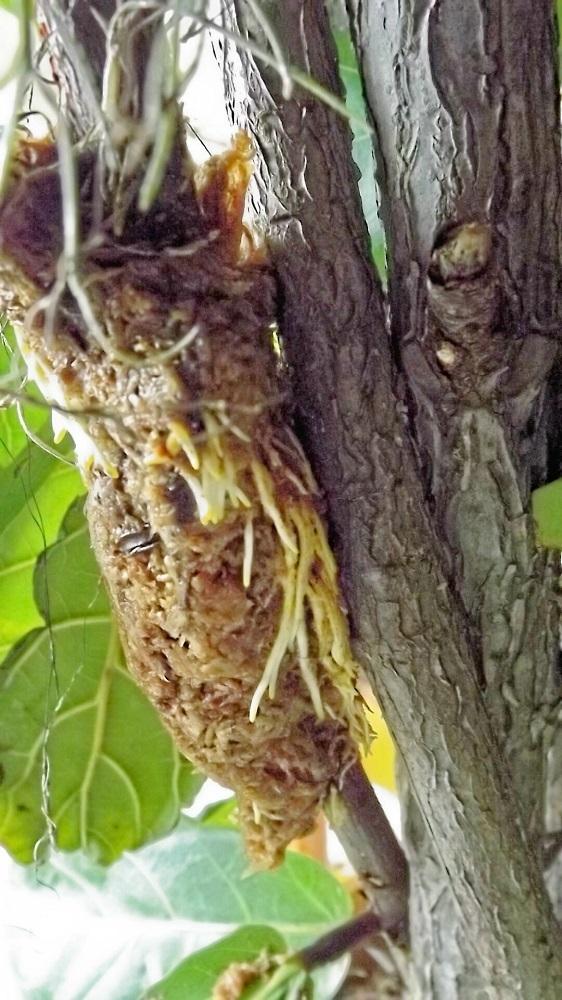
Five weeks later, six out of the eight branches have rooted. A single branch is not going to root. I knew when it started losing its leaves that I had cut too deeply into the branch, disrupting the flow of water and nutrients from the roots to the leaves. When I see those established leaves start to wilt and then brown, I know that branch is a goner! One root location is still wrapped since I see no well-established roots through the Cellophane yet. The leaves are fine so I know it will root. It was the most shaded branch.
Some people believe that rooting does best when that wrapped sphagnum is in total dark. At least in my experience when rooting fiddle leaf ficus branches, the more light there is the better and faster that branch tends to root. Several of pictures shows exceptional rooting and those branches were facing southeast, getting maximum indirect light. The further the branches were towards the back of the porch, getting little indirect light, the less rooting there is.
I will leave the Cellophane off these six wads of sphagnum for a few days and then section those branches just below the wads of sphagnum and pot them up in 1 gal. pots. In 2-4 weeks, those plants will be well-rooted in their pots.


| Thread Title | Last Reply | Replies |
|---|---|---|
| Ficus Lyrata Browning by Kmkh | Dec 16, 2017 6:38 AM | 1 |
| grafted plants by plantcollector | Jun 9, 2015 8:35 PM | 4 |
| update by drdawg | Mar 19, 2015 6:08 PM | 0 |
| This was very helpful, Thanks. by tabbycat | Mar 7, 2015 4:11 PM | 1 |
| Untitled by Poohdaddy | Mar 6, 2015 9:11 PM | 1 |


