Image
Jan 17, 2015 11:37 PM CST
Thread OP
Name: Becky
Sebastian, Florida (Zone 10a)
Celebrating Gardening: 2015 Daylilies Hummingbirder Butterflies Seed Starter Container Gardener
Charter ATP Member I was one of the first 300 contributors to the plant database! Garden Ideas: Master Level Lover of wildlife (Black bear badge) Birds Ponds
How do you separate the worms and eggs from the castings?
What lies behind us and what lies before us are tiny matters, compared to what lies within us.
Garden Rooms and Becky's Budget Garden
Avatar for smdrinkard
Jan 27, 2015 10:42 AM CST

Becky,
This is how I do it. Dump out bin on tarp. Wait about 5 minutes to let the worms head to the bottom to escape the light. Then harvest the castings. As you do this, you will find some contrite worms and eggs. All worms and eggs are put in a container.
Keep rebuilding the pile and worms will duck and cover. Eventually you'll have every thing separated and worms and eggs ready for the new bin.
Hope this helps.
S.
Image
Jan 27, 2015 6:45 PM CST
Thread OP
Name: Becky
Sebastian, Florida (Zone 10a)
Celebrating Gardening: 2015 Daylilies Hummingbirder Butterflies Seed Starter Container Gardener
Charter ATP Member I was one of the first 300 contributors to the plant database! Garden Ideas: Master Level Lover of wildlife (Black bear badge) Birds Ponds
S - Thank you! Welcome to ATP! I appreciate your suggestion and consider doing just that, but ....

I found a YouTube video about making two different screens to sift out the worms and their eggs:

https://www.youtube.com/watch?...

I like the screens because it will allow me to separate the worms and eggs rather quickly. Thumbs up
What lies behind us and what lies before us are tiny matters, compared to what lies within us.
Garden Rooms and Becky's Budget Garden
Avatar for booneatl
Jan 28, 2015 7:49 AM CST
Name: David
Atlanta, Georgia (Zone 7b)
Composter Region: Georgia Seed Starter Garden Ideas: Level 1
Becky,

I have been raising worms for just over a year now and have tried many different methods for separating the castings and eggs. I think that I have watched every youtube video on worm castings and there are so many different ways to go about this.

One thing to consider with this screen method is the size of your worms. It appeared in the video that he was using larger worms, which would be easier with a screen like he used. I tried this method and it was difficult for me. My worms are so small that they either went through the screen or got stuck in the holes and had to be painstakingly removed one by one. My screen may not have been small enough so I can't say for sure that I did it properly but I gave up on that method. Also, the castings were very moist and did not seem to flow easily through the holes. The eggs are so small that I think it would be difficult for a screen to catch them. Some people dry their worm castings first; but this seems to kill all of those beneficial microorganisms that we are trying to have.

I have seen several videos where food is placed on one side of the bin and the worms are removed as they cluster around it and placed in another bin, until they are all removed. At some point the remaining eggs will hatch and you will have new babies in the bin but this seems to be more thorough if you have the time. This method is not quick !! I do like this method the best so far and this is what I am doing.

Lots of people dump the entire bin or make small piles and wait for the worms to crawl down away from the light but this is really slow. I dumped my entire bin one day on a tarp and thought that I would never be done. I finally scooped them all back up as I didn't have hours and hours to give to the project. My 6 and 8 year old don't allow me the time needed for this method.

One thing that I do if I need some castings is to scrape them from the sides of the bin and place them in a small plastic shoe box container. I use a putty knife to sift through them and pluck out any worms and toss them back in the worm bin.
I can easily come up with a pound or two to use. The worms are not usually around the sides of my container so this goes pretty quick.

Since I have been mixing worm castings in my seed starting mix I have had great success with germination. I'm always experimenting and it's fun to see positive results. My worm population has more than tripled in a year and I am working on another worm bin as we speak. My wife doesn't appreciate them like I do !!

Hope my thoughts have helped.
Image
Jan 28, 2015 9:29 PM CST
Thread OP
Name: Becky
Sebastian, Florida (Zone 10a)
Celebrating Gardening: 2015 Daylilies Hummingbirder Butterflies Seed Starter Container Gardener
Charter ATP Member I was one of the first 300 contributors to the plant database! Garden Ideas: Master Level Lover of wildlife (Black bear badge) Birds Ponds
David - Thanks for listing your method and experience. The screens are suggested to be 1/4" and 1/8" mesh, so I don't know if that would be about right for red wigglers or not. These are the smaller worms. You are right that in the video the castings seemed to be drier so that they would sift right through the screens without sticking. So .... I guess I shall find out.

Many have said they do what you do and just place food in a corner of the bin and wait until most of the worm move over there and harvest the castings from other areas of the bins. So far, my worms seem to be doing okay. A few have escaped (only to dry up and die on the concrete patio or garage floor. But that has only been a few worms. Most seem like they are settling in their new homes.

I was told that it takes a good 6 months when first starting out to get the worm colony really going strong. Then after that, there are enough that they really increase and compost at a good rate, so that you may have to add more worm bins to keep up with the growing colony. I have almost an entire yard of gardens to feed, so that works for me! LOL!
What lies behind us and what lies before us are tiny matters, compared to what lies within us.
Garden Rooms and Becky's Budget Garden
Avatar for booneatl
Jan 29, 2015 7:13 AM CST
Name: David
Atlanta, Georgia (Zone 7b)
Composter Region: Georgia Seed Starter Garden Ideas: Level 1
Becky - Please let us know how it goes. I think that I used 1/4 inch screen when I tried that method. I also tried an old plastic pasta type strainer with much smaller holes but everything stuck to it and the holes were quickly plugged up. Maybe there is a happy medium between drying them and not killing all of the living organisms in there. I've read articles from some of the experts in the field and they always say that the castings are living and they should be kept moist and aerated ; which makes sense to me.

I wanted to mention that I have been keeping my bin in our garage. It is not heated and has a regular non insulated door but the worms have been fine this winter. We had a few mornings in the teens but all was well. I keep several inches of shredded dry paper on top and that seems to help insulate and wick away any extra moisture. Also, I always keep the lid just slightly off the bin. Every time the lid gets snapped on tight (my 6 year old loves to help), I get worms trying to escape. I think it just gets too moist inside there. I do have air holes around the bin and drainage at the bottom; although, I don't ever have the leachate drain from the bottom.

Best of luck !!
Image
Feb 5, 2015 10:09 PM CST
Thread OP
Name: Becky
Sebastian, Florida (Zone 10a)
Celebrating Gardening: 2015 Daylilies Hummingbirder Butterflies Seed Starter Container Gardener
Charter ATP Member I was one of the first 300 contributors to the plant database! Garden Ideas: Master Level Lover of wildlife (Black bear badge) Birds Ponds
David - Thanks for your encouraging posts! This is all new to me! I am doing pretty much the same thing as you are doing. In my garage, but I don't have dry stuff on top of the soil. I added burlap cloth over it and misted the cloth to make it damp. I use that to keep the fruit flies out. I also keep the lids on both bins. I will say that my son turned the light off in the garage one night. When I checked on them the next day, one bin had the worms climbing up the inside of the bin, but the other bin the worms were NOT trying to escape. The difference in bins was I believe the moisture level. The escapee bin was much damper. I also think I have been underfeeding the worms. I added more liquid food and the worms were all over it within a matter of a few hours. They seemed very hungry. I was too worried about over-feeding, so I have not been feeding them but a couple times a week. Apparently I have enough worms to be feeding them probably every other day.

I have 2 more questions I hope someone here can answer:

1) How often do you add lime to the worm bins?

2) What kind of grit do you use for the worms. I know worms have gizzards and need the grit to help break down the food. (Though I do use my juicer to pulverize the scrap food before feeding it to the worms. They are all over this liquid food when I add it to the worm bins.)
What lies behind us and what lies before us are tiny matters, compared to what lies within us.
Garden Rooms and Becky's Budget Garden
Last edited by beckygardener Feb 5, 2015 10:15 PM Icon for preview
Avatar for booneatl
Feb 6, 2015 7:34 AM CST
Name: David
Atlanta, Georgia (Zone 7b)
Composter Region: Georgia Seed Starter Garden Ideas: Level 1
Becky, I'll chime in one last time.

1) I've never added lime to my bins. It seems that if you stay away from citrus (of couse you're in Florida ) the worms can control the ph without any help. I have read some citrus is ok but not large amounts.

2) I use regular soil from around my home for the grit. I only added about a cup or so when I established my bins.

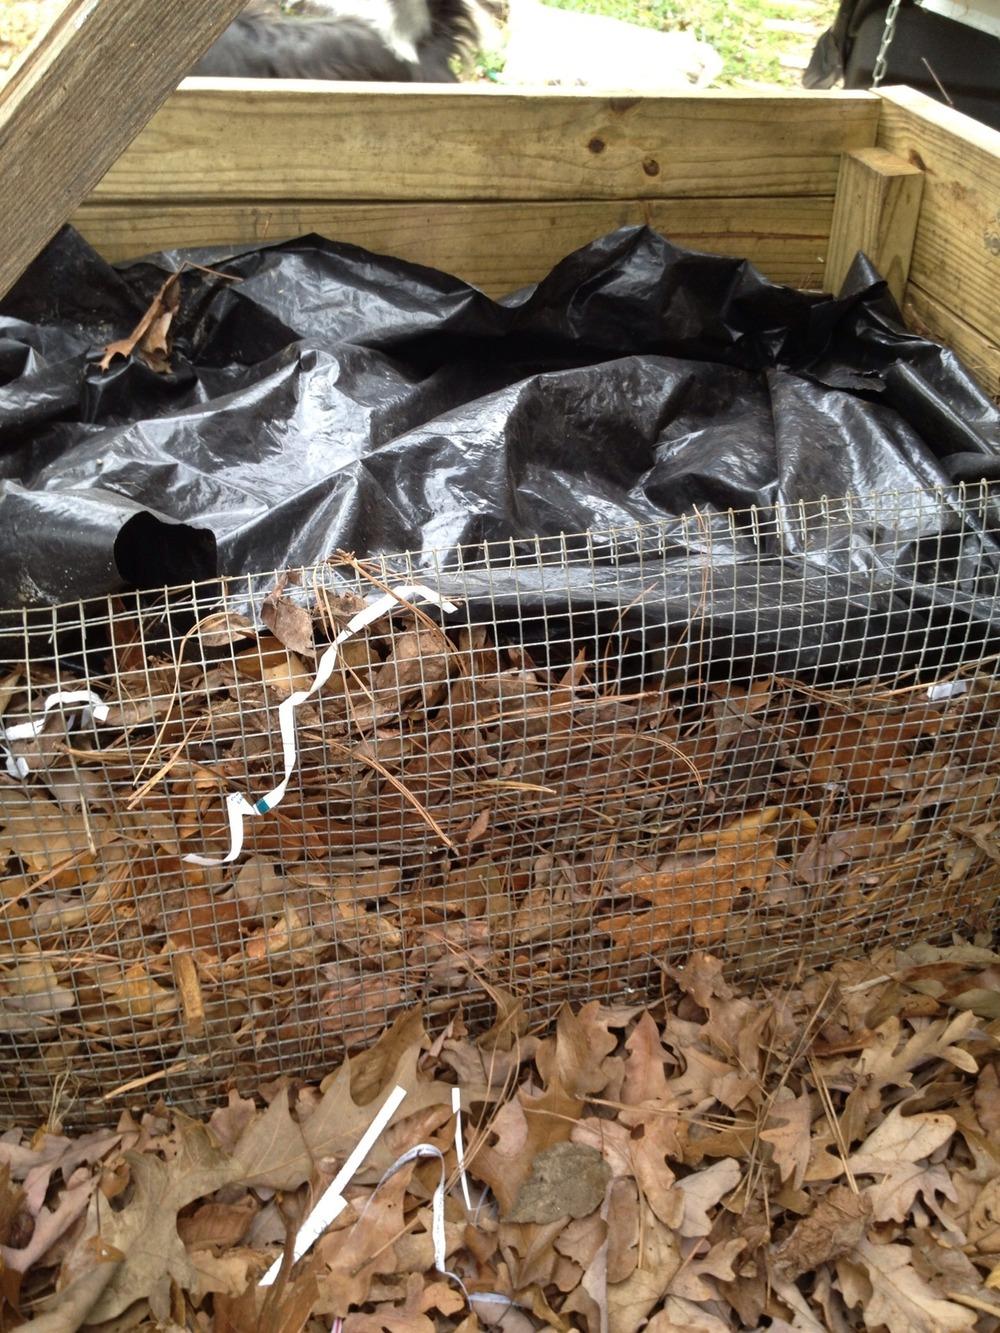
Also, I'm too lazy to pulverize my food that I add to the bin. I just throw whole pieces in and it turns into a slimy mess after a few days. They love melon and my kids eat a lot of watermelon. I just cut the rinds up in smaller pieces and by the end of the week it has broken down and puts off a lot of liquid. This is why I keep dry shredded paper on top of the food. It does a great job of controlling the fruit flies and within a month the dry paper has become moist. The paper seems to be pulled down into the worms as if they are controlling the moisture level themselves.

Here is a great source of information : http://www.bae.ncsu.edu/topic/...

At the bottom of the page under resources their is a document titled " worms can recycle your garbage" which opens a pdf pamplet with a lot of information. I trust this information as this lady (Rhonda Sherman) travels all over the world teaching about vermicomposting and works for a university extension service.

Good luck !
Last edited by booneatl Feb 6, 2015 8:29 AM Icon for preview
Image
Feb 7, 2015 12:16 AM CST
Thread OP
Name: Becky
Sebastian, Florida (Zone 10a)
Celebrating Gardening: 2015 Daylilies Hummingbirder Butterflies Seed Starter Container Gardener
Charter ATP Member I was one of the first 300 contributors to the plant database! Garden Ideas: Master Level Lover of wildlife (Black bear badge) Birds Ponds
David - Chime in ANYTIME!!! I appreciate all the very helpful information that you have shared with me. Great website link you posted and I followed the links on that website for even more information. Awesome! Thank you!!!

I am new to worm farming, so it's going to take me some time to learn the ropes. Right now my worms seem to be very happy and are quickly breaking down anything I add to the bin. They really love banana peels and other fruits. (Though I balance their diet with greens too, like spinach and lettuce and carrots.) I actually love the juicer because it breaks down the food immediately for the worms to eat. I had read that the worms eat the bacteria (and perhaps fungus) that actually breaks down the food. The decomposing time is much quicker when it is blended or juiced and I have not noticed any smell whatsoever. I had read where someone bought a used blender to use for the food scraps, so that is why I am using the juicer. I just happen to have that option and thought I would try it. I also freeze the extra juiced food scraps for later feedings. Additionally, I sprinkle a little corn meal in the bins and the worms seem to really like that too. I think I probably need to add a little more sand or grit to the bins. My biggest challenge is figuring out how often I should do that.

Interesting about you not needing to add lime to your worm bins. Hmmmm .... maybe I don't need to do that either. I wonder how I could tell? I had read the issue with citrus, so I therefore don't use citrus scraps. (Or very little if I do.) That is also very interesting about the dry paper and the worms controlling the moisture level by pulling it down. That is something I had not thought about. Great ideas you've shared with me! Thanks so much!
What lies behind us and what lies before us are tiny matters, compared to what lies within us.
Garden Rooms and Becky's Budget Garden
Image
Feb 14, 2015 7:23 AM CST
Name: Laura
Georgia (Zone 7b)
Prepare your garden for the years a
Beekeeper Vegetable Grower Keeper of Poultry Permaculture Organic Gardener Canning and food preservation
Greenhouse Garden Art Winter Sowing Garden Ideas: Level 2
Here is what a lifetime gardening (40+ years) person has learned to do. I have had to figure out easier ways to do things in my old age.
I have a wooden bin that is separated by hardware cloth. When one side of the bin gets pretty full - I just start feeding the other side. The worms go through the wire mesh to the other side to get to the food. And I have worm free castings. Or almost, takes a few days, depending on how much food is left on the full side. Photo shows the mesh. More photos on my site
lifetimegardening.com


Thumb of 2015-02-14/Artistwantobe/cc149b
Check out my fledging blog about the journey to convert my garden to permaculture so I can keep gardening thr rest of my life.
www.steps2permaculture.com
Image
Feb 14, 2015 10:14 AM CST
Thread OP
Name: Becky
Sebastian, Florida (Zone 10a)
Celebrating Gardening: 2015 Daylilies Hummingbirder Butterflies Seed Starter Container Gardener
Charter ATP Member I was one of the first 300 contributors to the plant database! Garden Ideas: Master Level Lover of wildlife (Black bear badge) Birds Ponds
Laura - That's a great idea to split the compost pile in half with hardware cloth!

I don't have a compost bin anywhere on the ground. I am using the red wrigglers which probably wouldn't survive in my ground soil being mostly sandy. I do plan to move the plastic bins outside into a shady area this Spring and I am worried about them escaping. The worm bins are in my garage currently. I leave the lights on since some of the worms in one bin will try to escape if the lights are off. Which means that may happen should I move them outside and it gets dark unless I can keep a spotlight on the bins at night. Not sure yet what I will do about that....
What lies behind us and what lies before us are tiny matters, compared to what lies within us.
Garden Rooms and Becky's Budget Garden
Image
Feb 14, 2015 10:16 AM CST
Thread OP
Name: Becky
Sebastian, Florida (Zone 10a)
Celebrating Gardening: 2015 Daylilies Hummingbirder Butterflies Seed Starter Container Gardener
Charter ATP Member I was one of the first 300 contributors to the plant database! Garden Ideas: Master Level Lover of wildlife (Black bear badge) Birds Ponds
I just went to your website and see that your compost pile is indeed an above ground wooden worm bin! That is totally awesome! Thanks for sharing the info about it. I will be reading your website very carefully to learn more! Looks like a great set-up! Thumbs up Thumbs up Thumbs up
What lies behind us and what lies before us are tiny matters, compared to what lies within us.
Garden Rooms and Becky's Budget Garden
Avatar for booneatl
Feb 15, 2015 4:15 PM CST
Name: David
Atlanta, Georgia (Zone 7b)
Composter Region: Georgia Seed Starter Garden Ideas: Level 1
Laura,

I enjoyed reading on your website. I'm curious about your outdoor worm bin. I am also in Georgia, south of Atlanta in Coweta county. I am curious how your worms are doing on these cold nights that we are having ? Could you tell me what part of the state you are in and if you are doing anything extra to protect the worms outdoors. I know that if they have a deep layer of mulch on top they can survive the cold but would love to hear from you. I would love to get my worms outdoors permanently and I would probably build a structure as you have.

Thank you and keep up the great work !!
Image
Mar 29, 2015 9:40 AM CST
Name: wayne
memphis (Zone 7b)
Keeper of Poultry Region: Tennessee
Artistwantobe said:Here is what a lifetime gardening (40+ years) person has learned to do. I have had to figure out easier ways to do things in my old age.
I have a wooden bin that is separated by hardware cloth. When one side of the bin gets pretty full - I just start feeding the other side. The worms go through the wire mesh to the other side to get to the food. And I have worm free castings. Or almost, takes a few days, depending on how much food is left on the full side. Photo shows the mesh. More photos on my site
lifetimegardening.com


that's a great idea. i love your website by the way!
Image
Jan 2, 2017 3:11 PM CST
North Central Massachusetts (N (Zone 5b)
Life & gardens: make them beautiful
Bee Lover Butterflies Garden Photography Cat Lover Million Pollinator Garden Challenge Region: Massachusetts
Region: Ukraine
Hi wormers,

I was looking for a string on worm bins I had previously taken part in but couldn't find it--found this instead! Hope it's okay to ask a related question....

I'm wondering if you can overfeed your worms? I put some food and paper in my bin yesterday and have some kitchen scraps for today. I hate to just throw them away, but don't want to overfeed my wormies! Is there such a thing as too much?

Thanks in advance.
You don't kick walls down, you pull the nails out and let them fall.
AKA Joey.
Avatar for Shadegardener
Jan 2, 2017 4:34 PM CST
Name: Cindy
Hobart, IN zone 5
aka CindyMzone5
Celebrating Gardening: 2015 Plant Identifier
Joanna - when I have a lot of food for the worms, I've put it in the freezer to hold. Of course, take it out to thaw to room temp before giving it to the worms.
Only when the last tree has died and the last river has been poisoned and the last fish has been caught will we realize that we can't eat money. Cree proverb
Image
Jan 2, 2017 5:15 PM CST
North Central Massachusetts (N (Zone 5b)
Life & gardens: make them beautiful
Bee Lover Butterflies Garden Photography Cat Lover Million Pollinator Garden Challenge Region: Massachusetts
Region: Ukraine
Shadegardener said:Joanna - when I have a lot of food for the worms, I've put it in the freezer to hold. Of course, take it out to thaw to room temp before giving it to the worms.


Thanks Cindy. I don't want to go that route though--I end up with a backup of frozen and non frozen stuff.
You don't kick walls down, you pull the nails out and let them fall.
AKA Joey.
Image
Jan 2, 2017 6:39 PM CST
Thread OP
Name: Becky
Sebastian, Florida (Zone 10a)
Celebrating Gardening: 2015 Daylilies Hummingbirder Butterflies Seed Starter Container Gardener
Charter ATP Member I was one of the first 300 contributors to the plant database! Garden Ideas: Master Level Lover of wildlife (Black bear badge) Birds Ponds
Too much food can cause your worms to leave or possibility even sicken and kill them. Take it from someone who learned the hard way.
What lies behind us and what lies before us are tiny matters, compared to what lies within us.
Garden Rooms and Becky's Budget Garden
Image
Jan 2, 2017 9:00 PM CST
North Central Massachusetts (N (Zone 5b)
Life & gardens: make them beautiful
Bee Lover Butterflies Garden Photography Cat Lover Million Pollinator Garden Challenge Region: Massachusetts
Region: Ukraine
beckygardener said:Too much food can cause your worms to leave or possibility even sicken and kill them. Take it from someone who learned the hard way.


OH oh, thanks! I'll be careful.
You don't kick walls down, you pull the nails out and let them fall.
AKA Joey.
Image
Mar 15, 2017 2:06 PM CST
North Central Massachusetts (N (Zone 5b)
Life & gardens: make them beautiful
Bee Lover Butterflies Garden Photography Cat Lover Million Pollinator Garden Challenge Region: Massachusetts
Region: Ukraine
A new worm bin question. It seems that everything has settled in. I've gotten rid of almost if not all of the gnats, and the worms seem larger and more numerous. They even show themselves in the food area. I discovered that they will go deep when a storm is on the way, and stay put when all is well and the weather is calm.

A newer phenomenon is a strange little bug that I thought was the gnats returning at first, but now I can see that it's not. I've been searching and can't find any mention of this thing. It's skinny and black, and the body is very flexible so when it crawls, the body can move in a sort of snake-like fashion. Forgive me, but to my naked eye, it looks like two gnats butt-to-butt, as if they're mating. But on closer inspection, it's one creature and very small. No wings so doesn't fly. They are also extremely tender and squish at the slightest touch. I looked up baby earwigs and it's not that, at least, I don't think it is. They do tend to get out of the bin.

Any ideas? I know we can't keep our worm bins completely free of little creatures, but I'd like to keep their populations down and certainly, keep them confined to the bin if possible. I'm also concerned as to whether they might be harmful to the wormies.

Thanks for your help!
You don't kick walls down, you pull the nails out and let them fall.
AKA Joey.

You must first create a username and login before you can reply to this thread.
Member Login:

( No account? Join now! )

Today's site banner is by Leftwood and is called "Gentiana septemfida"

This site is protected by reCAPTCHA and the Google Privacy Policy and Terms of Service apply.