
Specialized Products Company
800-866-5353
Item #44800NAT: Cable Lacing Twine, 9-Ply, Waxed Poly / 335 yd Spool
$7.00/spool
https://www.specialized.net/44...
<strong>General Desiccant Information</strong> <strong></strong>
This article is aimed at people who want to double or quadruple the number of years their seeds will stay viable. Most seeds will last 2-5 years or longer with no more care than keeping them consistently below 50% RH. However, most seeds' viable lifetime doubles with every 10% decrease in relative humidity from 50% RH down to 20-30% RH. Ideal storage conditions are consistently dry (15% to 30% RH), cool and dark.)
(A few types of seeds can only be sowed fresh, and/or must be stored moist. Don't try to store those dry!)
* * * * This blog entry is still being written. It needs photos, and then I'll offer it as an article * * * *
Any sealed container can leak over time, and even properly dry seeds do release some humidity over time, even for professionals. A desiccant inside the container solves that problem. The Kew Millennium Seed Bank Project suggests a humidity monitor inside each container so archivists know when to replace the desiccant. A 40 cent humidity card works great for that, if the container is see-through.
I use stapled paper coin envelopes to keep desiccants separate from seeds. Humidity flows freely through paper. I put a tablespoon or two or desiccant into a paper coin envelope and put that inside large plastic tubs with good screw-lids.
I keep seeds in plastic Ziplocs in the same tubs, trusting that the small amount of humidity released from dry seeds will diffuse through the Ziploc zipper and directly through the Ziploc plastic. The plastic Ziplocs also protect seeds from rapid humidity changes when I open the tubs. It also protects the seeds from excessive dryness if a large fresh batch of desiccant dries the air in a tub below 15% RH for a few days.
Probably storing seeds in paper, consistently dry but not too dry, is a little better than storing in Ziplocs. I like the resealable convenience of Ziplocs, being able to see the seeds, and the way they keep the seeds from going to 50% RH and back down to 20% every time I open a tub. Also, if I put the whole tub into a freezer to kill insects, there is no chance that condensation can reach the seeds.
You have to store silica gel and most other desiccants in a tightly-sealed jar, or they will absorb humidity from the atmosphere until they can't absorb any more. Bentonite clay seems to be able to keep its drying ability even if exposed to the atmosphere for months.
- <strong>Silica gel</strong> is my favorite desiccant. One tablespoon will last for months in a well-sealed jar if I don't open it too often. You can buy a few pounds of silica gel for $5-7 in a craft store's flower-drying aisle. In the United States, silica gel is the only desiccant approved by the FDA for use in food and pharmaceutical applications. It is literally safer than sand, since sand is crystalline and silica gel is amorphous. Even so, avoid breathing the dust.
You can regenerate silica gel by baking a shallow layer at 250 F for several hours, and sealing it back in glass before it sucks up much humidity. 250 F will melt most plastics!
Amazon charges three times what my craft store charges for silica gel.
https://www.amazon.com/dp/B0001EJIXU/
- <strong>Oil Dry</a></strong>- oil-absorbent Bentonite clay containing montmorillonite may not need to be regenerated, but it can be regenerated at 150 F. You can buy 40 pounds of Oil Dry in a Wal-Mart automotive section for $8. (Thanks, Dave, for pointing this out as an inexpensive desiccant.)
https://www.amazon.com/dp/B0001EJIXU/
- <strong>Drierite</strong> - anhydrous calcium sulfate - is a about the same price as silica gel, but more powerful. It's less dusty, but if you buy the indicating Drierite, the dust has a little Cobalt Chloride in it, so the dust is more irritating. This is the classic desiccant that you see in high school laboratory glass crocks.
<a href="https://secure.drierite.com/catalog3/page4a.cfm">https://secure.drierite.com/catalog3/page4a.cfm</a>
<a href="https://secure.drierite.com/catalog3/page4b.cfm">https://secure.drierite.com/catalog3/page4b.cfm</a>
If you use too much fresh Drierite it can desiccate seeds to death. That makes a humidity indicating card useful. You don't need seeds dried below 15% RH, so I don't let my jars go below 10% RH for long. (I store seeds in closed Ziplocs inside the dry jars, so the inside of the Ziplocs only dry further very slowly when the humidity difference is 10% vs 15% or 20%. Paper labels and the seeds themselves buffer that last few % of RH change.)
Drierite <strong> relative humidity cards </strong> cost 40 cents each, no minimum order:
<a href="https://secure.drierite.com/catalog3/page15b.cfm">https://secure.drierite.com/catalog3/page15b.cfm</a>
ULINE humidity cards, $18 / 100 cards
<a href="http://www.uline.com/BL_1002/Humidity-Indicator">http://www.uline.com/BL_1002/Humidity-Indicator</a>
<a href="http://www.uline.com/Product/Detail/S-8028/Damage-Indicators/10-60-Humidity-Indicators">http://www.uline.com/Product/Detail/S-8028/Damage-Indicators/10-60-Humidity-Indicators</a>
- <strong>Dry uncooked rice</strong> can be baked until it's almost-light-brown. When it's that dry, it is a useful desiccant. But if you over-bake it, it turns light brown, which greatly reduces its water-absorbing properties. You have to use a larger volume of rice to absorb as much humidity as a smaller amount of silica gel, but rice won't over-dry seeds.
I would love to know if dry, lightly-baked pasta absorbs humidity.
- <strong>Dry milk powder</strong><strong> </strong> is supposed to be able to take up some humidity. But I doubt whether it can be regenerated.
<strong>Moisture Barriers:</strong>
Professional seed banks and researchers use heat-sealed, tri-laminate foil bags.
Seal-A-Meal might come close, but both these trap humidity IN with the seeds.
Glass jars with a screw-lid and a rubbery gasket ring are good for many years. (Unless you open them - each time you open a container, you let in room air around 50% RH and the desiccant has to absorb that humidity. Eventually, any desiccant will be exhausted and stop protecting.)
Plastic jars with tight-fitting screw lids and non-paper seals are probably OK for a few years. That's what I use.
Double Ziplocs might leak humidity too fast for long term dry storage in humid air, but they protect seeds from condensation when coming out of a freezer or vegetable drawer. (By the way, the "crisper drawer" is the most humid spot in your refrigerator, not the driest.)
Big plastic tubs with snap-on lids leak so fast that desiccants will be exhausted rapidly. You might be able to slow the leaks down by clamping the lid over a thick plastic film like a gasket. And use lots of desiccant.
Kew Millennium Seed Bank Project, long-term seed storage containers:
<a href="http://www.kew.org/ucm/groups/public/documents/document/ppcont_014347.pdf">http://www.kew.org/ucm/groups/public/documents/document/ppcont_014347.pdf</a>
Sorbent Systems / IMPAK technical comparison of desiccants:
<a href="http://www.sorbentsystems.com/desiccants_types.html">http://www.sorbentsystems.com/desiccants_types.html</a>
Sorbent Systems / IMPAK CHART for comparing desiccant types:
<a href="http://www.sorbentsystems.com/desiccants_charts.html">http://www.sorbentsystems.com/desiccants_charts.html</a>
Kew: theory of desiccants and RH
<a href="http://www.kew.org/ucm/groups/public/documents/document/ppcont_014349.pdf">http://www.kew.org/ucm/groups/public/documents/document/ppcont_014349.pdf</a>
Many Kew Royal Botanic GardensTechnical Information Sheets about collecting and storing seeds, written by Millennium Seed Bank staff.
<a href="http://www.kew.org/science-research-data/kew-in-depth/msbp/publications-data-resources/technical-resources/technical-information-sheets/index.htm">http://www.kew.org/science-research-data/kew-in-depth/msbp/publications-data-resources/technical-resources/technical-information-sheets/index.htm</a>
You can bottom-water seedlings right in their tray if you put a a fuzzy capillary mat between the pots and the water-holding tray under them. Add only a little water at a time, and the mat will carry that water equally to every pot or cell.
Cotton Flannel Bottom Watering
A capillary mat cures over-watering and prevents water-retentive mixes from drowning seedling roots.
It also makes bottom watering <u>easier</u> than top-watering, and more uniform!
If you find it messy or time-consuming to bottom-water small pots, seedling flats, insert cells or propagation trays, cover the bottom of their solid 1020 tray with cotton flannel or a commercial capillary mat that is absorbent on both sides.
Then add only small amounts of water onto the mat, so that the mat is very wet but no standing water is visible. The mat and the grooves in the tray do hold a small reserve of water that each pot pulls from when it needs water.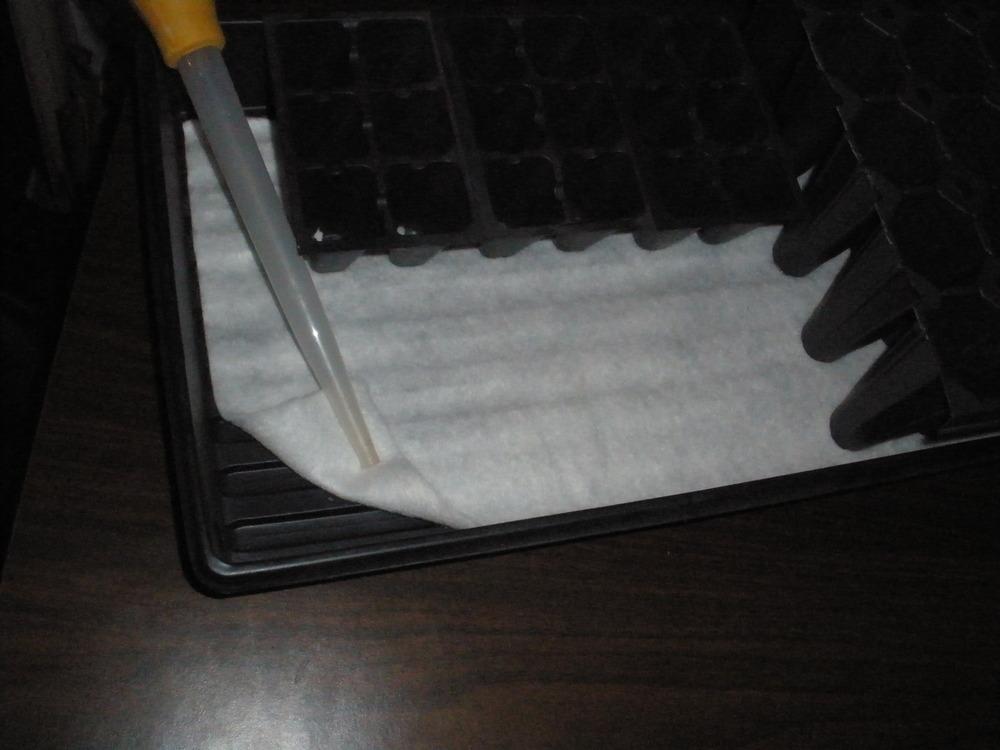
This capillary watering mat spreads the water evenly to all the plants. Every cell and pot gets an equal opportunity to sip only what it needs.
If you top-water and flood some pots but miss others, the mat will actively pull water down out of the water-logged pots and transfer that excess water to the drier pots. Capillary action plus gravity maintain similar moisture levels in the bottom of every pot and in the mat.
Remove standing water from above the mat with a turkey baster, unless you'll be gone for a week. Figure that the mat and the bottom layer of potting mix are approximately equally soggy or dry, when you consider adding or removing water from the tray.
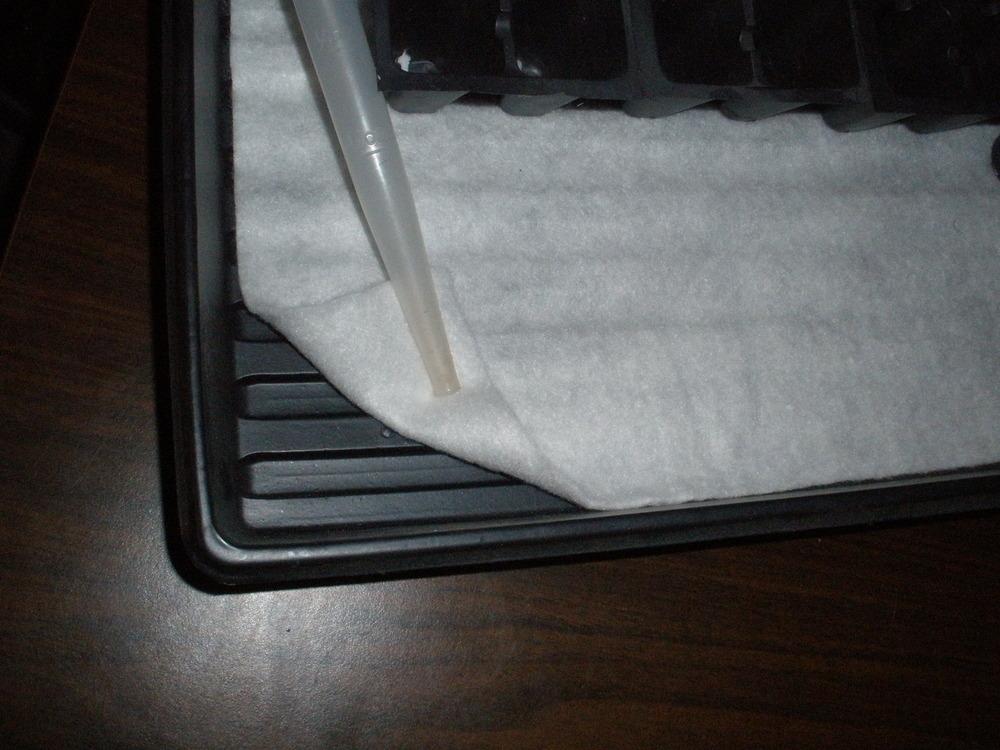
If you use propagation trays or "six-pack" inserts, make sure their bottoms rest on the mats to establish a capillary connection to the soil. 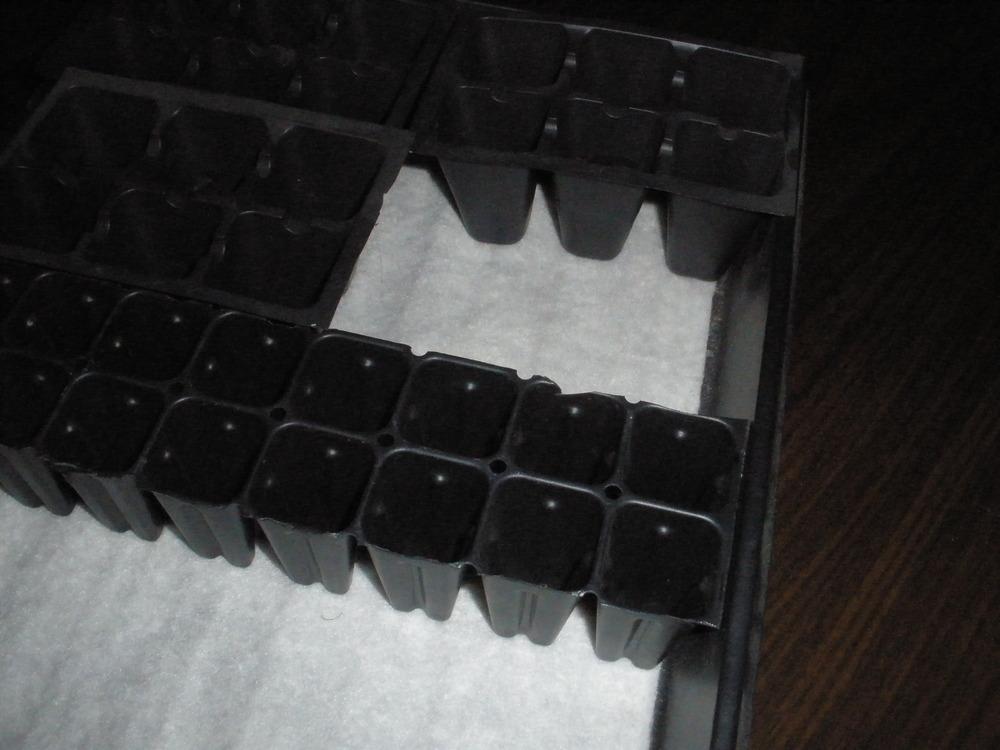
You may have to trim the edges or rims off the propagation tray so it doesn't rest on the sides of the 1020 tray instead of on the bottom.
<- Bad, the insert rims hold the cells UP, off the mat. Good - the insert rim fits inside the 1020 tray ->
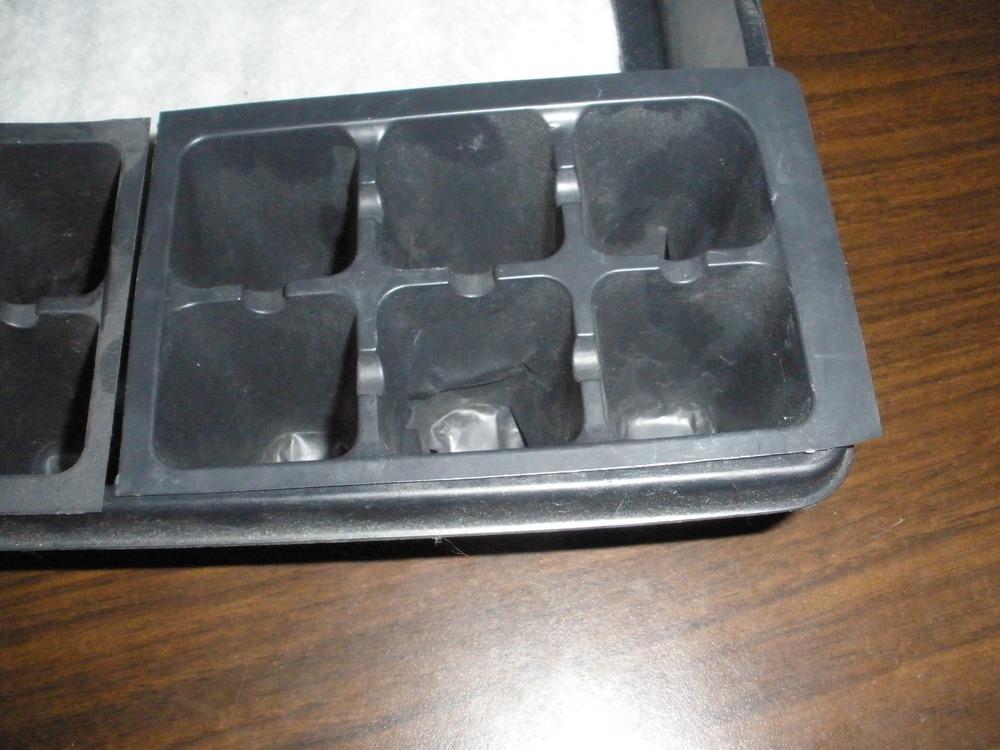
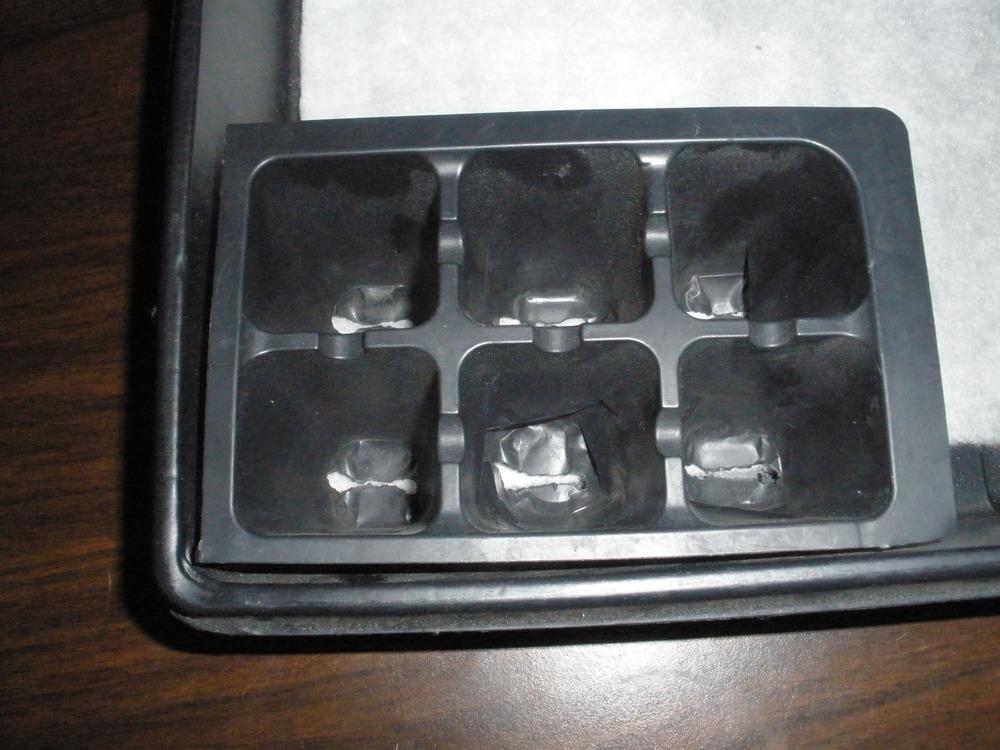
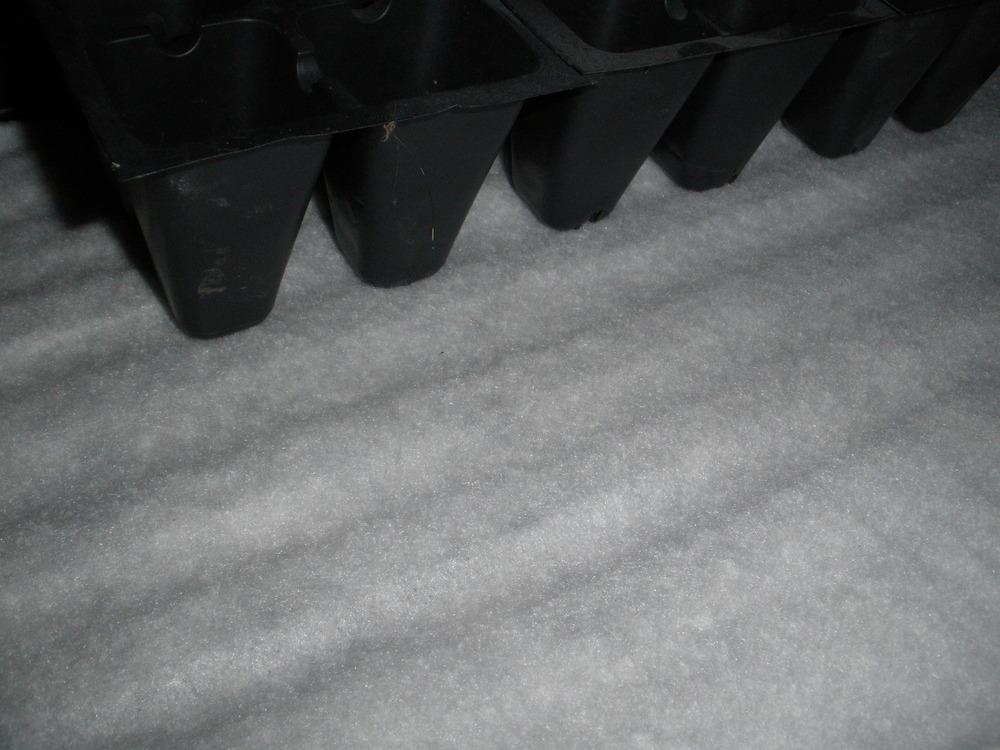
Note that the mat does not quite reach the edge of the 1020 tray in the last photo above, and some other photos. That is OK as long as the holes in the bottom of the cells or pots are over the mat (as you can see through the bottoms of the 6-pack cells in the last photo above.
If you use several small pieces of fabric to cover the tray, I suggest slight overlaps or bridging wicks so that every piece of matting shares water with every other piece. That way, every plant in the whole tray has water as long as any plant has water. And no cell will have any perched water drowning roots while any cell has less than capillary saturation.
I like to assure that the mat can suck every drop out of the grooves in the 1020 tray. To do that, I cut a few strips of cotton flannel or other thick wicking material that will fit down into the drainage grooves. They set up a capillary path from the bottom of a few grooves up to the flannel, so it can always drink the tray dry.
If you use this 'flannel method' to bottom-water large potted plants with soluble fertilizer for months, the pots might accumulate salts or unbalanced nutrients (like any bottom-watering method). To cure that, top-water heavily every few months until a good bit of water comes out the bottom of the pots. Remove that salty water with a turkey baster or wet-dry vacuum. Suck the water out of the tray grooves as well, to give the mat more capillary "pull down". That will flush away excess fertilizer. 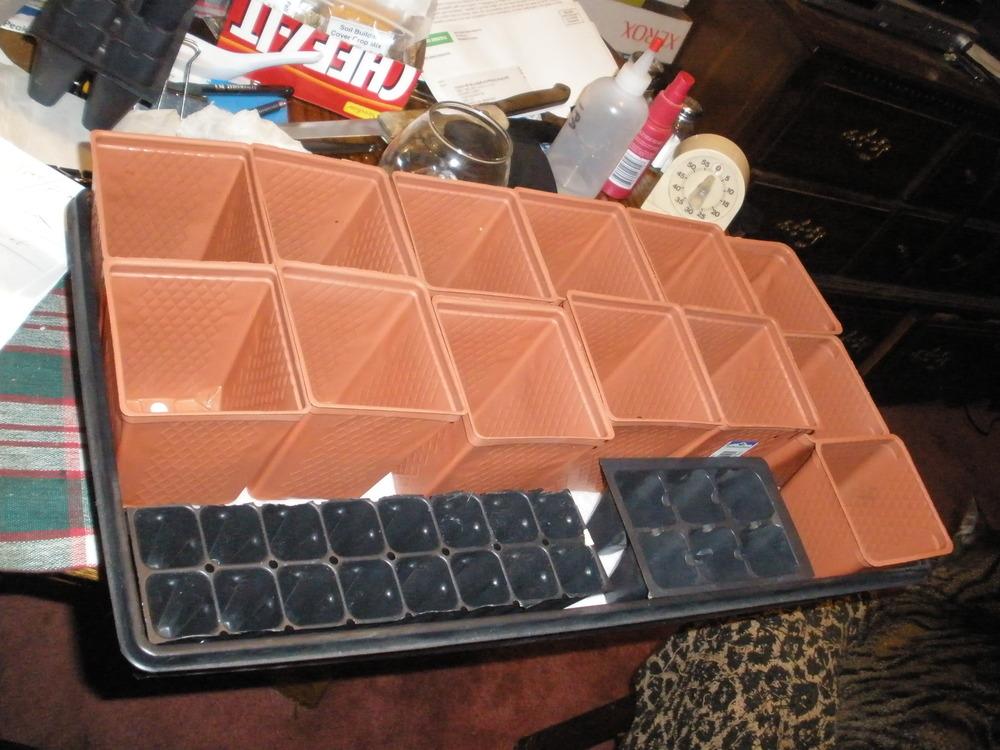
I haven't adapted this method to have a deep reservoir, but I think it could be done by draping the mat over some elevated platform or grid and dangling one or both long edges into the 1020 tray, and filling that tray pretty deep before leaving. Or maybe by setting a gallon jug of water 6" above the mat, and trailing a few lengths of cotton twine, parachute cord or other wick from the bottle down to the mat. But test it first to be sure it won't overflow in a few days!
- - - Prevents Perched Water Layers - - -
Since the pots are never submerged at all, the bottom half inch of the pot never floods, and a "perched water layer" never forms. The flannel mat's capillary "pull down" power is increased by gravity when the mat is not soaked. This draws fresh air down into the bottom of each cell, so it stays aerobic, sweet, and receptive to roots.
Without a mat, an over-watered shallow cell with only baby roots might <u>never</u> drink all the excess water from a perched water layer. With little or no air circulation, the soil mix in the bottom stagnates and becomes anaerobic or hypoxic. Roots are stunted, or drown and rot, or just never penetrate the bottom half of the shallow cell. Fermenting or anaerobic microbes may take over. That's even worse for roots.
The situation is even worse if the soil mix is peaty and fine and holds too much water. The only air spaces in the soil are narrow. Even a very thin film of perched water will exclude <u>all</u> air from a mix with too much peat and not enough coarse fiber! In that case, the entire pot or cell may become a perched water layer (no air spaces).
A capillary mat lets a peaty mix recover from over-watering much faster, if you remove standing water from the tray and grooves.
"OP Variety" vs. "Hybrid Variety" vs. "Openly Pollinated"
1. "OP variety"
An OP variety is genetically stable enough that it "comes true" to it's parents if it pollinates itself. That stability was achieved by inbreeding a strain for several generations while selecting for the desirable traits, and "rouging out" any plant that lacks the desired traits.
All heirlooms are OP varieties.
Once it is stabilized, you you can maintain and conserve an OP variety by allowing it to pollinate itself via wind and insects - as long as other varieties of the same species are not close enough to cross-pollinate.
Even if "isolation distances" are not observed, you can multiply OP seeds "mostly pure" by surrounding a patch of that variety with plants of different species. It also helps to mostly save seed from plants in the center of the patch.
A bee CAN travel ⅓ of a mile between visits to its hive. But it's very rare that a bee will visit a plant 1,500 feet from your yard, and then fly directly to YOUR plant and cross pollinate it. So unless you need 99% genetic purity, avoiding the same species in the same bed, and then not worrying about cross-pollination works quite well. Next year, just pluck any plant that does pop up lacking the desirable traits (before it can pollinate its neighbors).
2. Hybrid Variety
The opposite of an OP variety is an F1 hybrid variety. Those require human intervention to produce OR maintain. Usually there are two or more inbred "parent" varieties that were developed and maintained the same way any OP variety is created and maintained.
The named F1 cultivar is produced by carefully preventing the seed parent from pollinating herself, while someone transfers pollen from the male parent. It's complex and artificial, like plucking anthers and stamens, bagging seed blooms, collecting pollen, and manually pollinating a stigma with a small brush or Q-Tip.
3. "Openly Pollinated"
The opposite of complex and artificial pollination through human intervention is allowing plants to pollinate themselves and each other via wind and insects. If you allow F1 hybrids to do that to themselves, you get a blurry mix of 'blah' plants without the special traits the F1 cultivar was appreciated for.
If you let an OP strain do that to itself, you propagate the desirable OP strain and conserve all its desirable and familiar traits.
Say you let an OP variety pollinate itself openly, and label the seed pkt "OP". You haven't said whether you prevented, allowed, or encouraged cross-pollination with other varieties. If the recipient thinks you meant " here's seed from that OP variety we like so much", he might assume you intended it to be less than 20% cross-pollinated. After all, that IS how OP strains are propagated: openly pollinated BUT with at least some attention paid to isolation.
But if the recipient thinks you meant "here is seed that was freely and openly pollinated by wind and bees", he might think that you're hinting that it was pollinated by lots of who-knows-what, and hence is likely to grow out an interesting mix of surprising, varied and unique colors and shapes. He might hope the sender meant "openly pollinated AND heavily cross-pollinated by surprise neighbors".
But "openly pollinated" doesn't really specify EITHER paying attention to isolation OR encouraging interesting cross-pollination. It doesn't mean "selfed", and it doesn't mean "out-crossed" either. All it really means is "I didn't bag these blooms and play around with Q-Tips."
However, I think that less than 0.1% of hobbyist seed traders collect their trade seeds by bagging-and-dabbing. And the few that do go to all that trouble would mention it and name the parent strains.
My suggestion is that using "OP" on a traded seed packet to mean "openly pollinated" actually conveys no new information at all.
Instead it confuses people who think that "OP" means the same thing as it does on commercial seed packets: a stable variety that "comes true" to its parents.
I wish that the common usage was something different, like
"PB" for pollinated in a bag or with big isolation distances
"PI" for pollinated in some isolation,
"PP" for promiscuous pollination.
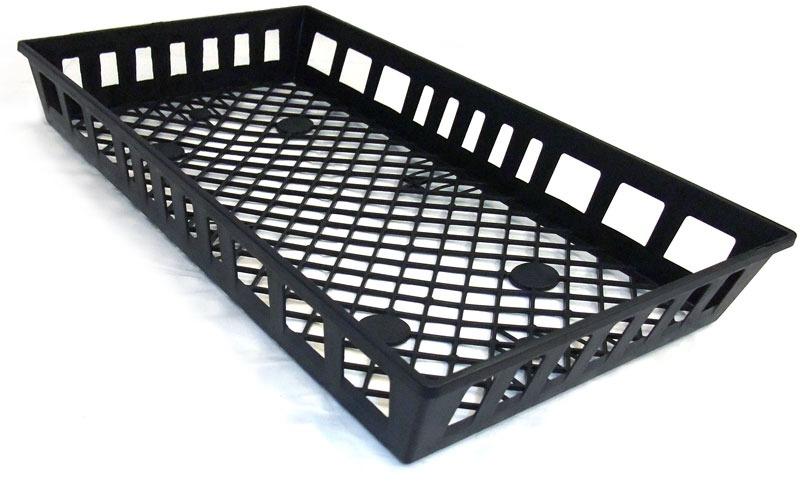
"1020" only means the size of the tray. A 1020 tray can have a plain bottom, or slits for drainage, or an open, web bottom. They are (usually?) undivided and used for carrying pots, inserts or "liners" (small, square pots).
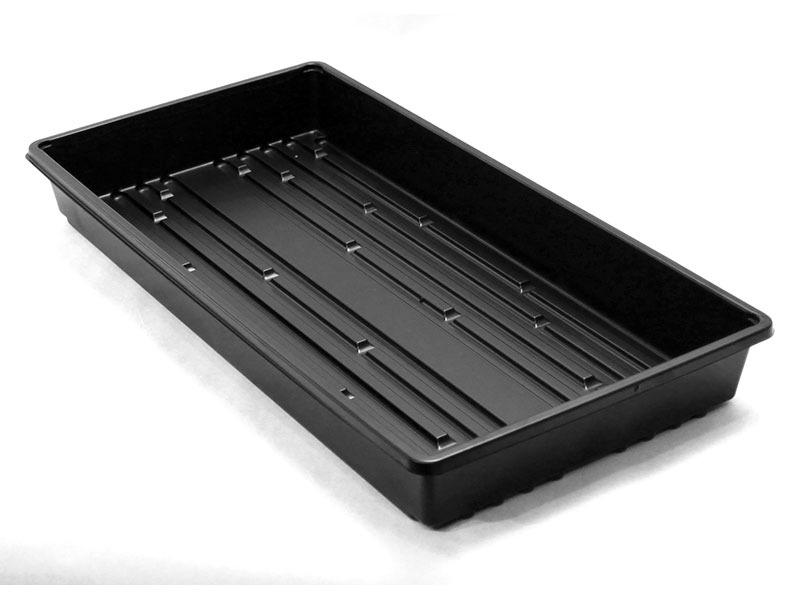
"Web" refers to very open bottoms. Mainly they hold pots so you can carry them around easier, and so you can dunk them into something bigger for bottom-watering.The webs are so far apart that sometimes I lay down a piece of window screening so that small pots will be better supported and less likely to tip over.
I think web trays tend to be sturdier than the kind shown above:
I thought all 1020 trays were 11"x22", but now I see they are not really quite that long, and different manufactures make slightly different lengths:
11" wide x 21.37" long x 2.44" deep
11" wide x 21.25" long x 2.44" deep
Besides being slightly variable in length, the "standard" defines the outside dimensions, not the inside dimensions. That must really drive commercial greenhouse owners crazy, when they buy a case of 100 insert trays or plug trays (propagation trays) that don 't quite fit their 1020 trays! To be sure that inserts and plug trays really will fit 1020 trays, you might have to buy both from the same supplier. The depth of a tray matter if you want your inserts t6o sit flat onj the bottom without you having to trim off the inserts' lips.
---------------
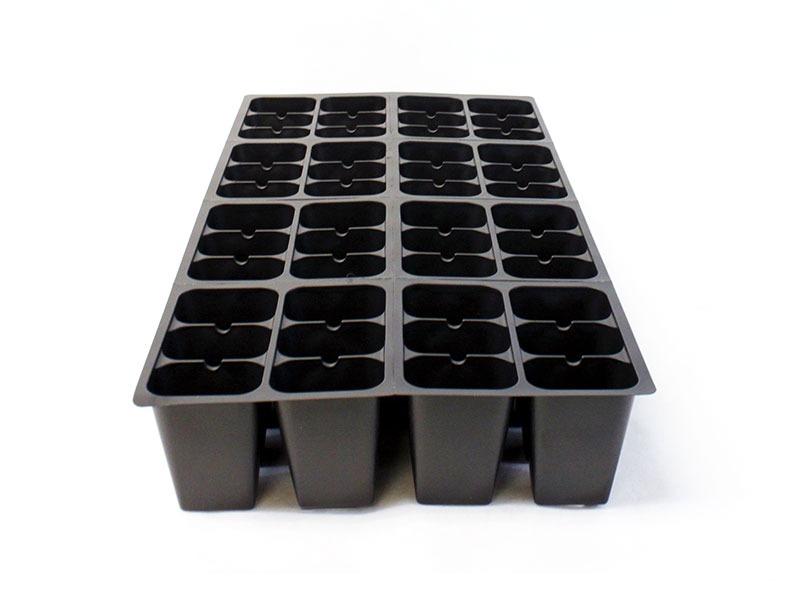
An "insert tray" is always very flimsy, 11"x21", and usually lets you tear them apart in 'paks' of 4 or 6. That's where the term "6-pak" comes from, if you never drink beer. They can be like a "tray of shallow, flimsy pots taped together so that they don't tip over", if there are only 12, 16 or 24 cells. If there are 64 or 72 cells, each cell will be only 1-2" square, so small that they only hold seedlings briefly, until you can get them into the garden.
The whole 11"x21" sheet of inserts is so flimsy that you really NEED a 1020 tray under them, or they fall apart when you try to lift them.
These are deep "1206" inserts: 12 6-paks. (I call these 72-cell inserts. They fit a 1020 tray with 12 rows of 6 cells per row.)
more photos of "deep" inserts:
http://www.greenhousemegastore...
diagrams of inserts with names:
http://www.greenhousemegastore...
------------------
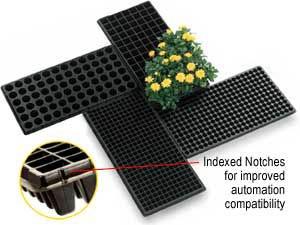
What are plug trays (propagation trays)? Sturdier than inserts and not tear-apart-able. They are sturdy enough that, if you don't mind mud on your shelves, they don't need a 1020 tray under them when you move them (just keep one hand underneath, as with a baby).
The cool thin g about plug trays is that they are aimed at commercial growers and super-gardeners who want to propagate vast tracts of seedlings. Like 128, 200, 288, 392 or even 512 seedlings per tray! Cells in the 512-tray are only 0.56" square!
They have rows and columns of cells like 8x16, 12x24 and 16x32
tiny plug trays
http://www.greenhousemegastore...
http://www.charleysgreenhouse....
<img class="decoded" style="cursor: -moz-zoom-out;" src="http://garden.org/pics/2013-04-05/RickCorey/4a5ac6.jpg" alt="http://garden.org/pics/2013-04-05/RickCorey/4a5ac6.jpg" />
------------
And here is a tray that has 20 rows instead of hundreds of cells:
