As per request of
@GigiPlumeria, this is a step by step on how I do an adenium root training, I believe there are a lot of other method to do it, and this is just 1 example of how I did it. Hope you find this useful , and feel free to comment, ask , or add any other missing information.
I have performed this for more than 10 adeniums, only 1 failed.
As the purpose is to show step by step with picture until we have the roots that we want, this will take around 1 year until we can see the result, to cut the process of waiting for 12 months, I will use different adeniums at different stages.
Special note:
1. As I live in Indonesia with tropical climate, no winter, I have no idea how other climate, especially winter will affect the growing process of the adeniums, and no idea whether adeniums will go to a dormancy stage in winter.
2. This process is just base on experience or what is available, it is not necessary is the right approach, please feel free to improvise and explore new ways.
3. Please do not do this with your expensive Adeniums, just try it with some seedlings that you can afford to lose.
4. On top of the standard root training process, I also make other experiment for my own interest, just consider those as a 'by product', not part of the root training
I recommend to do this with 2 to 4 adeniums at once, incase 1 or 2 die, we still can continue the process, not to waste 1 year.
Stage 1. Seedling selection criteria
- diameter or the caudex ( 2 - 4 cm)
- the height of the plant 12 - 20 cm , if the plant is too tall, it can not stand without any roots
- select the plant that is straight, not bending to 1 side, for the same reason as above
Tools required:
- a sharp knife
- fungicide , or shallots (thanks
@Wildbloomers), ( I never use shallots btw)
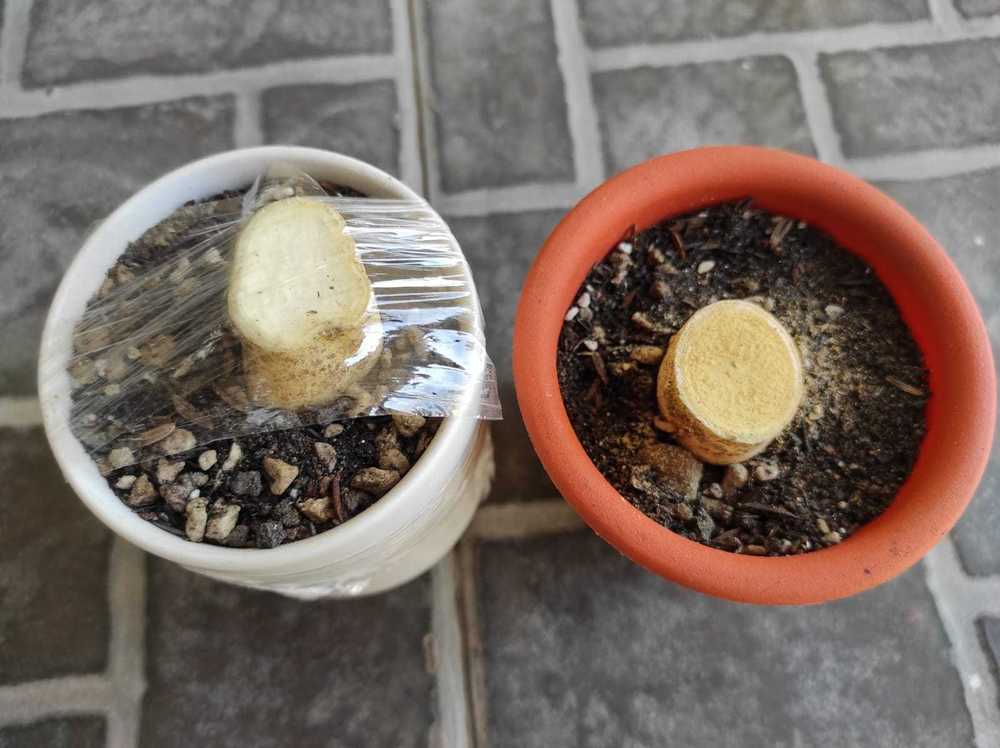
- small pieces of styrofoam or plastic bottle cap, or small piece of tile, anything that is hard and can be used to support the plant, the size is slightly bigger than the diameter of the caudex
Below are the step by step with pictures:
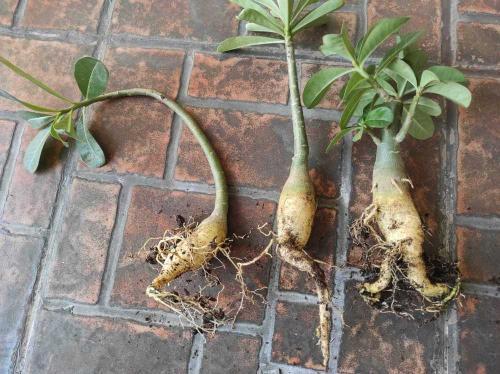
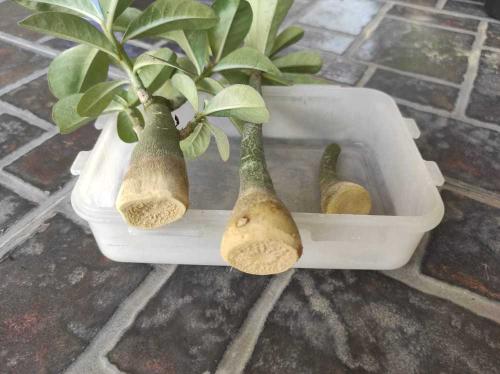
1.A. seedling selection, you may see that the one in the middle did not meet our criteria, it was too long and bending ( just ignore it for the time being, that is my sub-project), I also have a feeling that the one at the right looks like too old, lets see how it goes

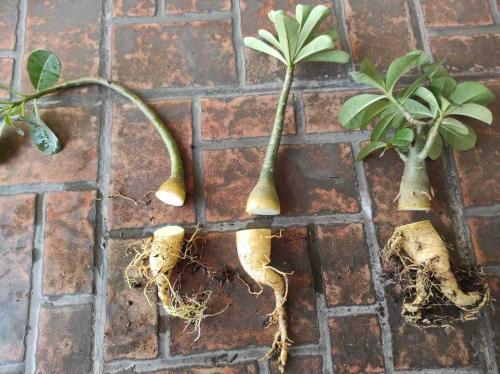
1.B. Cut them at the widest part of the caudex (please make sure the knife is sharp and clean) , for the one on the right, trim all the small roots that's still available at the trunk
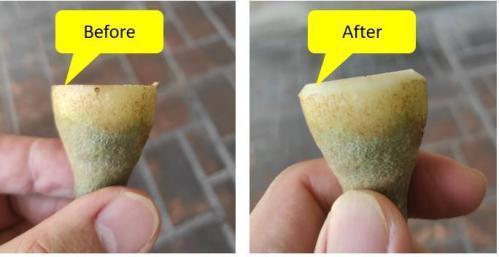
1.C. Trim the edge of the caudex by around 1.5 mm, when we air dry them in the next view days, we will like the skin of the caudex to shrink upward, not downward, as there is where the new roots will grow, we want the roots to grow outward
1.D Apply fungicide to all the wounds, then let them air dry for a couple of days, maybe 3 to 4 days, my criteria is to touch and feel the wound at the bottom, until I feel that it is hard, not soft. Please do not expose them to sunlight for now, just keep them in a place that is bright, good ventilation, and no direct sunlight.
1E. Cut some of the leaves to reduce evaporation, usually I like to keep around 4 - 5 leaves per branch

Now relax and don't worry too much, I was very worried when I did this for the first time