
I want to stress safety first and foremost. Please wear all appropriate protective gear (eye and ear particularly) and know how to use the tools safely. Also, please call 811 before you start digging. It's a free service and it will prevent you from having a potentially very bad day when you accidentally cut through power cables!
I also want to stress that this is just one way of putting these structures together. There are many other ways to do this. This is also a fairly inexpensive way of doing it as I use mostly pressure-treated lumber, with the exception of the cedar cladding on the posts, and no fancy connectors; just screws, nails, and bolts. I do use power tools for most of this, but it could potentially be done with hand tools, just a lot slower (and frankly, I'm getting too old to put that much effort into a project).
Okay, on with the show. (By the way, the posts that look bent in the photos are due to my phone pictures and are not ACTUALLY bent.)
With a plan firmly in mind, I am going to use 4" x 4" x 10' PT (pressure treated) posts, with the top of the structure being made of 5/4 x 6" PT decking boards. I like the decking boards because the edges are pre-rounded, and I think 2" x 6" boards are just too chunky looking for this application.
With your area laid out, break out your post hole digger and get to it.

The general rule of thumb for the burial depth of poles is 10% of the length of the pole plus 2'. That's probably overkill for something like this, but as it's going to be a swing, I'll err on the safe side. If you look closely, the marks on the post hole digger show that I'm at about 40" deep.

This gives me 3' burial with about 4" of stone added to the bottom of the hole. This stone layer will help to keep the pole from rotting for a very long time. I used marble chips because I had them on hand and they're fairly cheap.

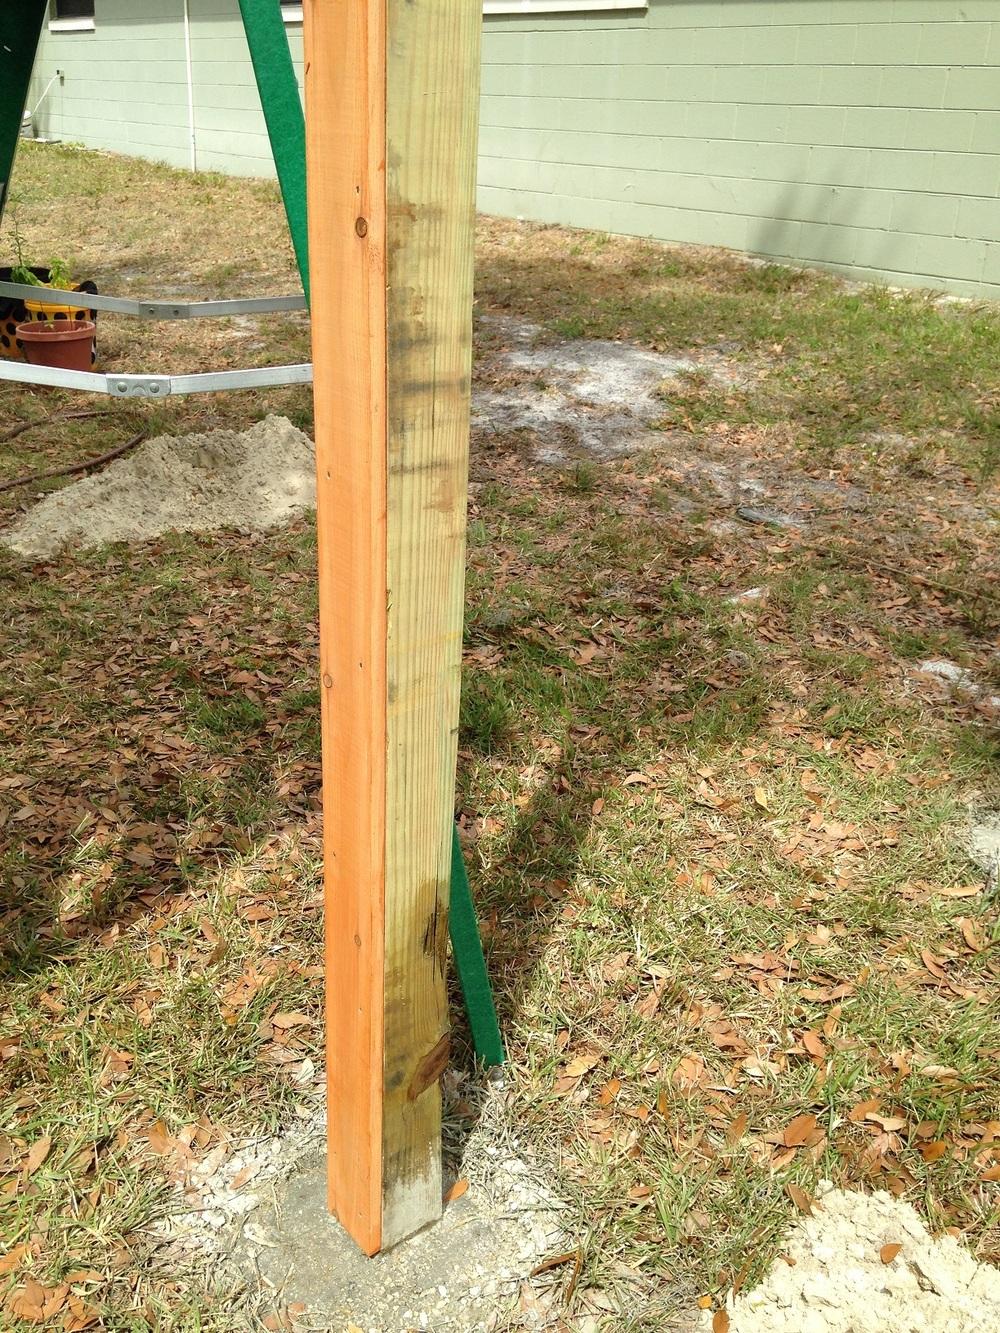
Even though the posts are pressure treated, I still like to add an additional layer of protection. I paint on a layer of Coppercoat (and yes, I know it says for NON pressure treated, but I'm paranoid, so there you go) You can skip this step as this stuff is NASTY! If you do use it, use it only outside and with a respirator. You can see on the right where the color is slightly greener -- where I've painted the portion that will be buried.

Okay, so now set the post in the hole. (You can now brace the post with boards and stakes in the ground to level it, but I just get my son to hold it in place fairly close, as you then have some leeway to level it when pouring the concrete.) You will be pouring fast-setting concrete into the hole around the pole in its dry state. I spray the hole with a hose to saturate the walls because in Florida the hole will NEVER fill 1/3 full of water. Then pour in your dry concrete to fill the hole to about 2/3. I spray more water in the hole and use a length of rebar (really, anything will do, even a 1" x 2" piece of wood) just to mix the water and concrete by stabbing into it repeatedly. This will also get out air pockets, which would weaken the foundation. At this point, put your longest level on the side of the pole on two adjacent sides to make sure this sucker is straight. Fill the hole the rest of the way and slightly overfill, spray with water and repeat the process. Again, at this point, make sure your post is level on two adjacent sides. When you have the hole filled and some excess above the top of the hole, use anything like a trowel or putty knife to put a slight slope in the top of the foundation so that water drains away from your post. Make sure to do this quickly before the concrete sets. (See the pictures)

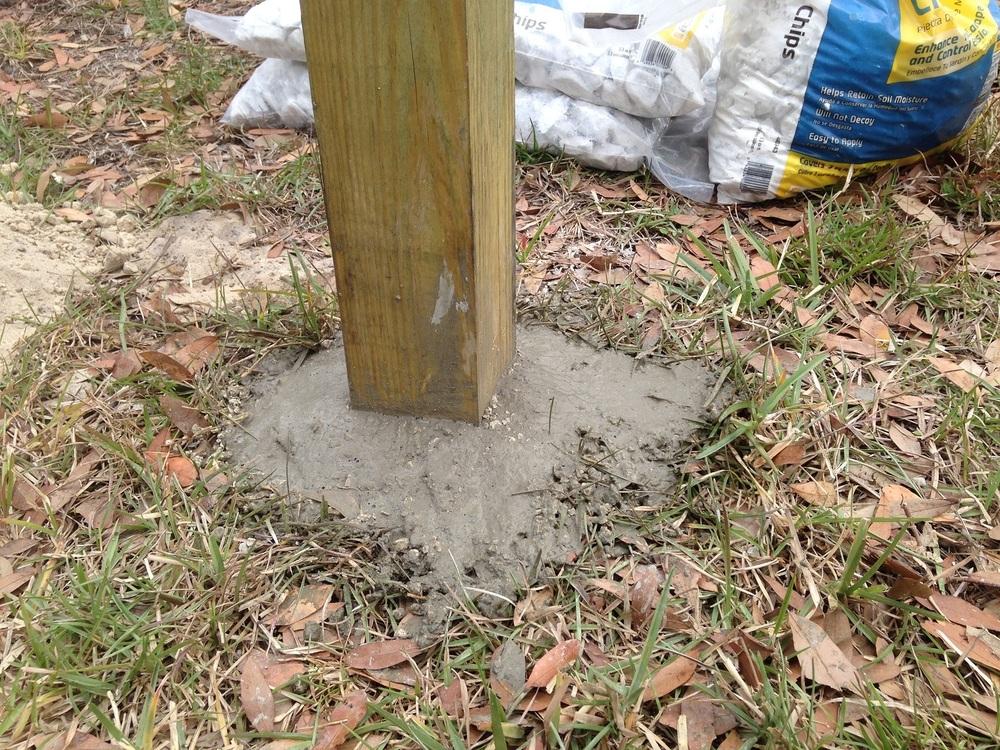
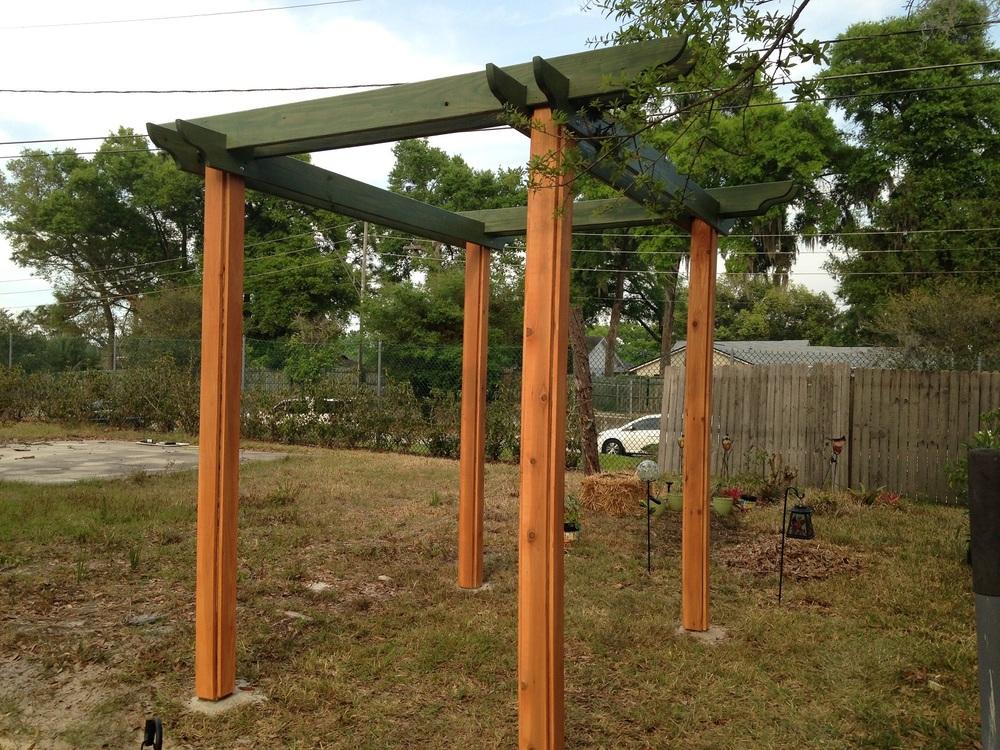
At this point you can just repeat the process for as many posts as you need. I used four in this case, and this is what I ended up with. (Please ignore the neighbor's house; we will be putting up a fence shortly, but that's another story.)

Stop here, pat yourself on the back, and have a cold beverage if that's your thing, because the really back-breaking stuff is done! Yay! Ideally, let this dry overnight. (You could probably continue on the same day because this concrete does dry pretty quickly, but I don't recommend it.)
Once the foundations are dry, run a bead of silicone where the concrete and the post come into contact. I just use my finger to smooth it out. Once again, this is for increasing the longevity of the posts.


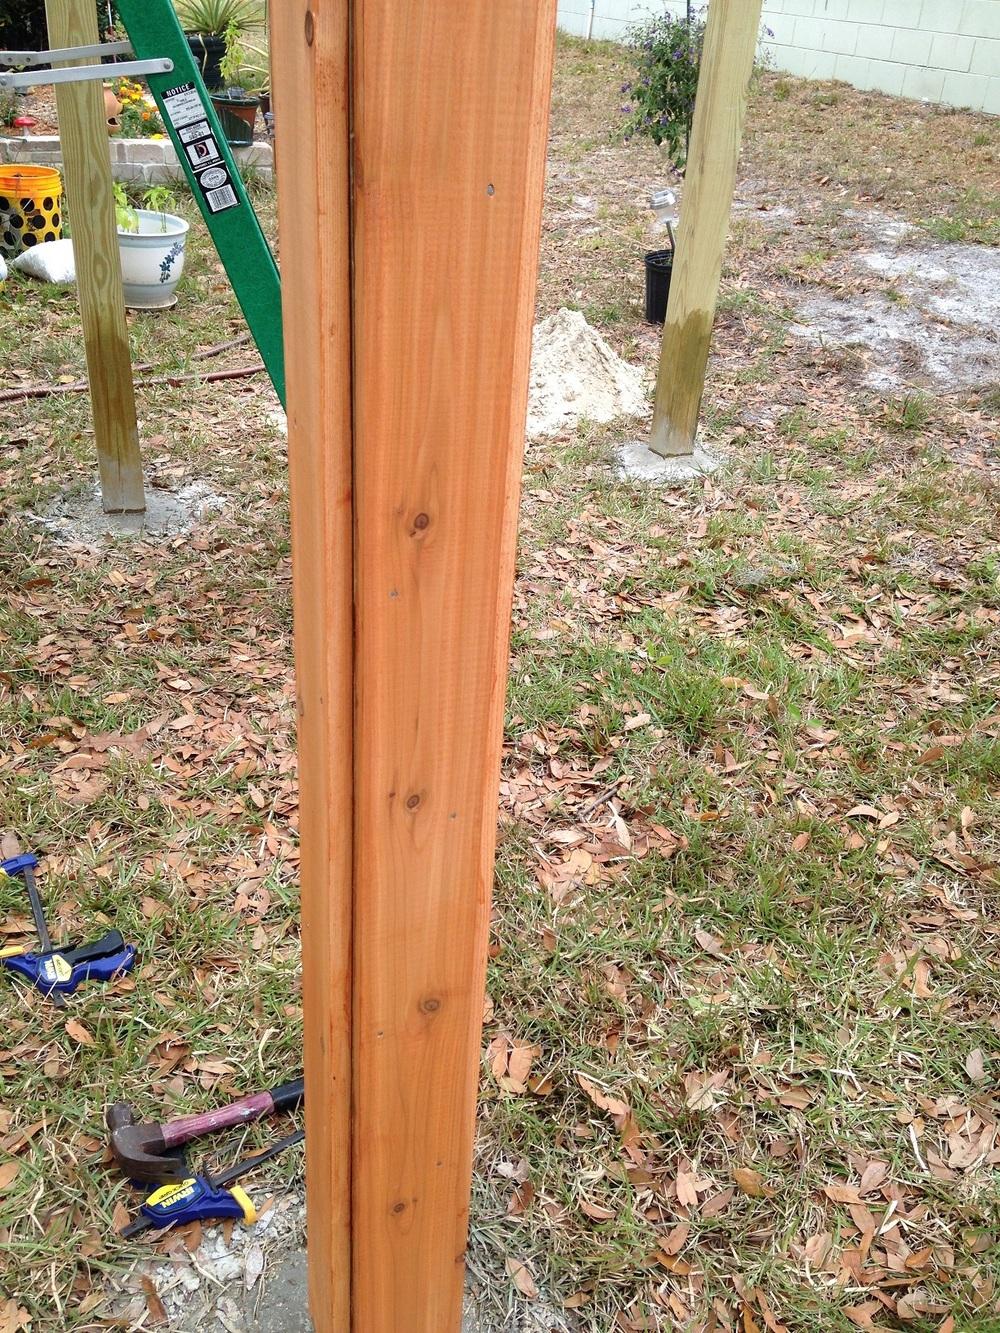
Now we are going to wrap the poles in cedar to make them look pretty. I'm using 1" x 4" cedar to get a particular look, which I'll explain in a bit. I use a clamp to put these on the posts, 1/2" to 3/4" above the top of the concrete, and then mark the tops for cutting. Then I use a construction adhesive on the back of the cedar and clamp it in place on the post.

Finally, use stainless steel nails to permanently attach the boards.

Repeat for the rest of the boards and posts.

Now onto the fun artistic stuff where you can put some character in this project.
A lot of the following is very "seat of your pants." Figure it out as you go along. For instance, what design do you want for the ends of the horizontal boards, and also, how much overhang do you want? I actually have mine sticking out farther in the front of the structure than in the back, just in case we ever want to hang plants from them.
Here's my high-tech design and cutting method.

Yep, I used an old plastic pot.
Then I cut it out with a jigsaw and smoothed over the edges with a palm sander.


Then they got two coats of a semitransparent stain and sealer that I had tinted the blue-green color.

Once both ends were cut, I clamped a board on each side of the post and drilled through the whole thing for the lag bolts. The pictures speak better than I can.


And yes, the Spiderman coffee mug is vital!
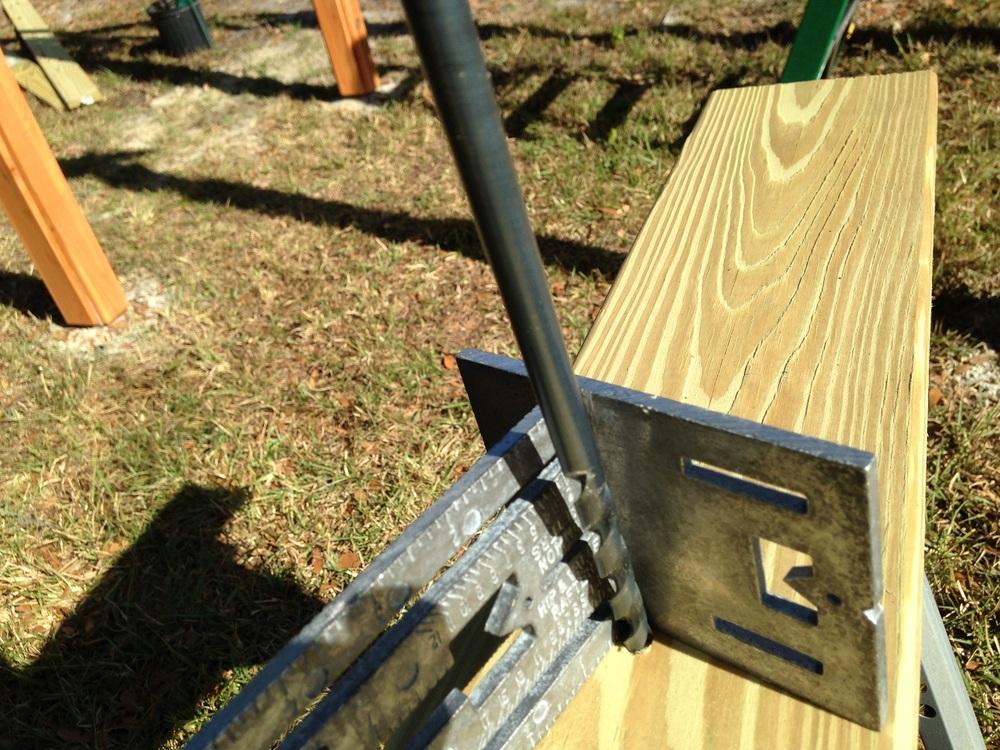
Oh, and a little technique I use to keep your drilling and bolts nice and straight at 90 degrees:
Drill a shallow starter hole. Then place something that you are sure is 90 degrees at the hole. (I use a framing square because it's deep.)
Put your drill bit tip into the hole so that it is against both sides at the bottom of the square.
Then move the drill until the upper portion of the bit is flush against both sides of the 90-degree object. Now you should be lined up perfectly for a 90-degree hole.


And here are the front and back lower braces in place.

On to the top boards that go across the boards we just put up. The first one can be a bit tricky, but after that they're pretty much identical.
I cut the board to length and shaped and sanded the ends just like the first boards.
I set one in place and marked where the slots would need to go.

I broke out the jigsaw and used a chisel to get out the chunks. You can see the blue tape on my square that I used to mark the depth I wanted so that they would all be the same. Then I stained them.

I then put wood glue on the contact points and coaxed them into place with a rubber mallet. The boards on either side of the posts could then be screwed directly to the posts.
The others are basically the same, except you will have to drill from the top through the board and into the bottom one for a long screw. But if you use the 90-degree method above, it shouldn't be an issue.
And here's what you end up with:


You can see I started on a trellis that uses basically the same methods.
And here's the privacy screen that was built exactly the same way. I still need to add the white quarter-round pvc between the cedar board edges on the swing structure, as shown here on the privacy screen. But that's just attached with the same construction adhesive, so I didn't see a need to go over it.

As you can see, this can be applied in many ways to many projects. Just use some imagination.
Hope I didn't bore you, I know I can get a bit long winded. If anyone has any questions, please feel free to contact me. I hope you enjoyed this.
| Thread Title | Last Reply | Replies |
|---|---|---|
| Wonderful job by cocoajuno | Jun 24, 2017 6:47 AM | 0 |
| June 2017 pergola by Philipwonel | Jun 23, 2017 11:46 AM | 0 |
| Great job! by plantladylin | Jun 23, 2017 7:45 AM | 1 |


