Hello!
I thought I'd take the most important element in photography and begin the tutorials with that one. Of course, the most important element in any photograph is the lighting. I'll try to stay brief while covering the most common situations you're likely to encounter while photographing plants, but, entire books have been written about lighting as it concerns the photographer and the more photographs you take, the more likely you are to encounter all of them at one time or another.
Because the subject matter of any photograph is highly subjective and often personal, the determining factor in the finished photo is the overall composition and the way in which all the important elements are presented. The most important element is the lighting. A photographer is an artist that uses light as his medium. You can have a lovely subject and a wonderful placement, but, if the lighting doesn't match the mood or set the tone of the photograph, it won't have the effect it could when the single most important element is not utilized properly. The interplay between light and shadow is what determines the mood and the lasting impression a good photograph makes on the viewer. The stronger the contrast between the two the more dynamic the photograph will be. I'm going to throw a caveat in here because the "purpose" of the subject matter and the technique you want to use will also determine the best lighting for your situation and not all photographs will be best served with a high contrast between light and dark. That will be further explained as we move through the tutorials. A good way to study the interplay between light and shadow, or, sometimes, just light and dark elements, is to pour over the work of some of the greatest photographers, past and present, and study how they utilized light and shadow, dark and light elements. The black and white photographs of Ansel Adams are a great place to start. He was a master at his craft and every photo speaks of his well trained vision and ability to utilize all the elements at his disposal to create lasting photographs that are as timeless today as the day he took them. There's a great documentary available on Youtube and it's really worth taking some time to watch it. Adams was truly an outstanding artist who knew his craft very well, which is why he could casually state that, "There are no rules for good photographs, there are only good photographs." Don't be fooled by it. He knew every rule there is and he utilized them as a master photographer. Learn the rules and you'll learn when you can deliberately break them---but, you have to learn them first. You can view the documentary here:
https://www.youtube.com/watch?... I'll give a few more names of some well known photographers at different junctions and you can look into their photos and portfolios and study how they handle the different elements of their compositions, paying particular attention to the lighting and the use of light and dark elements.
The first thing most of us would probably think of when we mention "lighting" is sunlight and that's a good place to start for those of us who most often photograph flowers and plants outside.

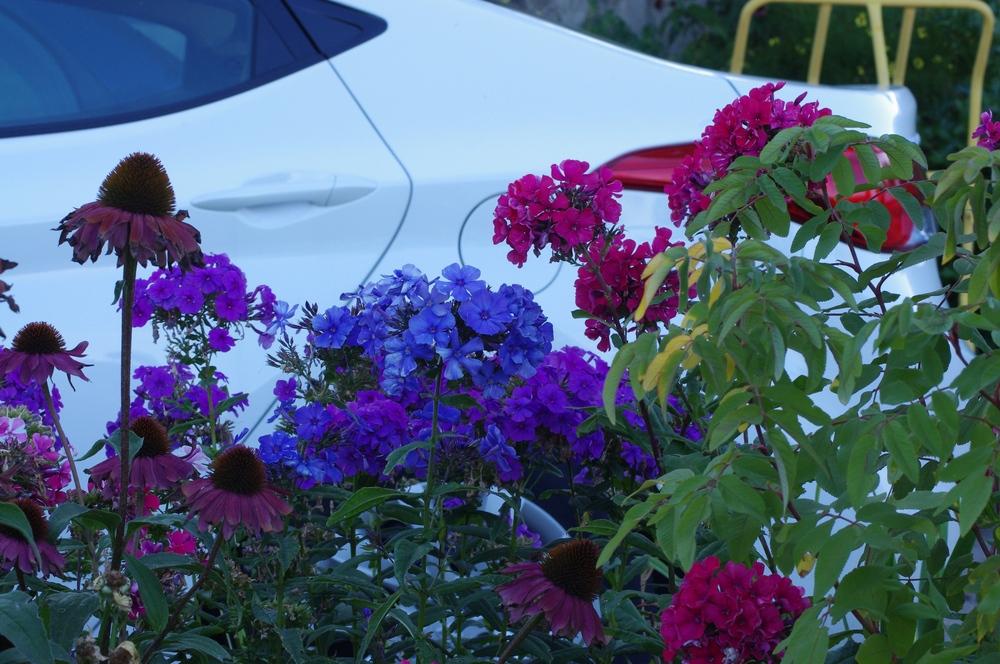
Sunlight, though, comes in different flavors and natural sunlight changes in color, direction, intensity and quality depending on the time of day, whether it is reflected light, diffused light, or, indirect light and is subject to the weather forecast. It can be your best friend or a real trial to work with depending on those variables. There's a certain kind of light I've encountered in the very early morning before the sun meets the horizon when you have just enough light to take a photo only to find out all the photos I shot have a blue cast to them. The grass looks blue-green and none of the colors are true. You can try to fix it in an editing program, but, what I've found is that there really is no good "fix" for it after the fact. I've come to avoid the urge to shoot that daylily as soon as I possibly can and to wait it out until the sun comes up. Not an easy task when you're dying to see that first bloom! If it happens that that's the only time you have to shoot the photo, or, you can't resist being out before dawn, you can try using a yellow/orange lens filter to balance out some of the blue wavelength, although filters can also cut down on some much needed light. It would certainly help to use a flash to simulate better light which would help render more realistic colors. Adjusting your white balance (or choosing an equivalent setting on your point and shoot) will help to compensate for the blue tint. When set on automatic the camera will "read" the light and it's color temperature and adjust your camera accordingly. It's been my experience that that doesn't usually work in those wee-hours. I've tried different things to get a good shot. I wrapped a dryer sheet around my flash once and even wrapped a paper towel around a flashlight before and taken a pretty good photo, so, it's worth getting creative with it. If your camera is not balancing out the blue tint, you'll have to make the manual adjustments. Keep in mind that there's also no direction to the light so there's no shadow, there's no intensity, the quality is poor and the color is in the blue. Overall, not ideal to shoot in. You'll probably need a tripod to steady the camera as the aperture will be opened wider and longer to let more light in and the shutter speed will be much slower, so, if you don't have a tripod, or, you're a bit shaky like me, you may end up with some blurry photos. I plan my photos now for later in the morning and that way I don't have to use space on my hard drive and end up deleting them anyway. Having said that, some may want to experiment with the lighting and see what kind of mood it sets and if it's a setting that might enhance the vision you have for your composition. Try it out and see how it plays out for you. Try different settings and manual adjustments to your white balance and you might be just fine. Some blue light is present at other times, just not to the same degree.
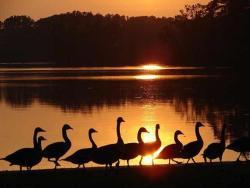
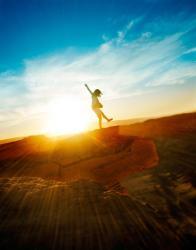
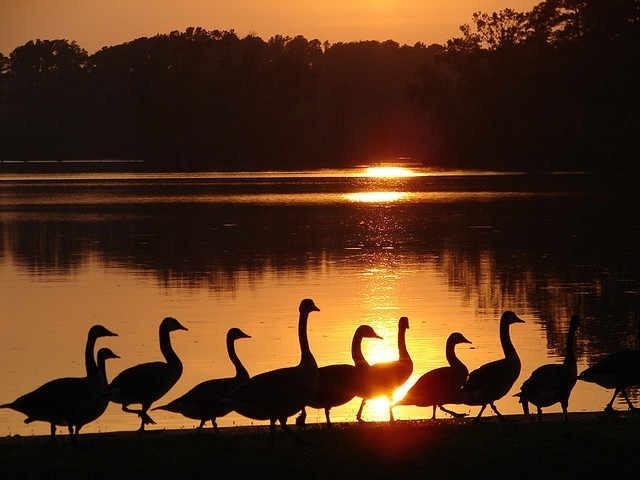
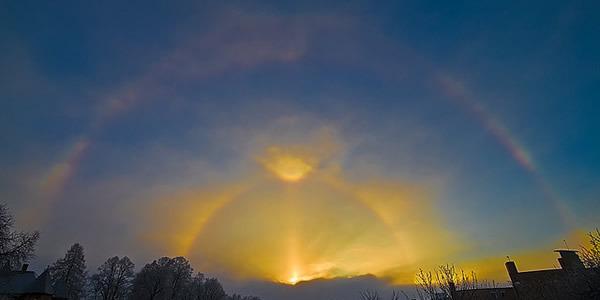
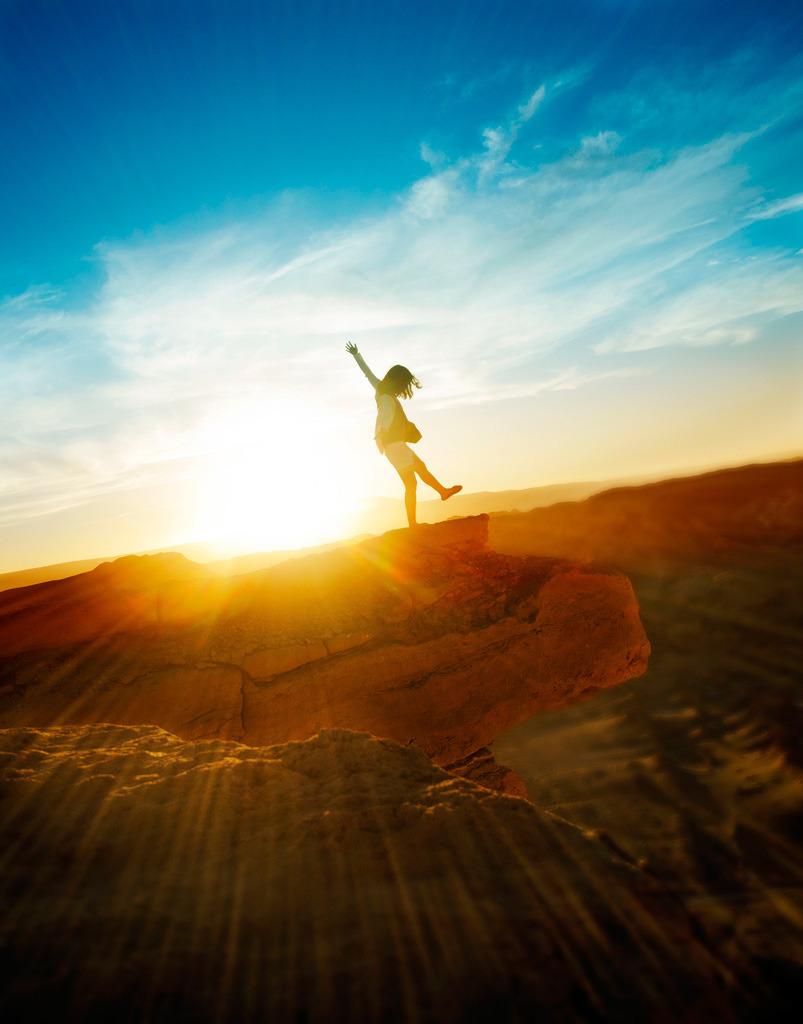
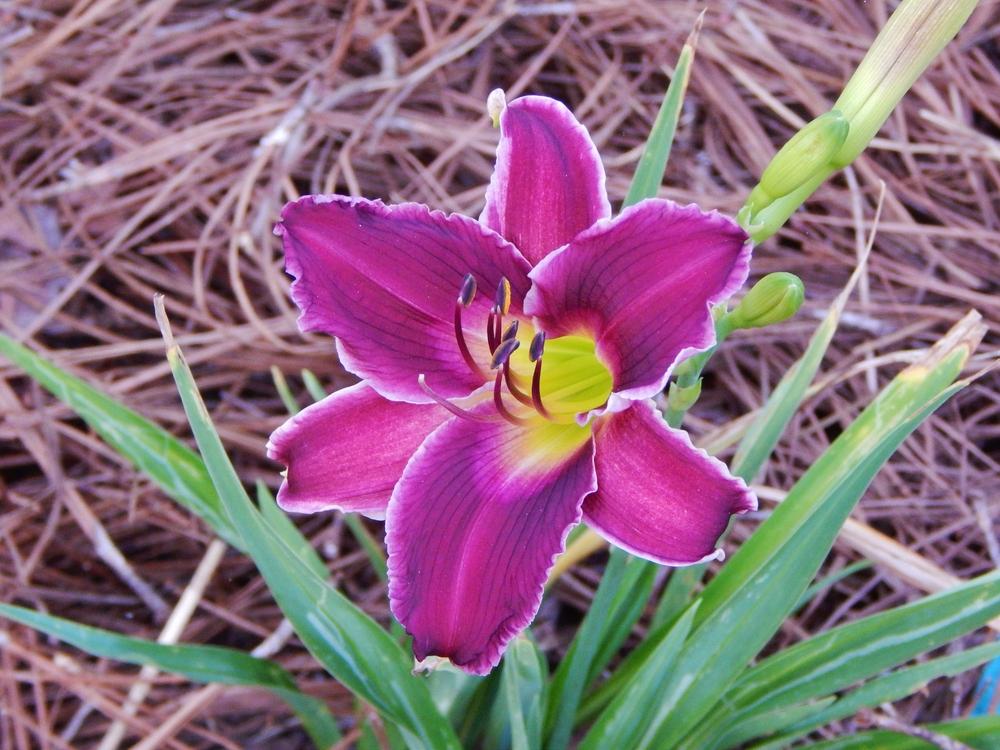
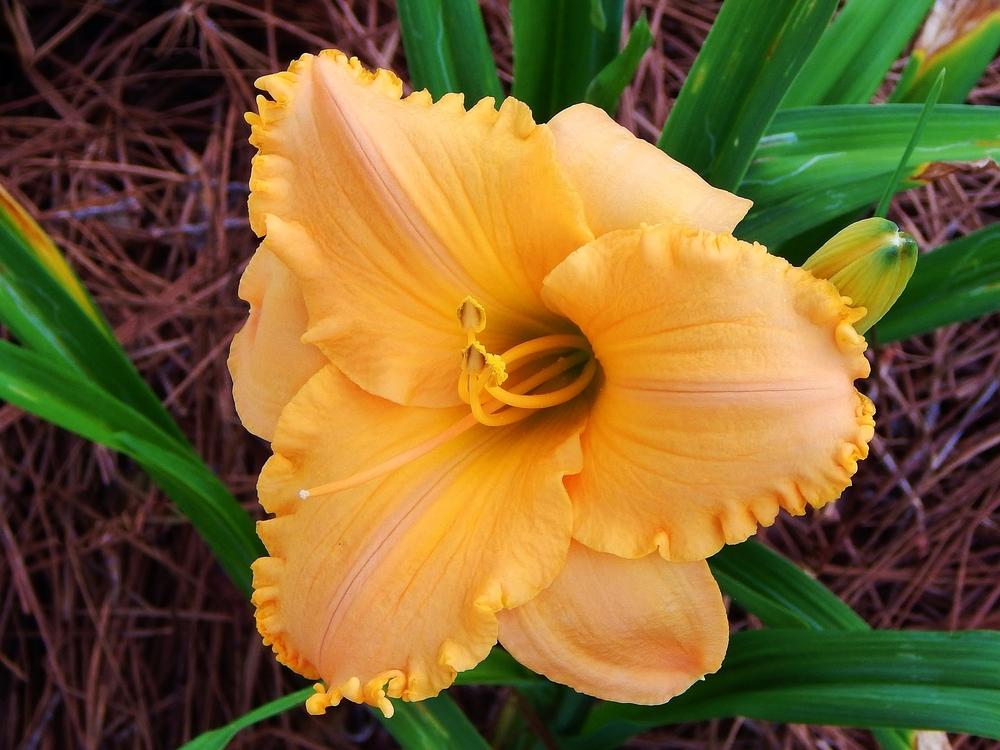
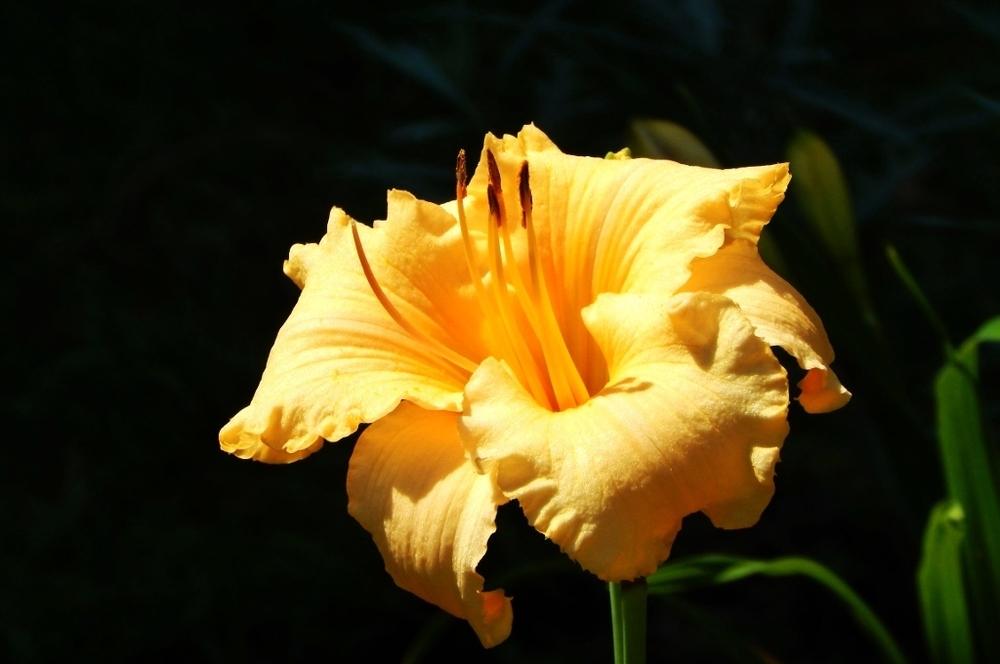
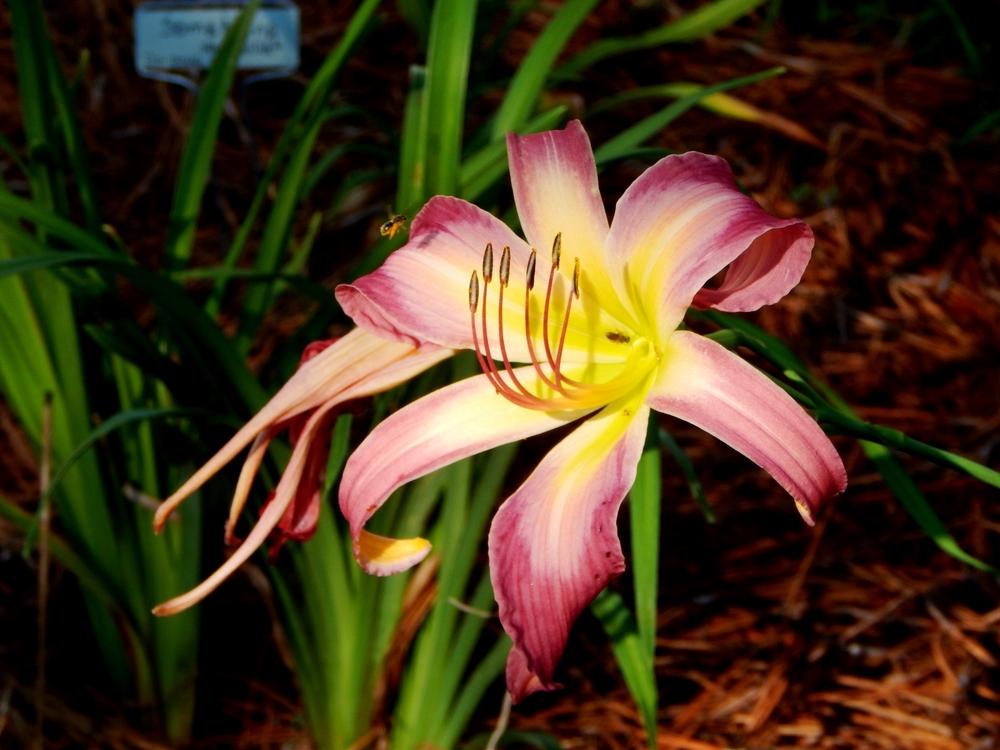
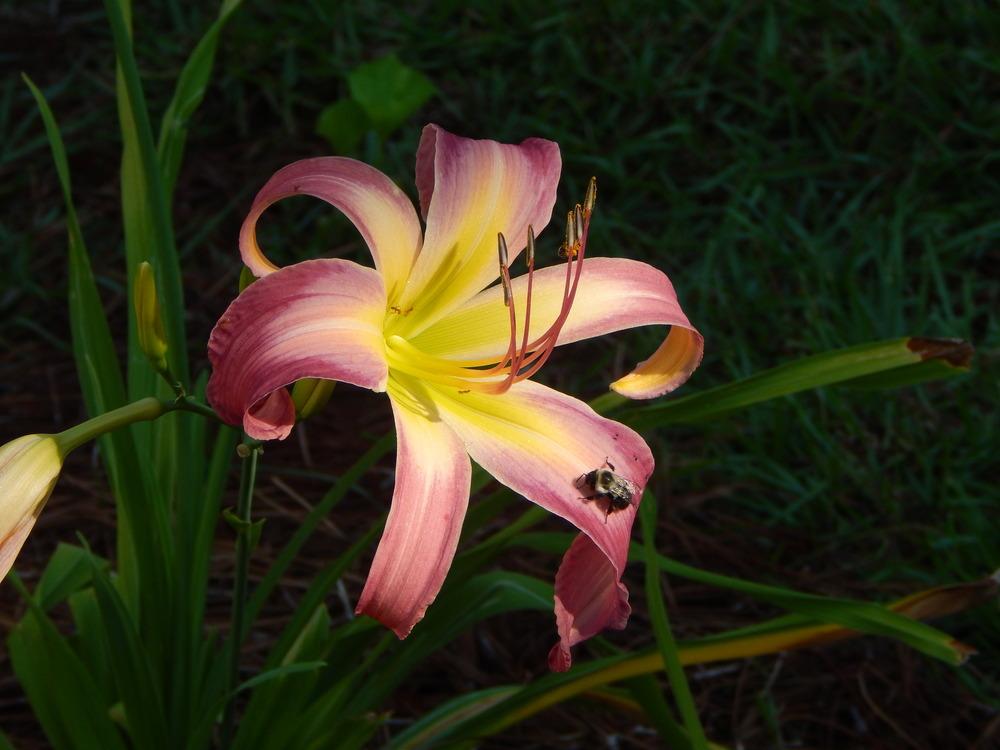
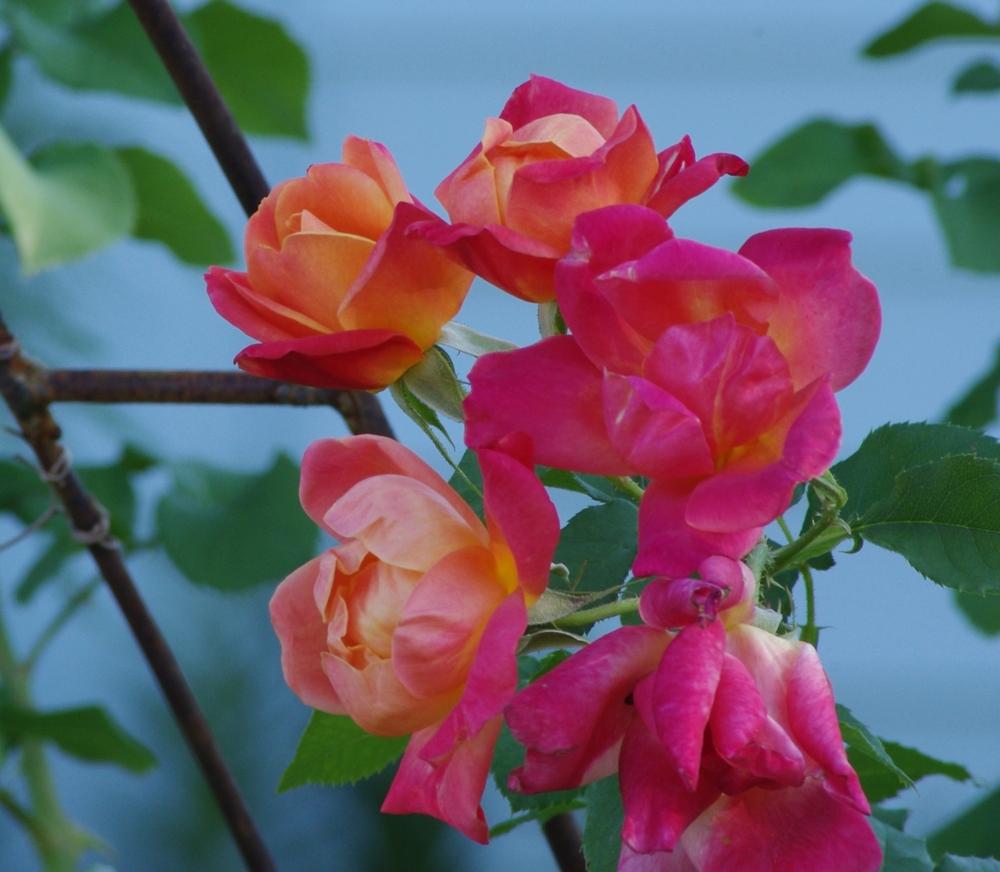
On the other hand, there's a certain condition of color, intensity and quality of light that's highly favored by photographers; it's the light that's available within the hour beginning just before and immediately after sunrise and in the late evening within the hour just before and after sunset when the light of the sun takes on a warm, soft glow and everything looks really pretty that time of day. That's why photographer's and artists refer to those hours as, "the golden hours." Things do indeed look warm and golden and many are the photographs that capture the rising and setting of the sun, be it over the ocean or a majestic mountain or landscape, and, yes, even over the lowly daylily in your back yard... You'll notice that the intensity of the light is soft although strongly directional, coming as it does from a point on the horizon, and it has a certain color to it that you'll probably fall in love with. The light at that time of day is a very beautifully warm, sometimes rosy, golden color, the quality of which can only be had in that short time frame. The color of that light, though, will effect the color of your subject matter, although in a magical way, but, keep that in mind when using it. Don't expect your colors to appear the same as they naturally would during those shoots. Color is subject to the quality, intensity and "color" of the light source. Use those elements of the golden hour light to your advantage as almost everything looks especially lovely in the golden hour sunlight. Your subjects will always look great when touched by, or, backlit by the sun. You can very often photograph the actual rays of the sun as they illumine your subject and all that they touch. One thing you'll notice about those hours is the very long shadows that are cast at the same time. You would need to consider how to avoid the long shadows by proper placement of you, or, your subject, or, of how to best incorporate them into the composition if you choose to. That's up to you. Just be aware of that particular challenge when shooting during the golden hours. You can also get wonderful reflective light when it's bounced off other objects as well. Sometimes the light color changes after the sun has dipped below the horizon and is reflected off the sky into visible light that varies in color sometimes from a warm orange/red into a cool blue or violet purple. Very dramatic images with elements that appear "blacked out" can be easily achieved during the golden hour. When you see those shots of the rising sun over the mountains and those with the sun setting across the ocean, see if you can't think of different ways you could use it for yourself. Try it out and see what you discover about it; it may be you'll become an early riser after all. Or, sleep in and catch the golden hour at sunset!
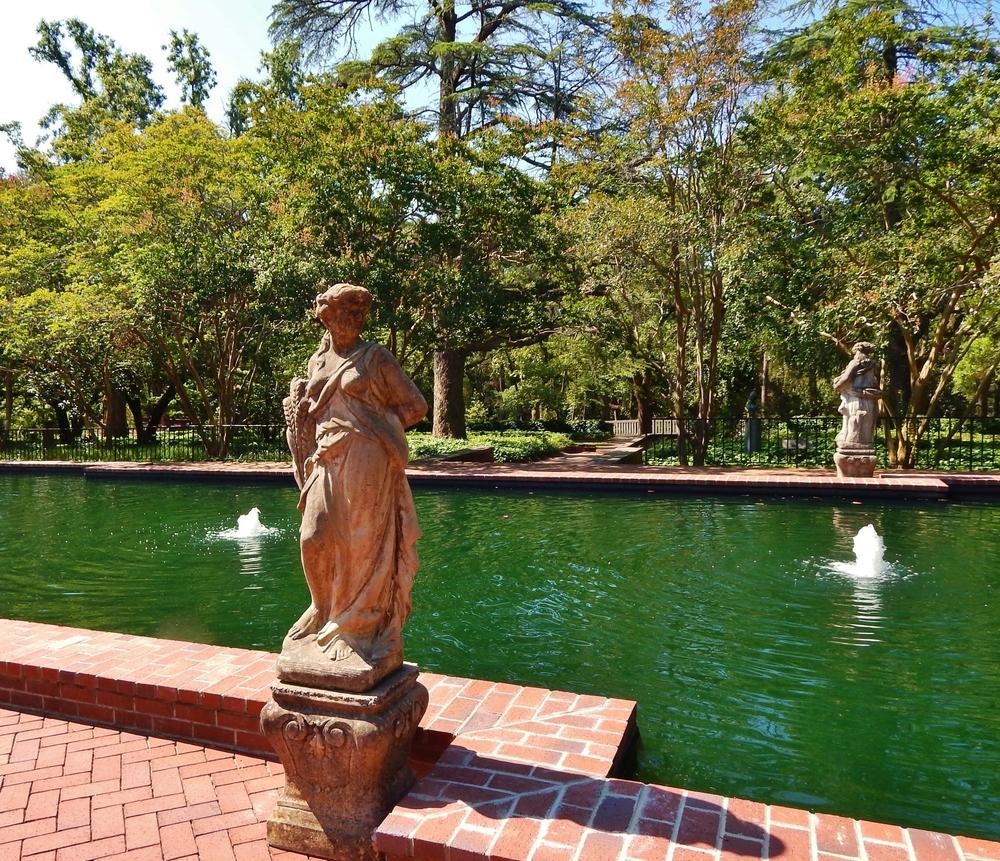
Here are a few photos taken during the golden hours. They're not mine, but, are used under the Creative Commons License and taken from Google.


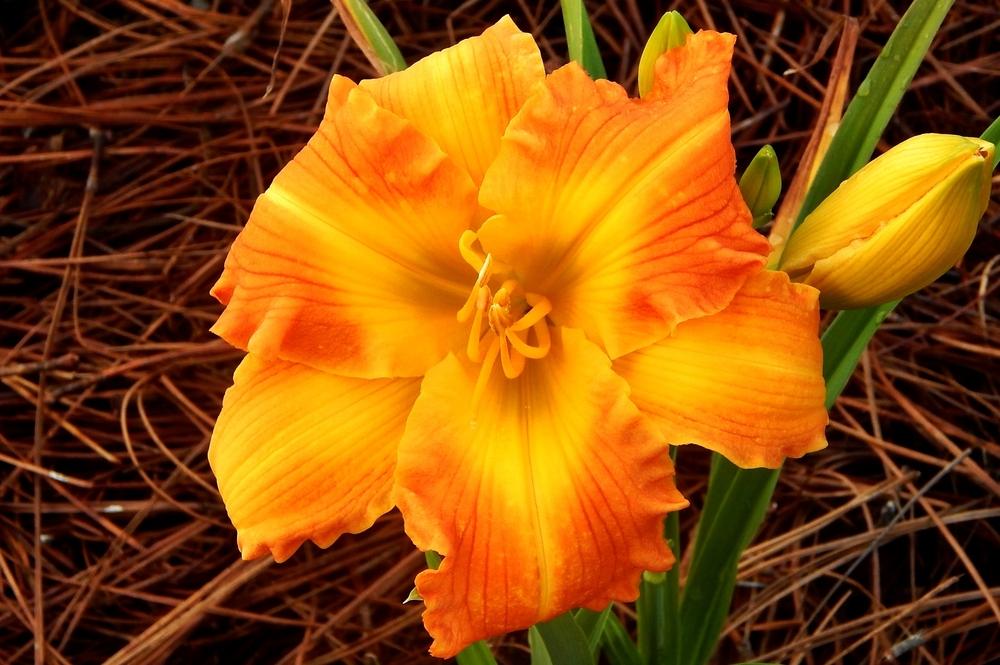
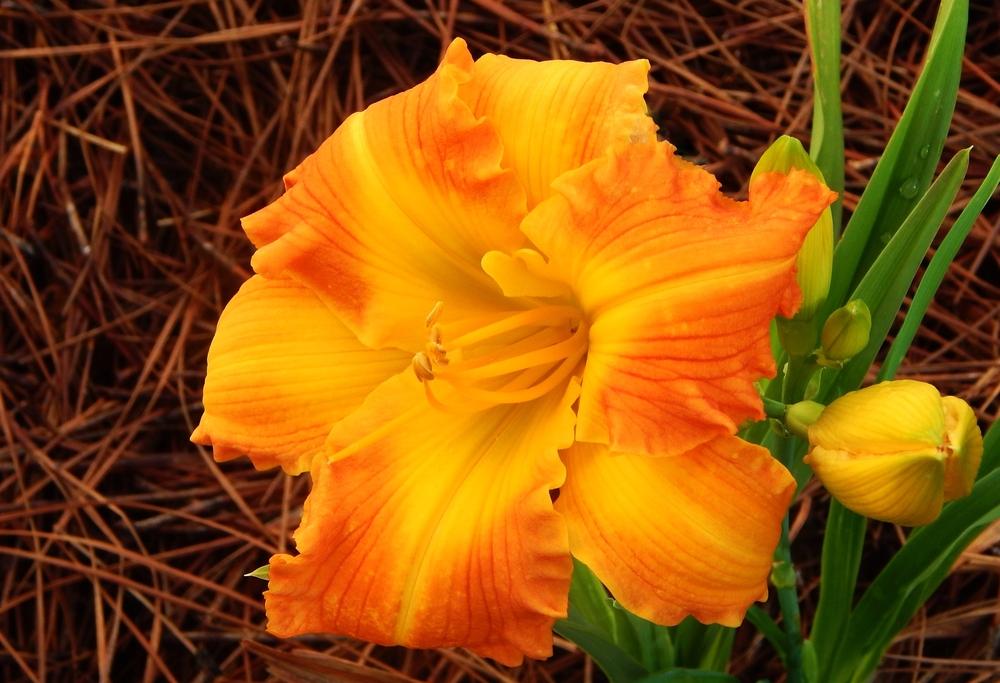
The infamous wash-out... I think we all have photographs where the subject, usually the family, is lined up outside facing the sun, you know, because we've all been told the photographer can't shoot directly into the sun so it has to be behind them, and you snap the photo and "blah!" Everybody is washed out and their clothes look like they were all soaked in a bucket of Clorox. I know I've got a dozen of those photographs in my old albums too! When the sun is high in the sky, the color of the light is going to appear mostly white, the intensity is very strong and casts very dark, often short shadows with little detail. In the case of portraits the shadows are often falling under their noses and chins. Not flattering at all and more often than not you're going to have an overexposed photo. Even if it's not high noon the shadows of a day with full sun are quite stark and the highlights are usually too white. If you're stuck in that situation the first thing you should do is "seek some shade!!" Really. If at all possible, find some kind of shade. It could be the shade of some nearby trees, or, tall shrubs, maybe an overhang of some sort, basically anything that can provide shade. In the case of the family photo, or, the portrait, it may not seem to be the most glamorous of shots, but, I promise they'll look ten times better than stuck out in the blarring sun with everyone squinting at you. Otherwise, if you're shooting a stationary subject or landscape and the sun is anywhere between about 12 and 2pm overhead on a very sunny day, in order to compensate for the less than ideal conditions you will be changing the settings on your camera so learning when and how to use them will serve you well. For those of us who like to photograph blooms and flowers, an umbrella shading the plant works great! As long as you can't see it in the photo, you can use your own shadow to shade the blooms, this works well for macro shots (very close up). However, nothing is much more hokey than having your own shadow clearly visible in your photo. Apart from finding some good shade, the first thing you can do is adjust the settings on your camera. The point and shoot cameras will likely have a setting for the bright sunlight and that's when you should use it. The digital cameras today automatically correct for white balance, which used to be a matter of film speed back in the day, and unless you've specifically made manual adjustments to it, it will do so until you choose the settings yourself. If you still have a washed out photo that is over-exposed after previewing it, and you should be previewing them as often as possible so you can make the necessary corrections and take another one if need be, you can again stop the white balance button down, the one with the +/- sign, one or two notches and you'll see a world of difference. The white balance button is actually reacting to the color of the light temperature and is compensating for it according to the Kelvin Scale. Having neutral density and polarizing lens filters, and knowing how to change iso, aperture and shutter speed settings will be invaluable for those conditions of intense sunlight. Knowing how to adjust those few settings will make all the difference in the worst of lighting situations. Otherwise, shooting on automatic is a matter of choosing the pre-set conditions that are programmed in for you and is a matter of sometimes adjusting the white balance a notch or two. Oh, one more nuisance you often need to contend with is the possibility for lens flares. A lens hood of a long enough length will eliminate flare. If you have none, physically shifting your position in relation to the sun will also eliminate flare. When you can, place an object between you and the sun to block it. Sometimes the rays of light surrounding an image is a dramatic element of the composition. You can often shoot in bright light using only one hand because the chance of a blurry photo is greatly reduced because of the fast shutter speed and small aperture settings, so use your free hand to shield your lens if need be. Of course, if you have a long lens, and the better lenses are often much heavier, you might find it too awkward, or, not even doable to shoot without supporting your lens at the same time, which is another instance when a tripod is needed. I've thrown a towel over my head with one arm supporting it before too---trust me, this works much better with a tripod. Use what you can to shade the lens from flare just make sure it's clear of the shot. In the case of your family or portrait shots----you can always move inside---and that's another story about lighting altogether!
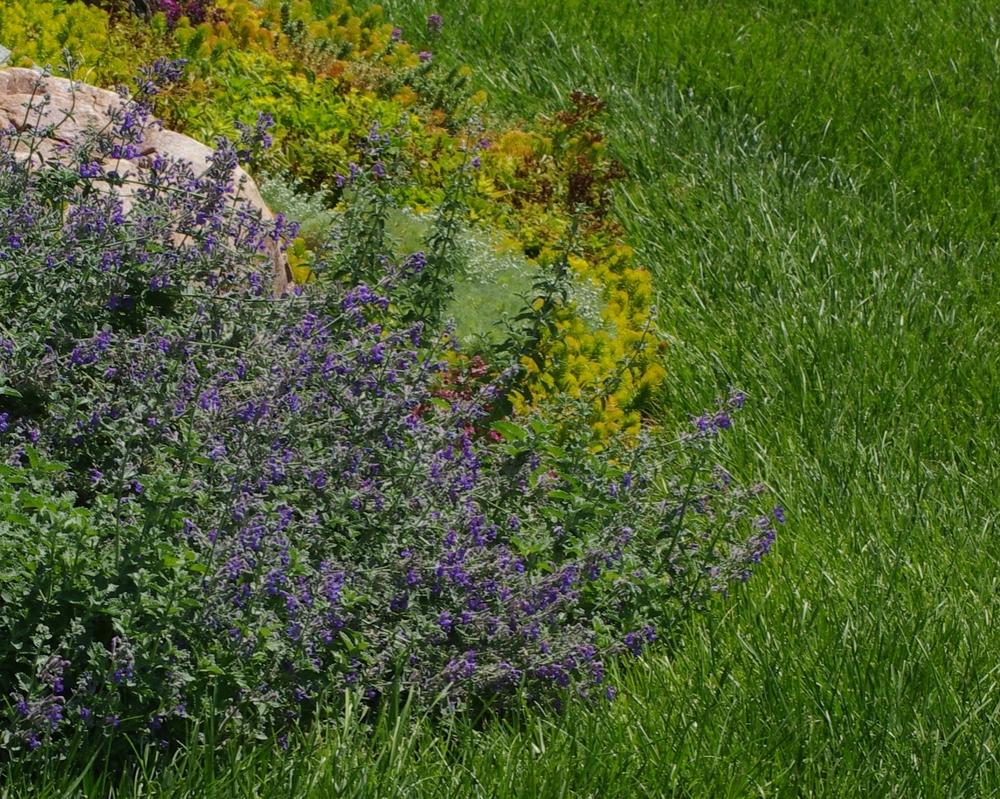
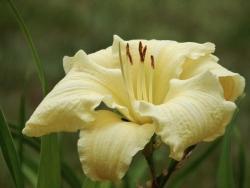
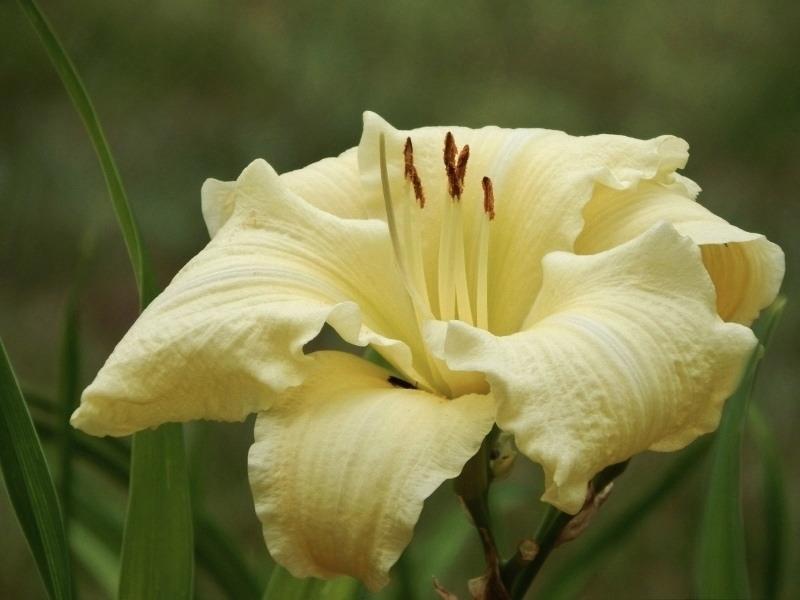
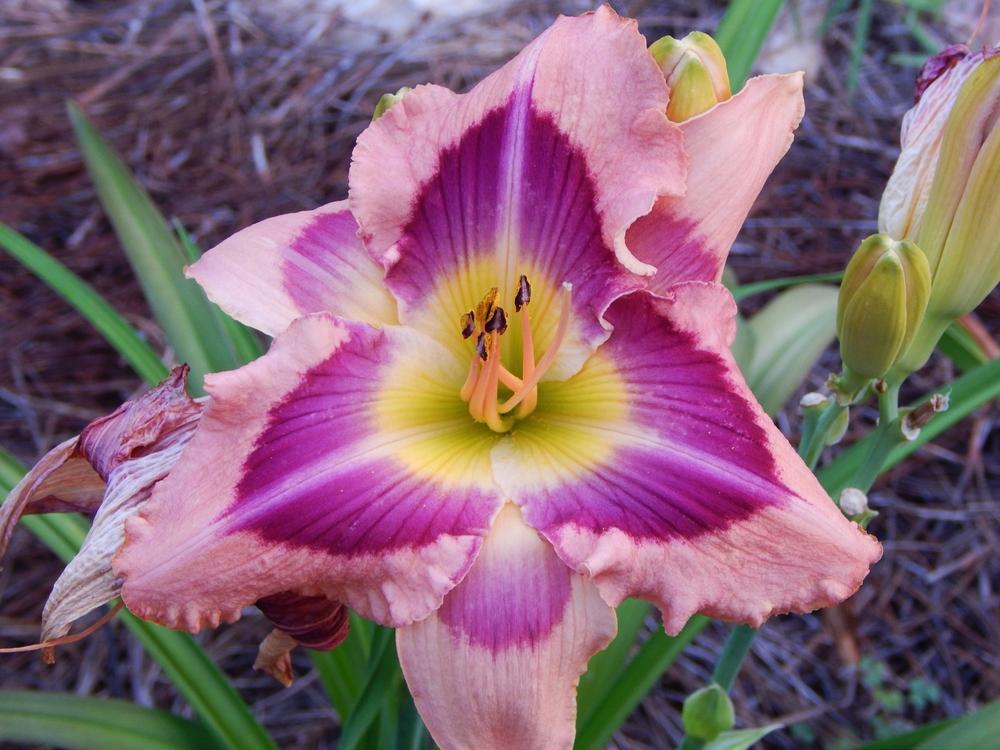
Another aspect of outdoor photography is shooting when the light is diffused. This is light of a different quality than either the very early blue light before dawn, the golden hours, or, the harsh light of direct sunlight on a cloudless day. This would be light that's usually absent any specific direction or strong intensity and is considered "soft light." The diffused light of a cloudy day with blue sky inbetween is pretty near perfect for photographing almost anything. Diffused light is also present on misty mornings and dark cloudy days when you can't find the sun and there's no shadows to speak of. It can be grey/blue in color as well, though it does vary greatly depending on the amount of cloud cover, your location, the time of year and the time of day. Most subjects lend themselves better to this type of lighting than any others. If you're in to shooting low contrast, moody photos, like maybe early morning dew drops, or, pin point macro shots, then this is the light for you too. Unlike water drops, dew drops can quickly dissipate, so, before the sun is fully up and burns the mist away you can get some really good shots with a unique mood to them. Some may find the photos lacking any strong appeal, but, when you remove the element of contrast between light and shadow the subject and the mood becomes more important and you can still produce a strong composition depending on the way you utilize all the other elements of good composition. Actually, for photographs of individual blooms and flowers, diffused light is ideal and a great assest. Often colors are represented as more saturated and true in their rendering. Most likely, shadows will still be present though not nearly as stark as direct sunlight. You'll have more detail and excellent color renditions in diffused light. Auto settings work very well in that lighting.
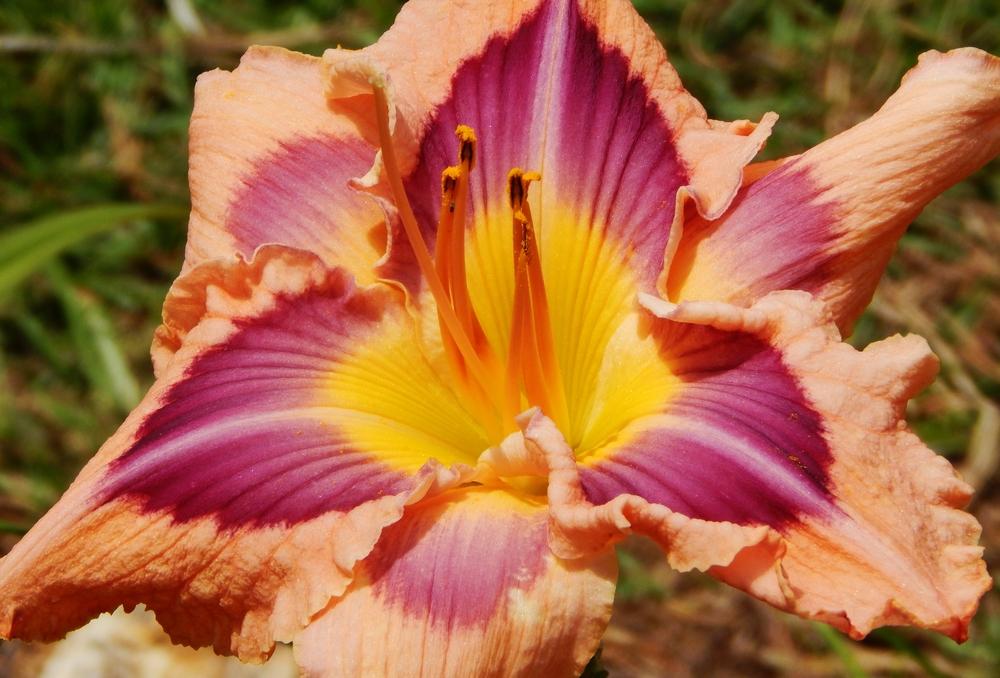
I've included an example of mine below using the light of a foggy morning in May to photograph the daylily, Tuscawilla Tranquility. I thought it was appropriate for the name of the daylily as well. It seems to me it does look very tranquil. The one thing I would have changed is the distance I zoomed in on the subject leaving more space leading into it. If I could have cropped it just a bit more off center I would have liked it even more, but, I had no room to do that because I was zoomed a bit too close to begin with. I think it's still a good photo because of the lighting, the bokeh and the tranquil mood it sets.
In the absense of strong light and shadow you can mimic contrast by playing off the natural areas of positive and negative space in the composition or by using light and dark elements within the composition to compensate for the absense of direct sunlight and natural shadows. We'll talk more about negative space and it's relationship within the composition in future tutorials. In the situation of diffused light, you can always introduce additional lighting by way of artificial light sources. Flashes, relectors and basically anything that can reflect light will aid in lighting your subject if need be. I would first try to work with it instead of against it. Just remember that the less light available to you, the longer the aperture will be open and the more chance for blurry photos. If the grey mood of an extremely cloudy day presents itself, choose a subject that lends itself to those conditions and fire away. Try using reflectors to bounce light onto your main subject rather than pointing your flash or lighting directly at your subject. If you have a removable flash you can twist the light to point straight up, to either side, behind you and often even fire it off camera with a remote control. For the most part, though, the diffused light of cloud cover is a blessing to the photographer, apart from the rain that sometimes accompanies it that is. Try using diffused light as often as it presents itself in different ways and to varying degrees and see if it doesn't suit most situations very well and sometimes even capture a very different mood in your photographs when the sun is hidden altogether.
As I said, many books have been written on lighting as it effects the artist and photographer and I've just barely scratched the surface here with a few variables. I've posted what I've written so far so as not to overload you with a lot of reading at once. There's so much more that can be said about lighting and I'll no doubt just integrate it into the content of my other tutorials as it comes up. I won't be getting into indoor lighting unless there's an interest in it after the tutorials on composition are finished. I want them to be pertinent to photographing "All Things Plants" for the most part. I'm flexible though and we'll see how it goes!
A quick bit of interesting information to file away. The "color temperature" of light was standardized by a British physicist in the 1800's and is consequently named after him. The "Kelvin Scale" is so called after William Kelvin and it basically assigns a number in centigrade to light going from those we call cool colors, or, the blue end of the scale, which is a chart, to the warm colors, or those on the orange/red end of the scale. If you can imagine the blue tint of ice and snow as opposed to the color of the sun and fire, you'll have the warm/cool principle down, well, with the exception that your impression of temperature as it concerns true color temperature is backwards. The warm colors are representive of the lowest numbers while the cool colors are the highest in temperature within the Kelvin Scale. There are color meters available to measure the value of light using the Kelvin Scale of the color temperature. So remember, the low temperature of light would be the warmer colors while the high temps would be the cool colors. Being "blue hot" is hotter than being "red hot!" I can't say I honestly understand it, I'm just passing the information along to you. There's entirely too much that can be said about light, but, for now, that's all she wrote!
Thanks for tuning in!
The photographer I think is a genius and master with lighting is a world class wedding photographer by the name of Jerry Gihonis. You can see his portfolio on his website here:
http://www.jerryghionisphotogr...
and here:
https://www.google.com/search?...


 pre-sun
 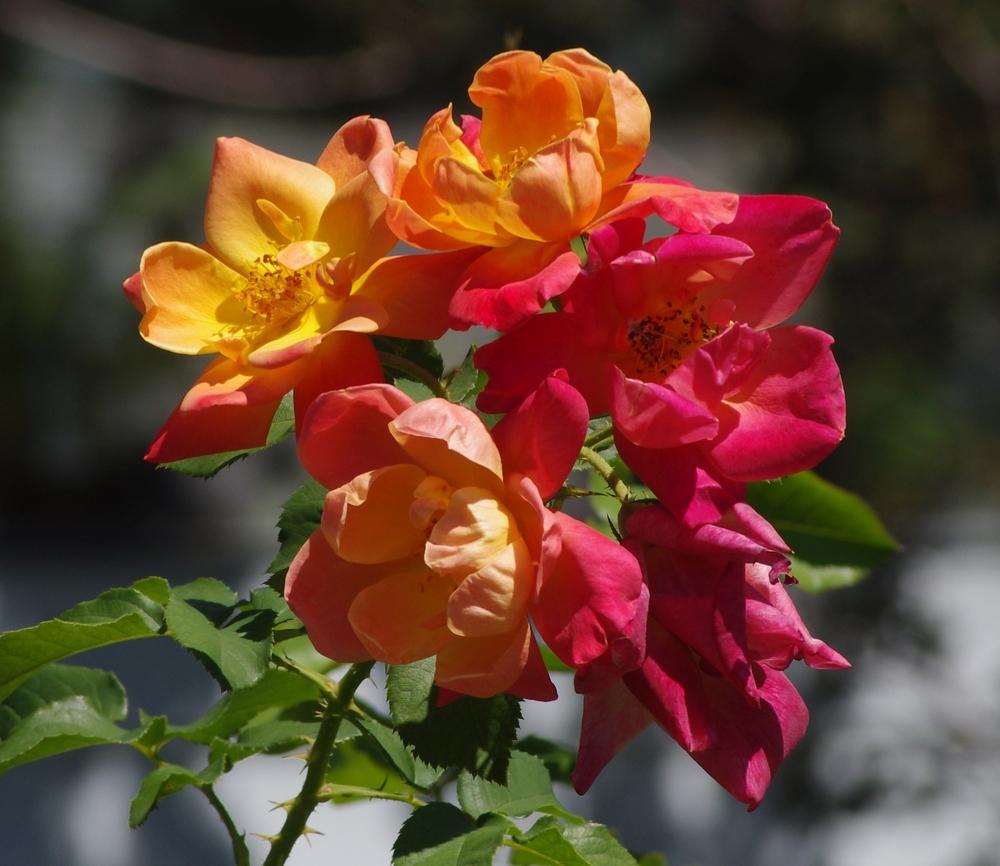 sun
sun