
 Seed sowing actually began about two weeks ago, when I started prepping pots, trays, and seed starting materials.
Step #1 - Recycling Old Potting Mix(es)
I almost tossed all the old mixes, until I remembered it doesn't matter what I start the seeds in, as long as it's sterile enough to get them going. The Roots Organic (RO -my seed starting mix of choice) will have given up its nutrients, but, I'll be watering with the Mittleider Magic Minerals "Constant Comfort" formula for seedlings, which will provide more nutrients than fresh RO. So, set your old potting mixes aside for step #5.
Step #2 - Washing Pots, Trays, & Tools
I fill a large Rubbermaid tub with boiling hot water, a couple good squirts of Lemon AJAX Dish Detergent (don't want too many suds!!!), couple splashes Lemon Clorox bleach (about a cup or two), and a couple splashes cheapy mouthwash (about 2-3 capfuls -- I like the BLUE ones from the Dollar Store, any cheapy brand). Such a Heavenly smell for such a "dirty" job, makes it absolutely pleasurable. Clean and disinfect in one motion.
Best to do this outside so the fumes won't intoxicate you -- been there, done that, LOL! And, because of the bleach, it is very important to wear some long household cleaning gloves -- I totally forgot, and burned the knuckles on my hands -- not fun...

Hit everything with a blast from the hose first, to loosen the dirt (like washing your car...), then put it into the hot water to soak for awhile (boiling water will kill anything alive at that point). Then, add just enough cool water to make the water warm enough to work with, and wash everything with an old washcloth/rag. Rinse well with the hose, and lay as much as you can out in the sun to air dry.
I complete this process on my driveway.
Then, sort and stack your trays and pots neatly in your potting area, where they'll be ready when you are. Ideally, you should complete this process immediately after you transplant the seedlings out. The potting mix will rinse out very easily at this point, and not harden in your pots. And, do it sooner than later, cause there's no feeling like, "uggggh, it's time to plant seeds, but I gotta wash everything first!"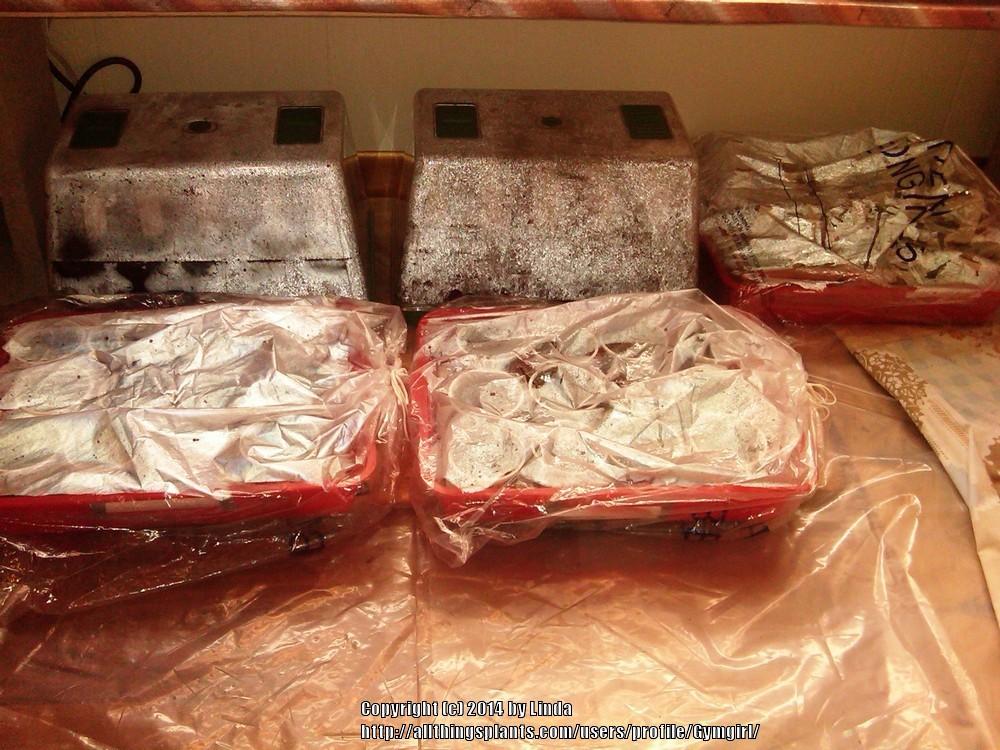
Step #3 - Greenhouse bags
I collect all the #drawstring bags from the trash bin when I go for my annual mammogram. These are the ones they give you to store your belongings in for 15 minutes while you take your exam. I shove the seed trays in them and poke air holes in the top. As soon as the first seedling declares, off come the baggies. FREE greenhouse material...
Step #4 - #Plant labels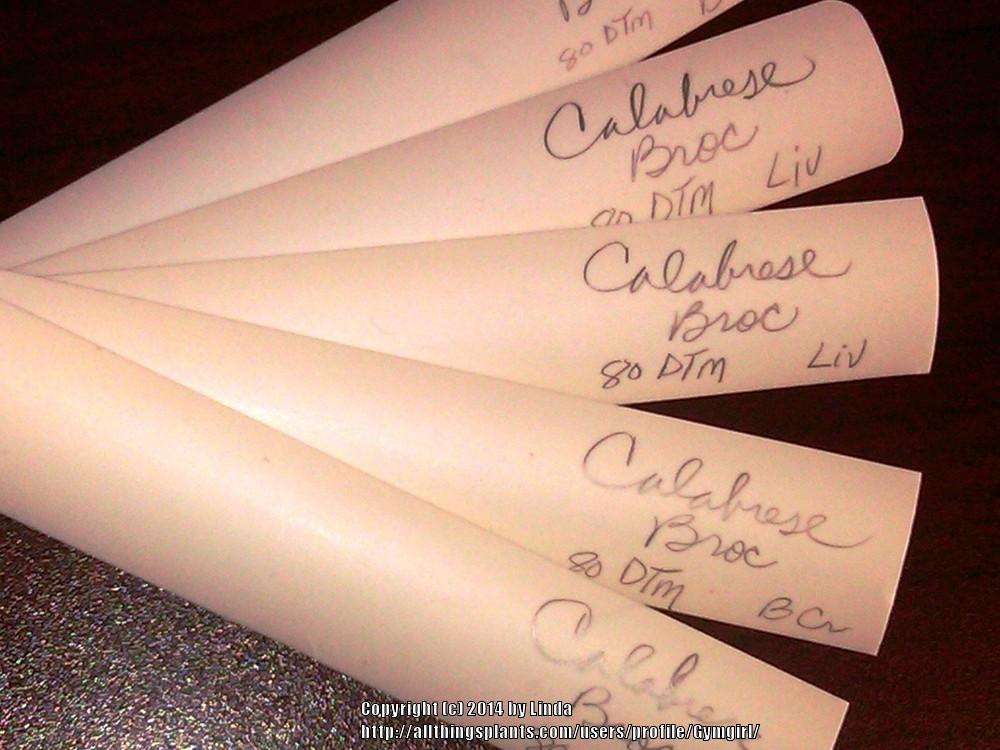
I use 3" to 4" pieces of vinyl Venetian blinds, and a sharp pencil. Label with the sowing date, days to maturity (DTMs), the expected harvest date, and the seed supplier name and germination date (for keeping track of how old the seeds are). Make sure the pieces do not stand higher than 1" above your soil, or you won't be able to lower your lights toward the seedlings (I keep my lights no higher than 1-2" above the seedlings). The pencil graphite will erase easily, however, the writing will not come off easily. You can scrub it off with some abrasive cleanser.
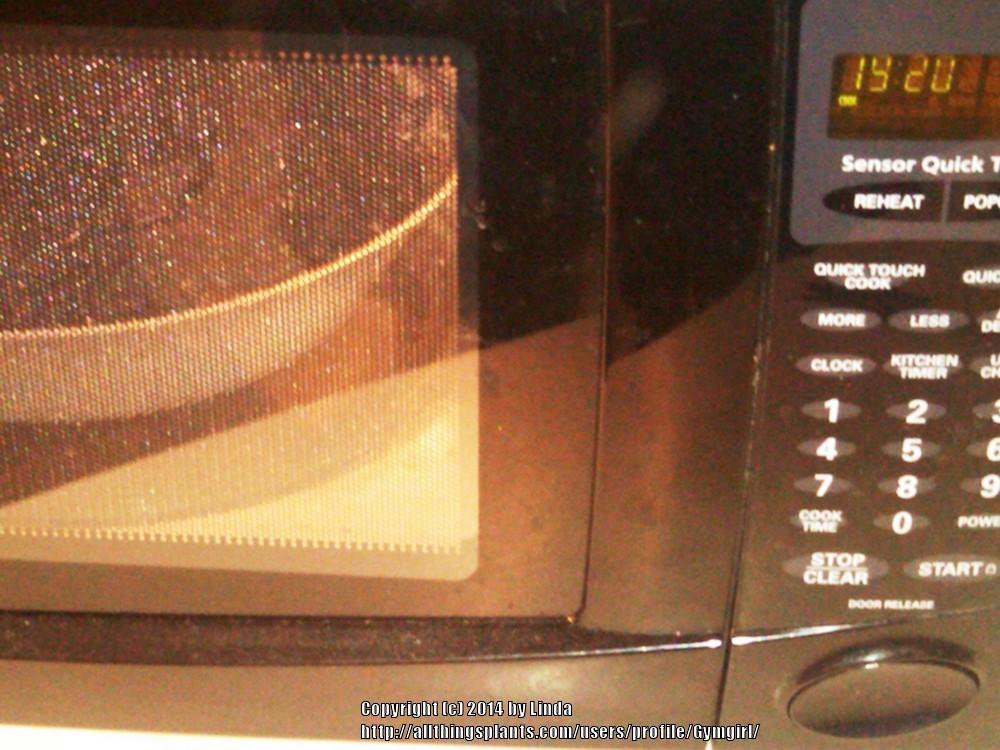
Step #5 - #Sterilizing Potting Mix(es)
I'll be running batches of old potting mixes through the microwave per my process found here: http://garden.org/blogs/entry/...
Just read some old blog posts from (2006-2007) when I was an absolute NEWBIE.
I just shook my head, because I could see where I was making mistakes, and where I was right on point in the gardening process. And realizing just how beneficial keeping a blog can be. I made some good notes about tomato varieties I like, and had almost forgotten some. So, I'll post them here, because I'm beginning my blog, again. I'll make sure to be diligent about posting at least once a week.
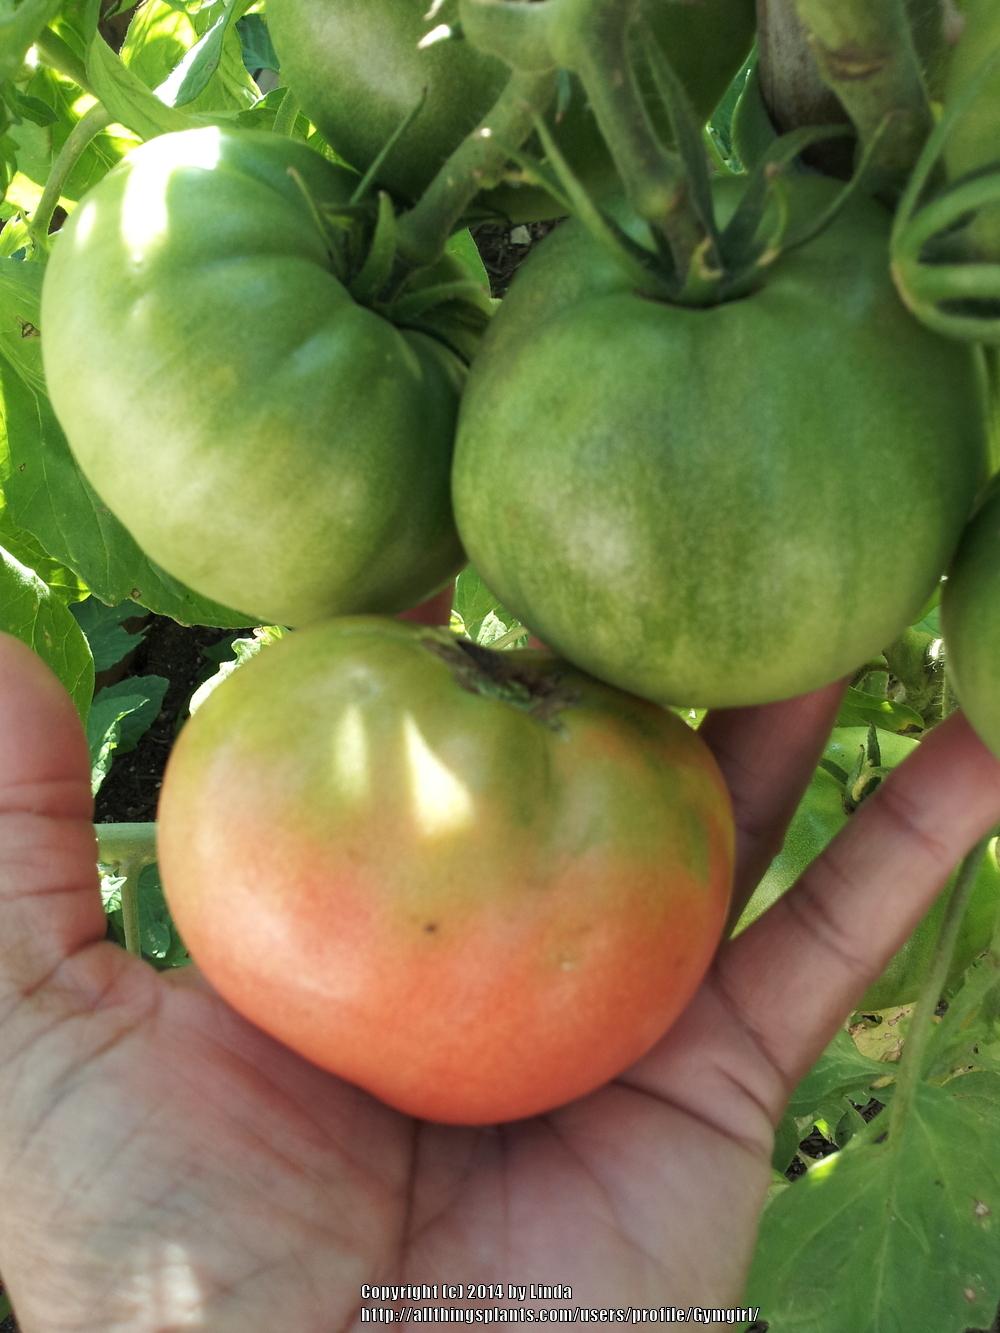
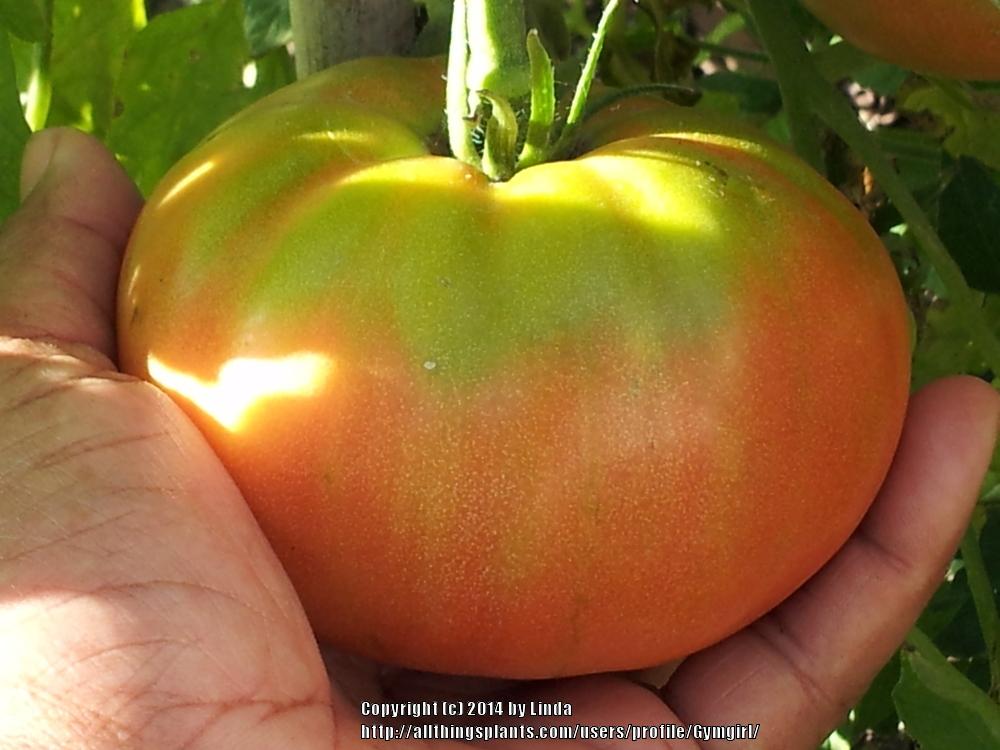
So far, these are favorite tomato varieties I have grown:
►PRUDEN'S PURPLE: My favorite! A keeper.
►BLACK KRIM: (prone to BER). My 2nd favorite!
►SIOUX (NOT Super Sioux). Cranks out in the heat like nobody's business! A definite summer producer!
►ARKANSAS TRAVELER: A keeper, and a long producer (almost completely through to the end of September)
►MOMOTORO, Japanese Hybrid: Beautiful red globes, and I LOVE these!
►EVA PURPLE BALL (clusters).
►CHEROKEE PURPLE: A keeper.
►BRANDYWINE SUDDUTH. Managed to eat about 3 of these, but not sure which they were. I believe they were huge, red, meaty and juicy, and I LIKED them a lot.
►BEAUTY BEEFSTEAK. Beautiful red globes, larger than the Momos.
►MORTGAGE LIFTER.
►MULE TEAM
►VIRGINIA SWEETS. Look like miniature pumpkins, and very challenging. Will keep trying to get a decent harvest of these.
►BLACK CHERRY. Had bad seeds and didn't produce. Will keep trying.
These I will not grow again:
►PERSIMMON: Better than the Azoychka, but I'm still not fond of the yellows.
►AZOYCHKA: A stinkbug magnet!
►STUPICE: The fruits are a bit tangy for my taste buds.
►CHINESE YELLOW. Never did get any fruit.
►SUN GOLD. Not fond of them...
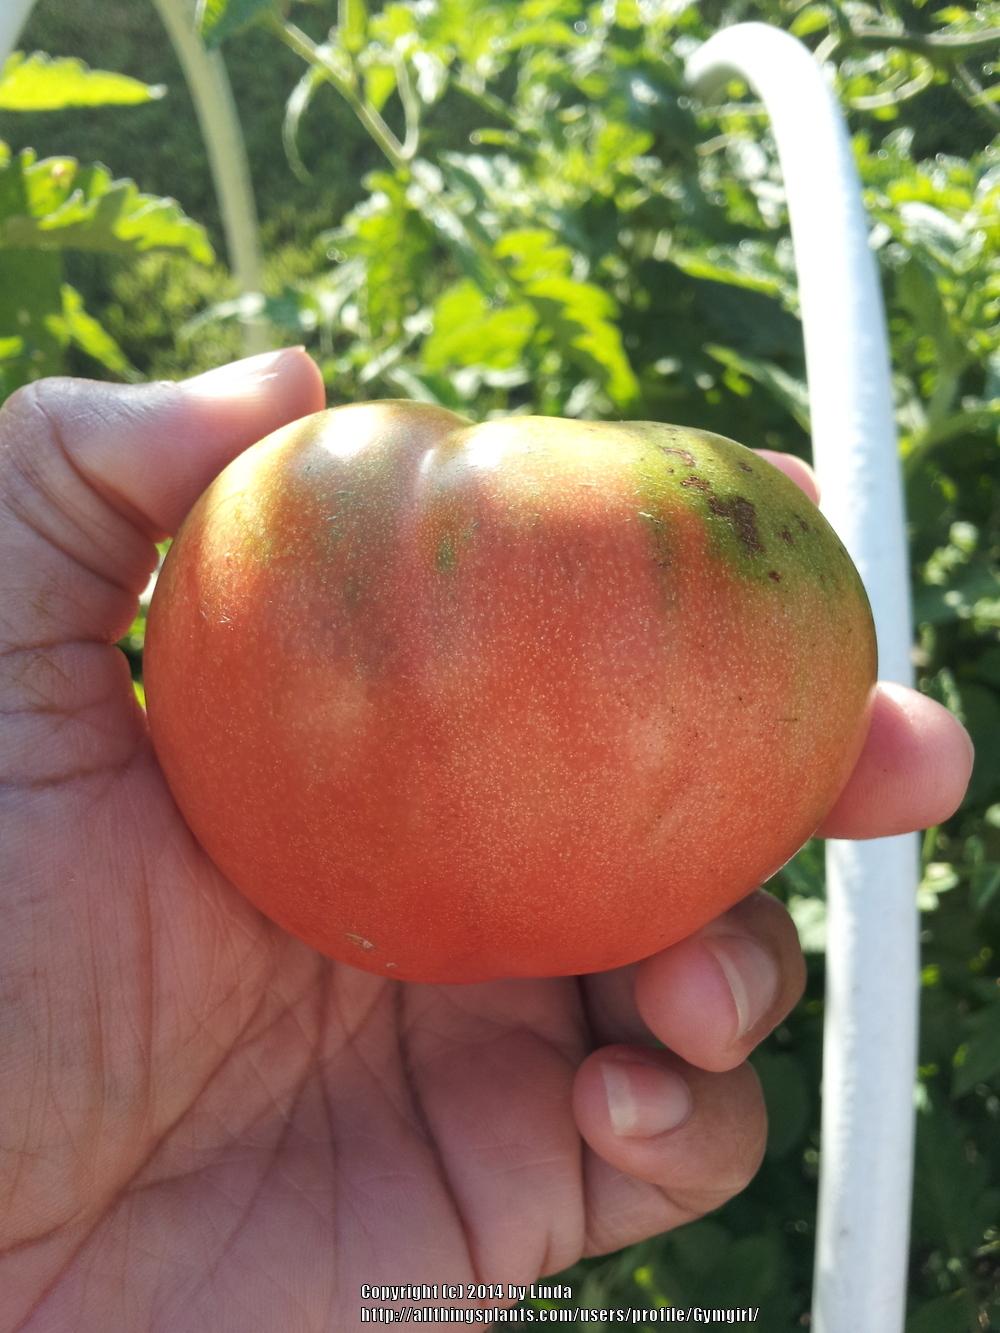
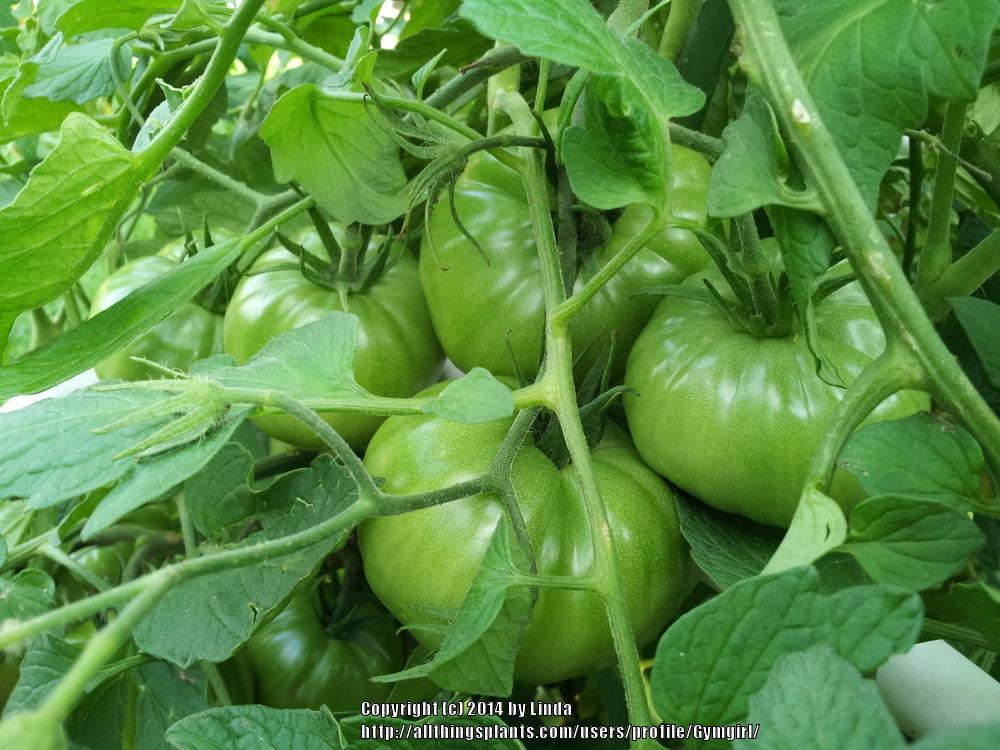
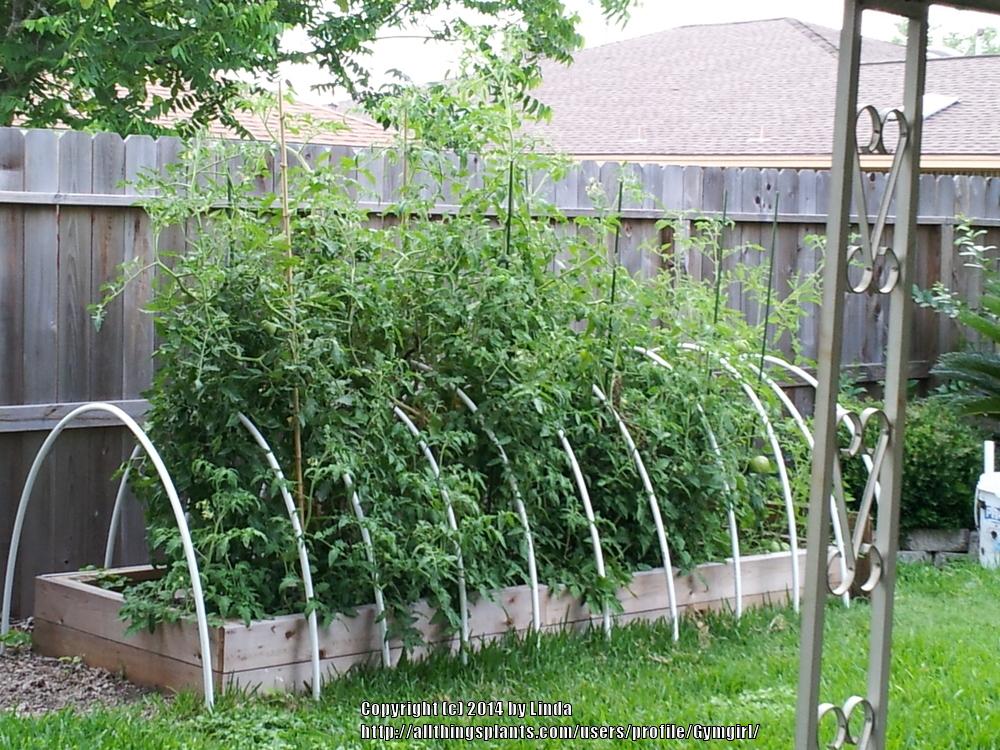
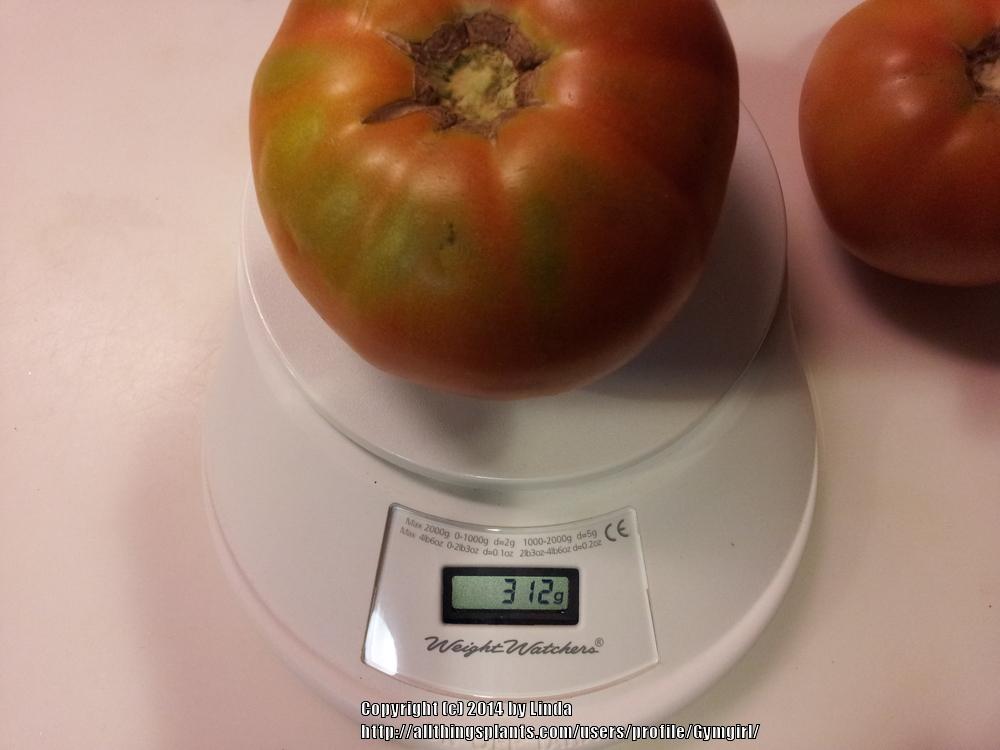
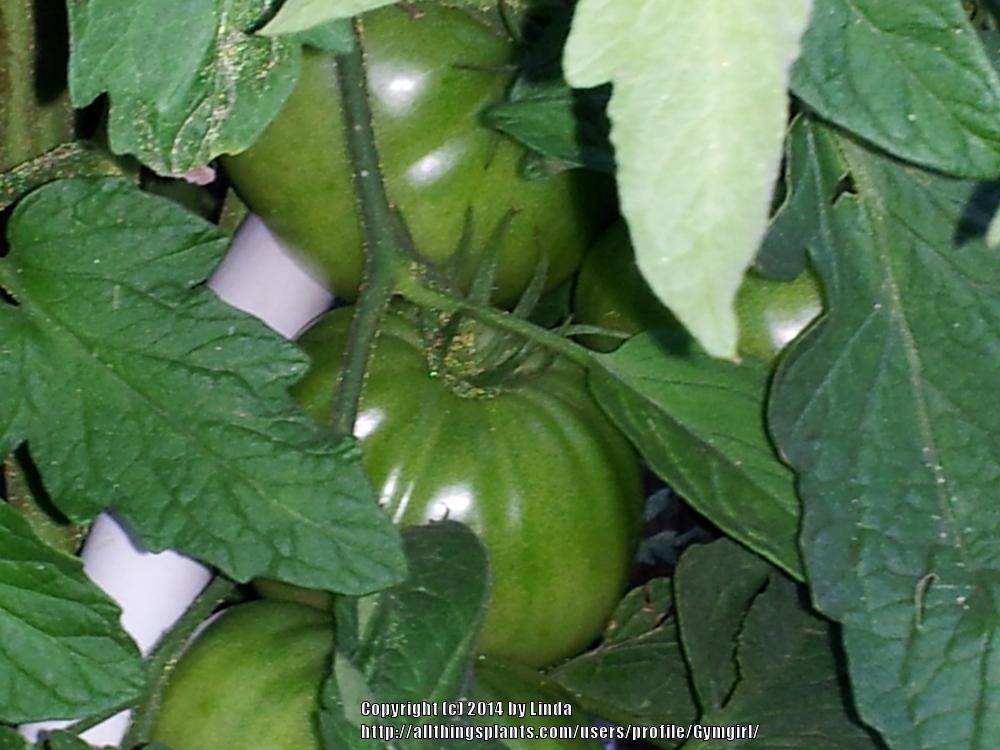
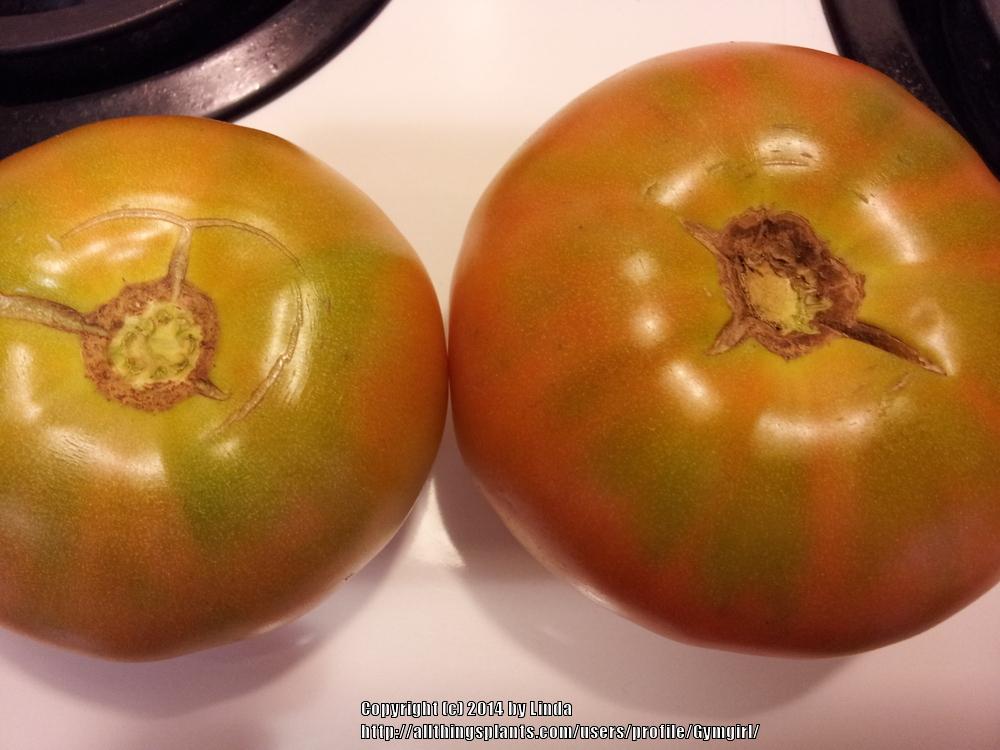
The following are images of where my 2013 Spring/Summer garden was by early May. The tomatoes were already ripening, after a transplant out the 3rd week of February. Planting the long-season, beefsteaks out early enough, and having frost protection contingencies in place was the key. Used Mittleider Weekly Feed once a week. The plants were done (actually, I was done) by the end of June...


Well, the bucket garden is cranking up!
I raced out this morning, 'cause I hadn't watered since Sunday, expecting to pull the hoop cover and see drooping plants. However, we had a major rainstorm yesterday, and either the wind was blowing rain into the hoop, or there are more holes than I thought in the plastic. Either way, the plants were damp. The temp today is in the high 50s - mid 60s, with sunshine, so I left the hoop off. My main reason for putting it up was against the whipping winds. These plants will be fine in temps down to the mid-30s.
I've upped the MG Water Soluble plant food solution to a full, heaping teaspoon per gallon/water, and pour one full gallon on the larger plants, and about 2/3 of a gallon on the smaller ones. Then, I'm following with a straight water chaser, just until run-off. Ran out of time to follow with the water this a.m. (I finally figured out what coveralls can REALLY do...), but since the soil was already damp, I think they'll be ok without the chaser.
My cabbages are growing fast now! Heads have formed on most all of them, and they're starting to look like cabbages! I figure I should be pulling at least 3 in the next two weeks or so.
Still haven't put out the Snowball Cauliflowers I rescued from the rainstorm we had 3 weeks ago. They've been inside under lights long enough, and look like a bouquet of artificial greenery. Their recovery has taught me even more about when and how much MG fertilizer is necessary, and when they should get straight water. Fascinating!
I'm a bit concerned about my broccolis, though. I read somewhere that if they don't make a flower?? it means they won't make a head??? I have several with really strong stalks, almost a quarter-size in diameter. They have great leaves, but I haven't seen evidence of a head yet, on any one of them. I'll be watching!<img style="float: right; margin: 5px;" src="http://garden.org/pics/2011-12-15/Gymgirl/ecbbd8-250.jpg" alt="2011-12-15/Gymgirl/ecbbd8" width="250" height="250" />
The Brussels Sprouts are beefing up, too, although I know I shouldn't expect anything from them for the next 3-4 months! I can hardly wait for sprouts.
Finally, either the Bayer Complete spray or the Garden Dust liquid I sprayed for the cabbage worms kicked in, or one 'a those nighttime dips chilled them, 'cause I'm not seeing any freshly chewed holes in anything lately. And, that's a good thing!
Godspeed, and Good Harvest!
If at first you don't succeed, do it over, 'til you get it right....

So, Saturday was spent de-constructing and moving all the plants from the bucket pad. I purchased a roll of weed block, and, since the weed block pegs cost $5 for only 20 pieces, I decided to make my own, and save the $5 for something else -- like the Thuricide I needed to spray for the cabbage worms (I love shifting money...). So, I raided my closet of all those excess wire pants hangers you get from the cleaners and made my own. And, my co-workers are bringing me all their excess, so I should end up with a lifetime supply!Since I had hastily constructed the hoop to protect the plants from the blustery winds, I realized it needed to be redone, properly. And, more importantly, there were more tall plants underneath that needed staking....
First, I put down a layer of thick, heavy carboard (salvaged office furniture delivery boxes), followed by the weed block tacked down over the cardboard with the homemade wire hanger pins. The bucket patch sits on bare ground, and I dont want the fertilizer run-off to encourage weed/grass growth there. When the buckets are gone, this will be my primary raised bed site!
Then, I reassembled the hoop. For those who don't know it, making a PVC hoop is a piece 'a cake! Takes all of about 15 minutes to assemble, once you have your anchors cut and the sides of your hoop marked parallel on the ground.

Chose your PVC pipe diameter. Buy Schedule 40, and make sure the inside diameter (ID) is the THIN walled kind. Put some outside diameter (OD) next to it to compare -- the OD PVC has a thicker inside wall -- I couldn't figure out why one rib wouldn't fit over the rebar I had pounded into the ground...until I looked inside and realized I had indavertently bought a piece of 1/2" outside diameter. The thick inside walls wouldn't slide over the rebar...duh...
Purchase one 10' length of 3/4" Schedule 40 diameter PVC pipe from HD/Lowe's ($1.18-$1.44/pc.), and cut it into 12" sections (anchors). These will be pounded into the ground, 12"-14" apart on each side of the hoop, along your parallel line. Then, purchase your "ribs," 10' lengths of 1/2" Schedule 40 PVC which will be bent over and slipped into the anchors on either side.
Now that I'm thinking about this, when I need another hoop, I'll probably buy the thicker walled 1/2" OD PVC for the ribs. The one piece I have bends just the same, but would give a little more rigidity to the entire structure. And, like in the collage pic below, you could add a central berm for even more stability. When I have time, I'm going to install a berm down the center of my hoop using bolts. Remember to install the bolt pointing toward the ground, so it doesn't poke through your sheeting! The top right and bottom left shots in the collage are my very first hoop attempt. I didn't have plastic and was in a hurry, so I just threw the sheet over the eBuckets pictured. The plants were fine overnight in 30 degrees.

In my new location, I discovered on the fly how hard my ground is, and I was in a hurry. So, instead of sinking the PVC anchors, I just pounded in 12" sections of rebar, and bent the ribs over the rebar. Either way works, but you have better control over how deep you sink your ribs by slipping them into the anchors. Use plenty of LARGE bulldog clips to hold your covering in place, so wind doesn't blow it away, and rain/snow won't make it sag! If you don't have the 4-6 mil contractor's plastic, you can use old sheets, or lightweight blankets.
Territorial Seeds makes a lightweight, perforated plastic sheeting that is mighty handy, letting in rainwater, air, and ventilating the plants on the sun-shiney days of winter, so the heat doesn't build up inside. You don't have to take it off and on when it gets warm outside. It works great for tunnels low to the ground. But, I'll have to go a different route, however, since the plastic isn't wide enough to cover my existing, tall hoop. So, while I'm sitting in front of the TV, housebound on the rainy, dreary days ahead, I'll get a fresh/clean sheet of my 4 mil contractor's plastic, and a hole punch or a soldering iron, and make my own holes!
Godspeed, and Good Harvest!
 Yesterday, I raced home to construct my hoop over the bucket patch. Winds were gusting at 30-35 mph and ALL the broccoli and cabbages and Brussels sprouts were leaning in one, wind-blown direction! And, temps were supposed to drop into the mid-30s overnight (which was NOT as problematic for these cold-lovers as the whipping winds was).
I usually pound 12" sections of 1/2" PVC pipe into the ground, but that was taking waaaaaaay too much effort in dry soil. So, I pounded in 12" pieces of rebar instead (much quicker), and bent my 3/4" PVC hoops over those.
About 7 Broccoli plants were too tall, so I just moved the buckets underneath the patio cover for the night. I love the portability of my bucket garden!
All was wonderfully fine this morning, and the plants under the hoop are righting themselves. Last thing I had to do was roll up the ends to vent the hoop, so too much heat doesn't build up underneath. The sun is out shining brightly right now, and I don't want fried veggies on the stalks!
On another note: I seemed to have missed all the important roots when I drove the 5' stakes in -- the Broccs are doing fine! But, won't do it last minute again!
Godspeed, and Good Harvest!