
Cabbages are really, really, really forgiving...they have to be, with as much abuse as mine have suffered since sowing seeds July 30th...
Early Jersey Wakefields came up in record time, 3 days from sowing, and grew beautifully under fluorescent lights. I put them out for hardening off about three weeks ago (maybe?), and that's when the abuse started, because they've been swooning and fainting in the heat, while I've been waiting for cooler weather to set them in the ground....
Unfortunately, it has remained so warm here I was reluctant to set them in all the heat, just in case I needed to bring them in again (not...). We had a brief cool spell last week, and they felt it. I could tell how they started perking up. But, it was short lived, and only 5 plants got set on Monday, September 29th.
This morning, I checked the 8 others still growing in 6 oz. yogurt cups, and those cabbages were standing at attention, and looking simply wonderful! So, I will set them tomorrow, and do much better by them.
Next season, I will NOT, NOT, NOT sow seeds indoors any sooner than 6-8 weeks before October 15th...It's just not worth it to hold the plants that long, waiting for cooler weather...
Let's not even discuss the ratty broccoli seedlings.....
Friday, October 3, 2014, I soaked three varieties of #beets to soften the shells and speed up the germination. I chose Detroit Dark Red, Chioggia, and Bull's Blood for this season. Last year I tried some "Golden" beets, but was sorely disappointed with that variety. It was waaaaaaay more mild than I expected, with hardly any taste at all. I decided I like beets that taste like beets, LOL. I especially need them to have a bold, robust flavor for the canning process, since I LOVE spiced, pickled beets! Seems like most of the men I know have a secret love affair going with beets, too, but don't get them much because their wives don't like them! Go figger, LOL!
Anyhow, I'm growing a boatload of beets for canning this season...
I used 6 oz. wide-mouth yogurt cups (HEB brand) filled 2/3 full of water. Then, I added one capful of Hydrogen Peroxide to each cup, and dropped in the seeds.
Within 48 hours, I saw little white nibs peeping out from the seeds!
Sunday, October 5th, I used a tweezer to capture seed pods and set them on top of the MG Potting mix in individual yogurt cups. Since most of the pod clusters had separated already, I was capturing only one plant at a time, versus the 5-6 that come out of one unsoaked cluster. So, I carefully placed 3 nibs on top of the mix in each cup, covered them lightly with some fine sand, and misted them with the hose sprayer.
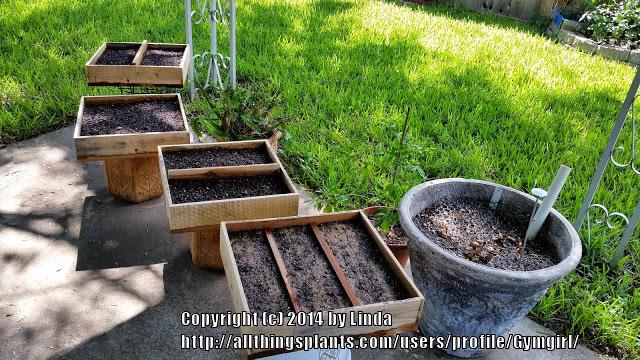
I set the flats of cups on top of the raised bed where they'll be transplanted in about another week.
I'm still here...Here's what those seed flats below looked like this past Sunday morning, November 9, 2014. 
It's been 41 days since I constructed and seeded the flats. I've been waiting, and waiting for them to take off, and, in the process I learned yet another lesson, regarding temperatures and the fall/winter crops. Observation: It does not matter how soon you sow those seeds in the fall -- they will not really take off until the ambient temp drops to at least 65°, and the soil cools off. I saw it with my own eyes, overnight.
Last week, it rained really hard on Wednesday, and the temps began to drop. By Saturday, the temps had dropped down to 48° overnight. From Saturday evening to Sunday morning, those seedlings grew a whole 1.5"! And, with the nighttime temps averaging in the mid-50s now, they have put on phenomenal growth in just a few days.
Moral of the lesson: Save your water, your fertilizer, and your time. Get everything prepped and ready to go. But, don't drop those seeds until the nighttime temps average 75°- 60°.
Here're a couple more shots of what's growing in the seed flats.
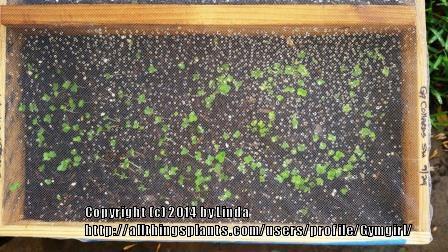
[Photo LEFT] Red Creole Onions (left half of flat) and Red Grano Onions (right half of flat). These will be transplanted New's Year's weekend, in an 18"x15', sunny bed on the north side of the yard. Observation: The Red Creole seedlings are more robust than the other onion seedlings. These declared first, grew the steadiest in the daytime heat, and, they're beefing up faster than the other two varieties being grown.
[Photo RIGHT]
Texas 1015Y Onions (bottom flat in pic)
[Photo BELOW]
Blue Stem Georgia Collards (bottom flat, left half),
Georgia Collards (bottom flat, right half)
Buttercrunch Lettuce (top flat, left half -- right half didn't germinate at all...).  Observation: There were at least two little fuzzy caterpillers making their way throught the flats of greenery, chewing holes in the seedlings. However, there is NOT ONE HOLE in the Buttercrunch Lettuce tray! Something to think about next time, cause this lettuce is gorgeous! The leaves look like lime green lamb's ears. Can't wait for them to grow up so I can taste them (first time)!
Observation: These greens and lettuce seedlings definitely will not grow in the heat. As soon as the weather dropped, they took off! These will all be transplanted into RB #3, which sits along the northwest corner of my yard. Bright daylight (no direct sunlight -- they don't need too much sun...). I've been giving them a regular sprinkling of bloodmeal for an added, slow-release hit of nitrogen, and using the Mittleider Weekly Feed once a week.
All in all, I am very glad that I constructed the seed flats, and, I intend on making many more. It was much easier to seed the flats and keep them outside to grow on, than have them indoors under fluorescent lights. As I improve my gardening skills, I am making better decisions about "how" to do "what". Since these seedlings thrive in the cool/cold weather, they don't require the kind of attention tomatoes do, regarding fluctuations in temperatures. This was "set it, and forget it - 101!" I will definitely start certain of the cole crop seedlings outdoors in the flats from here on.
 I will, however, continue to sow the broccoli, cabbage and beet seedlings indoors, in the cool. I usually set them out at 8 weeks from sowing, which means they get started while it's still too hot outside. I have a better handle on the sowing timeframe, though, if this season is any indicator. This first wave of broccoli (right) was sowed on August 30th, and, they are just now taking off in the cool, but growing very, very fast. It doesn't take long for them to catch up when the temperature is right!

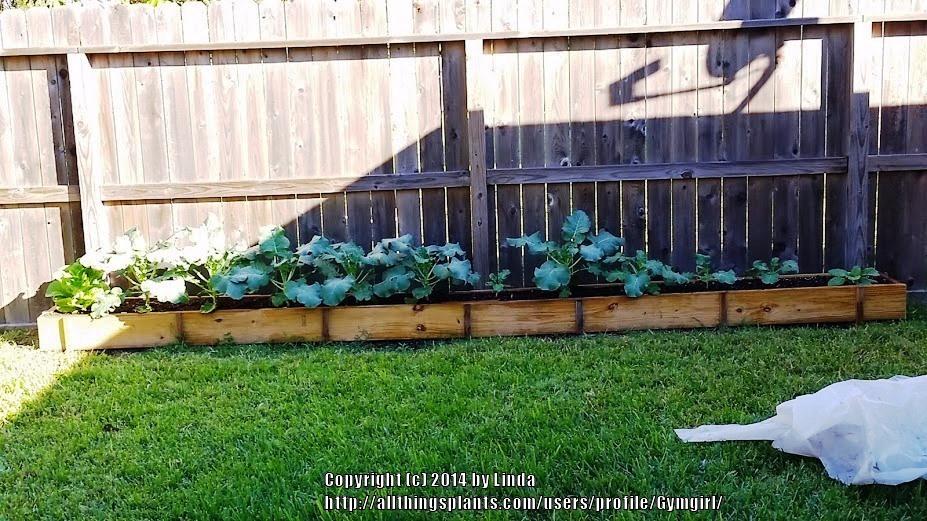
[LEFT] Transplanted beets and heading Early Jersey Wakefield cabbages. Next season, I hope to stagger the sowing dates: 8/30, 9/30, 10/30, 11/30 and 12/30.
If I stick to the sowing schedule, I should harvest broccs, cabbages, beets and collard greens from 11/30/14 through 03/30/15. By then, it'll be time to rip the cole crops and replace them with the summer crops.
These carrots (below) were also sowed on 09/29/14. I layered one-ply toilet paper on the soil, sowed lightly, covered with a thin layer of fine sand (can also use vermiculite), then sprinkled lightly with the garden hose on mist (see previous blog entry for method). The TP allowed me to see how many and where I was sowing. These need light to germinate, which is why I barely covered the seeds. They came up in FOUR DAYS! and, I haven't had to thin them!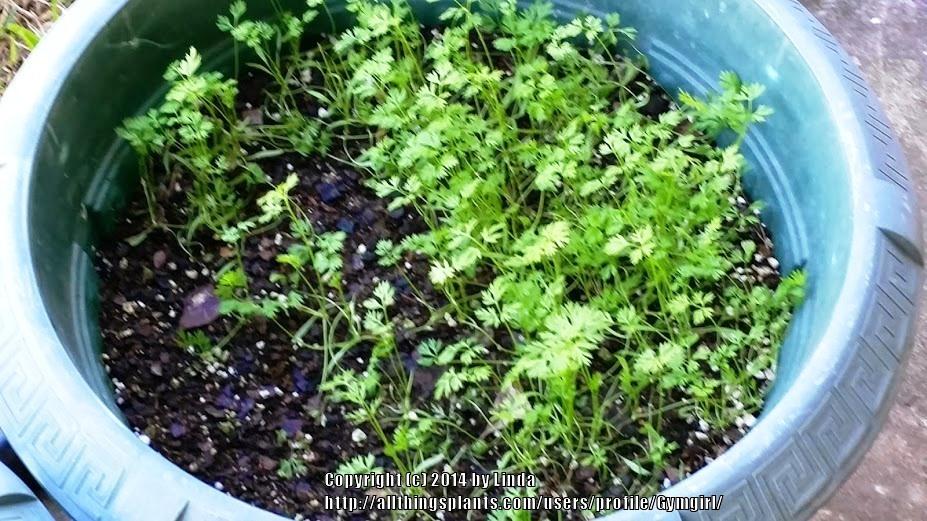


Observation: "I LOVE the fall/winter garden!"
It's been a minute, but, I'm back!
 On Monday, September 29, 2014 I was landlocked, since my car was in the shop for a major repair. SEED SOWING DAY!!! My plan was to sow #onions (Tx. 1015Y, Red Creole, Red Grano), #collards (regular Georgia, Georgia Blue Stem), #lettuce (Paris Cos, Butter Crunch, Romaine), and #carrots (Nantes Stubby).
 I started with a seed starting formula of Miracle Grow Potting Mix, with a sprinkling each of blood meal (nitrogen for the greens), Dolomitic lime, and the Mittleider Weekly Feed (WF). Once the flats were filled and leveled, I remembered something I've been seeing over and over in the back of my mind -- do NOT plant the seeds too deep!!!
 So, I sprinkled the seeds on top of the mix, lightly covered them some fine sand (the kind we fill the sand bags with...), watered them in with the mist sprayer on my hose, and set them under the patio cover.
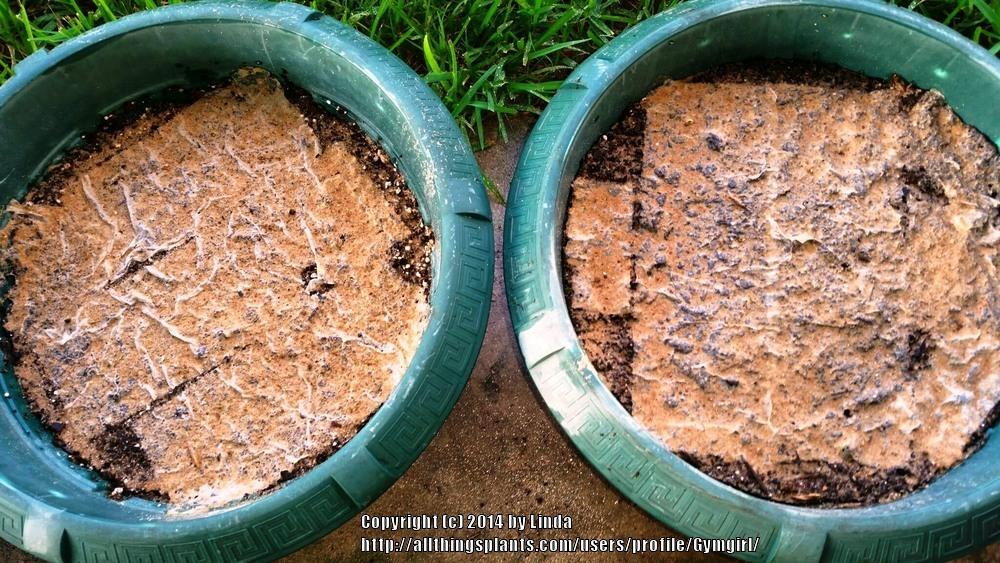 All the seeds were up by Wednesday evening, except the onions and carrots! The onions were up by Friday morning, and the carrots were up by Saturday morning, 10/3/14. I tried a new method for sowing the carrots, too. I pulled apart some two-ply toilet paper, and laid the single-ply sheets on top of the potting mix. Then, I sprinkled the tiny seeds onto the sheets. The white tissue helped me see where, and, how thickly, I was sowing, and it worked like a charm. I used the hose mister to moisten the top without disturbing the seeds too much. The last time I sowed onion and carrots seeds, it took almost 3 weeks for either of them to peep. I attribute this lightning fast germination to only one thing -- NOT planting those seeds deep. Lesson proven...
Since I live at Grand Central Station for squirrels, and have a stray kitty or two, I covered the seed flats with squares of tulle taped all the way around with painter's tape. The blue looks kinda kewl, LOL. The regimen has been a light misting each evening, to keep the soil evenly moist. So far, this has worked really well, and the seedlings are taking off with lightening speed. In fact, I've had to open two ends of the tulle to accommodate the height of the seedlings.
This morning, I started watering all the flats with the Mittleider Constant Comfort formula (which is just a diluted version of the Weekly Feed - 2 Tbsp. WF to 3 gallons of water). This weekend, I'll start moving them closer toward the sunlight, to toughen them up for transplanting in about two more weeks.
"Godspeed, and Good Harvest!"
Whew! It's been 10 days, but, here's my latest update.
I left off with harvesting and breaking down three (3) wooden pallets to make seed trays. Spent all day Saturday cutting the pallet wood into 17" pieces (cause most of the slats were less than the 18" I anticipated, so they were cut to the next most logical length...). Once assembled, each tray ended up being 17"x18" (cause I didn't account for the overlap on the ends, LOL!). And, although I could have staggered the overlaps and ended up with a perfectly square box, I didn't wanna have to keep up with the overlaps, LOL! (one in, one out, one in, one out...duh)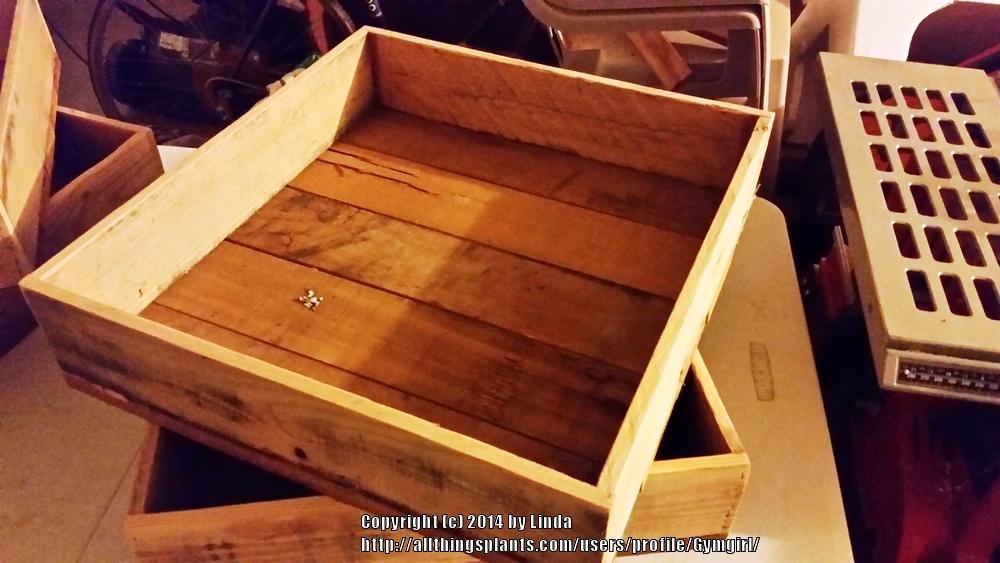
After I trimmed all the wood for the frames, I sorted it into piles that were the same thicknesses, since some pieces were lighter weight, and some was nice, thick lumber. Then I remembered I had to also have slats for the bottoms of all the trays, but I had already used most of the lighter weight pieces for the frames. I didn't want to use the thicker pieces for the slats. So, as I went back to the drawing board for an option, I spied all of the reclaimed cedar fence pickets I had lying around for other projects. Viola! The cedar was perfect slat material on several levels:

►First, it's more rot and termite resistant.
►Second, it's lightweight but sturdy (exactly what I was going for)
►Third, it was easy to trim to 17" lengths, without much waste
►Fourth, and most importantly, it was FREE, FREE, FREE!!!
So, I cut 5 cedar slats for each frame, and glued and pin nailed each tray together. First, I tacked on each end slat, then eyeballed the spacing between the remaining slats. It was very tricky shooting the pin nails vertically through some of the pieces without them coming out the sides, so, several times I had to remove a protruding nail and try, try again...
But, I did it! I made four trays last night, enough to start onion, beet, lettuce, and spinach seeds. 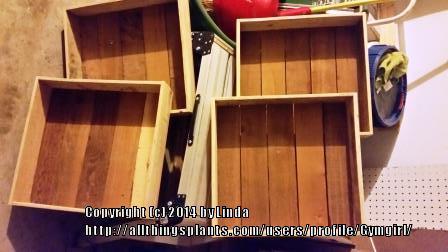
I thought I should stain the trays with some wood preservative, but, pallets are a dime a dozen, and I enjoyed the carpentry practice making them, so I probably won't bother. If I get three good seasons out of these trays, I'll be more than happy to make more!
Hugs!