
The best attribute of concrete is that it is long-lasting. Once I create something, I don't have to worry about it falling apart or rotting. I do NOT like to do garden projects more than once, if at all possible.
I had a stack of pavers that I had removed from an area of my yard where I preferred mulch instead. What to do with these concrete 12"x12" squares? Hmmmm ... I was also in need of two more raised beds. So I looked long and hard at all those pavers, trying to figure out how I could use them to make a raised bed. I had used cinder block and wall blocks for other raised beds, so why not try pavers?
I made the smaller bed first to see how it would work out. I cleared and leveled an area on the ground where I wanted a new raised garden bed to be located. My yard slopes, so it was very important to level this area. I determined the size of the new bed by the dimensions of each paver. I made a rectangular bed that was 2 pavers wide by 6 pavers long. (The height was 12" since that was the height of each paver when standing up on its side.) I used construction adhesive (in a tube) and a caulking gun to adhere the pavers together. It took me one afternoon to make this small raised bed.
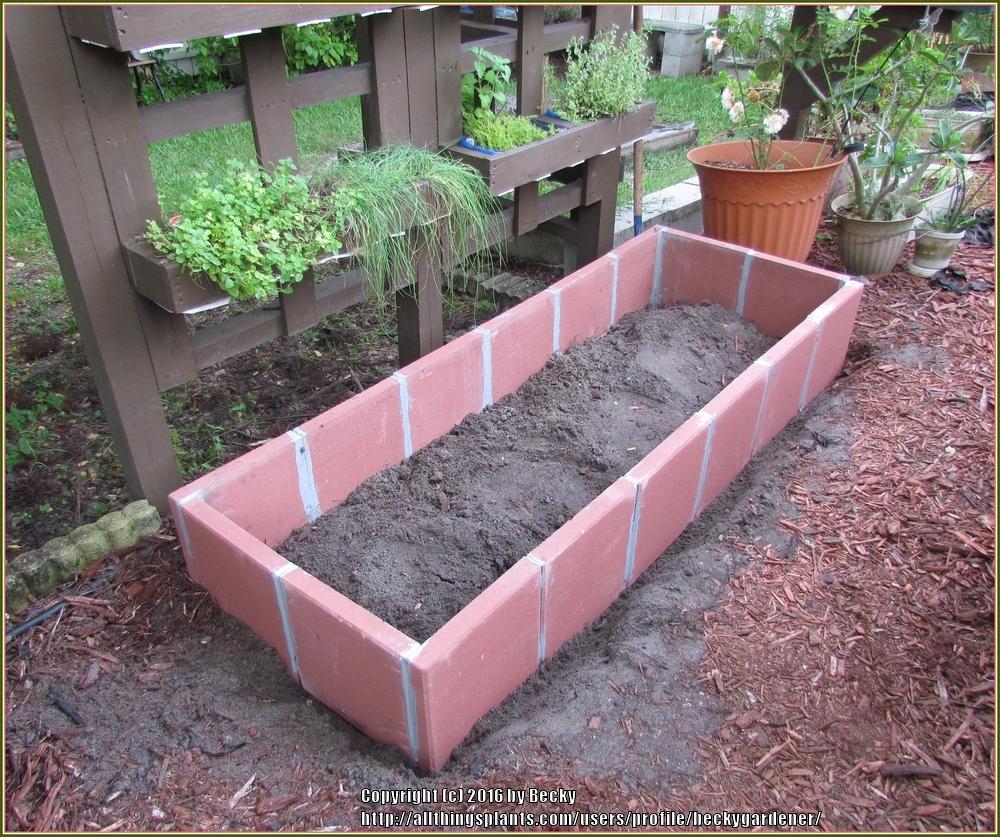
After it had set up for a few days in the hot sun, I painted it and filled it with a soil mixture. Then I added 8 daylily plants.

It turned out better than I had expected, so that gave me the confidence to try a much larger, more complicated raised bed. I had decided that I wanted a key-hole style raised bed. The key-hole design allows me to reach the middle of the raised bed, creating a "U" shaped design.
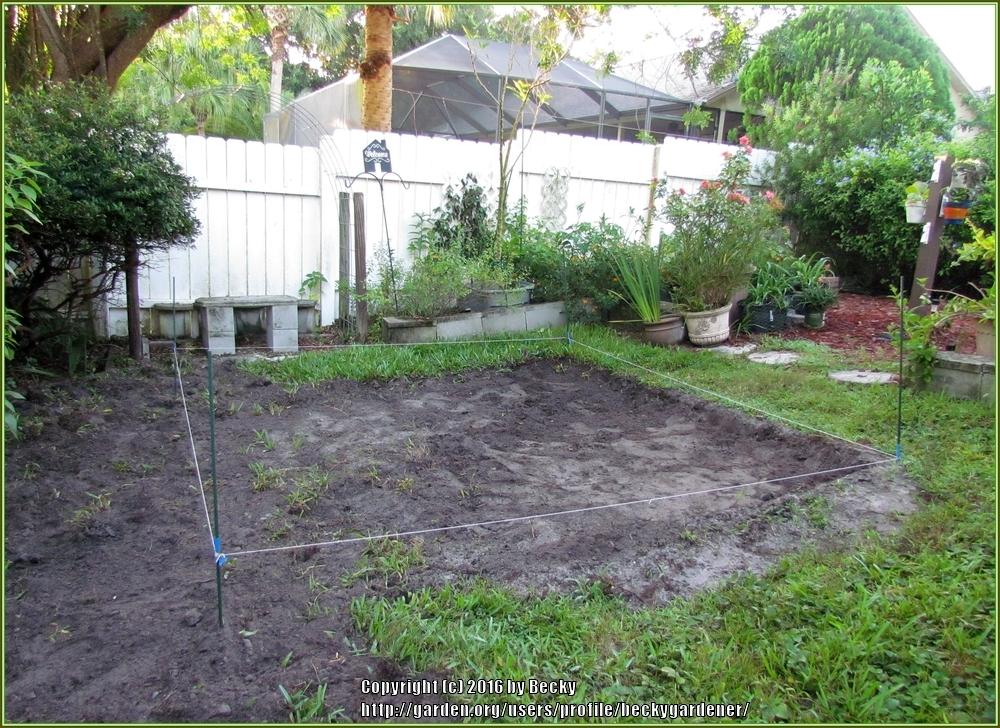
I drew up plans on graph paper for this larger and somewhat more complicated raised bed. I concluded that it would be approximately 9' x 9'. I measured and marked the area with a string line, spray painted the outline of the ground to be removed, dug up the grass, and leveled the ground. Rain helped to settle the ground as well as watering the area with a hose.
After letting it sit for a week, I began creating this new raised bed starting from the front of the bed where the key-hole opening was to be located:
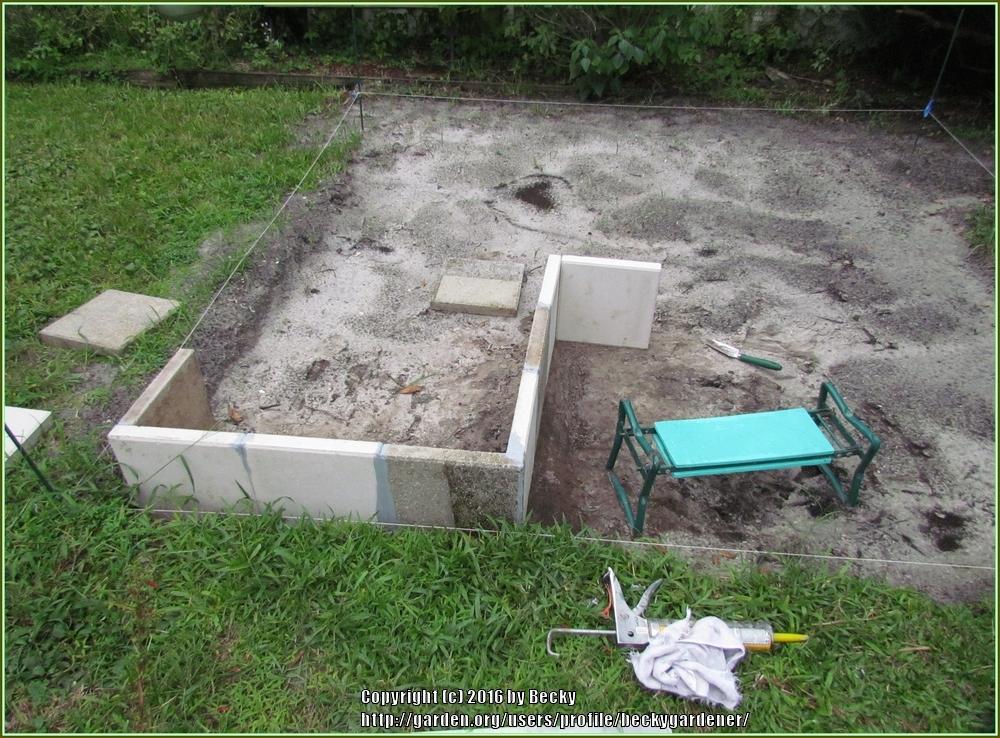
When building such a large bed, it is very important to keep the pavers straight along the string line. I could only do a few pavers at a time to allow the adhesive to dry before adding more pavers. Sometimes, I even had to temporarily prop a paver against the paver wall, to keep the wall from failing over while the adhesive dried. It was a slow process that took about a week. I added a few pavers each day, let the construction adhesive dry overnight, and was back at it the next day, adding more pavers until the job was completed. Afterwards, I let the project cure for an additional week before painting it. I chose a barn red color simply because that was my preference at the time. The nice thing about concrete is you can easily repaint these concrete raised bed walls to change the color scheme. I left the grass around the outside of the bed.

Plants (daylilies) were added to this new raised bed. I recently covered the grass with cardboard, weed cloth, and then mulch to make this a no-maintenance area. (It was a bit of a challenge to mow around the key-hole bed.):
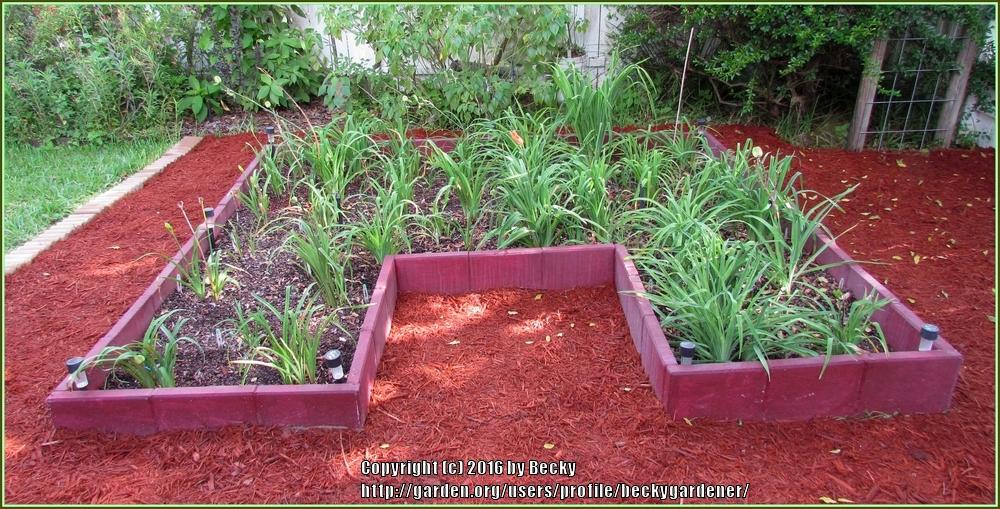
My 2 raised bed projects were created by using re-purposed pavers, construction adhesive, and paint, and then by filling each of the new raised beds with good soil, pine fines, compost, and some slow-release fertilizer, after which I added the daylilies and water. Both raised beds turned out better than I had expected. These beds were cheap to build and probably will outlast me. This was another concrete idea that worked out well for me and could for you, too!
| Thread Title | Last Reply | Replies |
|---|---|---|
| Untitled by Rubi_Stars | Jul 31, 2023 9:39 PM | 1 |
| Not using New. Refurbishing established bed. by Lioba | May 16, 2017 9:36 PM | 3 |
| Falling apart by vallektz | Mar 30, 2017 10:30 PM | 7 |
| concrete by louy51 | Jan 18, 2017 12:07 AM | 1 |
| Yes to keyhole by mnmat | Dec 11, 2016 12:44 AM | 3 |
| Good job, but... by Polymerous | Dec 10, 2016 9:16 AM | 3 |
| Great job! by plantladylin | Dec 8, 2016 7:25 AM | 4 |
| Love the Keyhole by blue23rose | Dec 7, 2016 11:46 PM | 1 |
| Thanks! by CarolineScott | Dec 7, 2016 11:44 PM | 1 |


